
Pruning
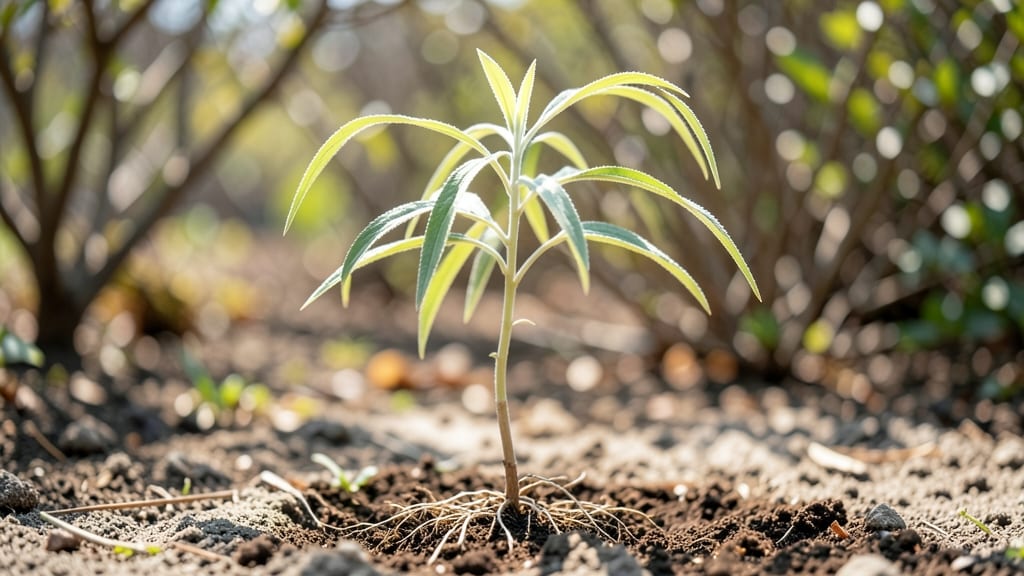
Growing willow tree seedlings from cold-stratified sprouts is one of those gardening triumphs that feels like magic. 🌱 The key to success lies in mimicking nature's winter chill—just 4 weeks of patience transforms a dormant seed into a vibrant sprout ready to plant.
I've struggled with willow seeds before, but this method actually works, even for varieties like the delicate weeping willow that gardeners love but often fear to attempt.
The secret starts with the right soil mix—light, sandy, and well-draining to prevent those aggressive roots from sitting in soggy conditions. You'll need a shallow tray, some damp paper towels, and a zip-top bag to create the perfect cold-stratification environment.
Most people overlook the importance of consistent moisture during this stage, which is when the real transformation happens.
By week 4, you'll have sturdy little seedlings with their first true leaves unfurling, ready to transplant into their forever home. The roots spread fast, so give them plenty of space—willows aren't picky about soil but they do need room to stretch those long, graceful limbs.
Just be prepared for their invasive tendencies if you're not planting in a contained area.
This method works best in early spring, when the ground is workable but not yet baking hot. Whether you're growing a fast-growing pussy willow for quick privacy or a stately weeping willow for shade, the same principles apply.
The payoff? A tree that grows with shocking speed and brings that iconic willow charm to your landscape.
📚 In This Guide
- What you need
- Instructions
- Tips and common mistakes
- Wrapping up and next steps
What you need
- ● Willow seeds: Collect fresh, viable seeds (or buy from a nursery). Aim for 10–20 seeds to account for germination variability.
- ● Cold-stratification supplies: Damp paper towels or peat moss (enough to fully cover seeds).
- ● A resealable plastic bag (quart-sized or larger).
- ● A refrigerator (set to 34–40°F for stratification).
- ● Growing containers: Small pots (3–4 inches in diameter) with drainage holes. Use 5–10 pots depending on seed quantity.
- ● Well-draining potting mix: A blend of 50% peat moss, 30% perlite, and 20% sand (or a pre-mixed seed-starting mix).
- ● Spray bottle (for gentle watering).
- ● Grow lights or sunny windowsill (6+ hours of light daily).
- ● Plant labels & marker (to track seedlings).
- ● Humidity dome or plastic wrap (to retain moisture during germination).
- ● Heating mat (for faster germination, set to 70–75°F).
- ● Fertilizer (balanced, water-soluble, 5-5-5 NPK, diluted to half-strength).
- ● Tweezers (for delicate seed handling).
- ● Garden journal (to log progress and conditions).
Step-by-Step instructions for growing willow tree seedlings
Cold-stratifying willow seeds unlocks their potential—here’s how to coax those stubborn sprouts into life.
🌱 Step 1: Harvest and Prepare Willow Seeds
Collect fresh willow seeds (those fuzzy, cottony seed pods) in late fall or early winter when they’re still green and plump. Let them dry on a paper towel for 2-3 days at room temperature. The fuzzy coating needs to soften slightly before stratification, so don’t skip this step.
Once dry, gently separate the seeds from the fluff by rubbing them between your fingers over a bowl. You’ll need about 20-30 seeds per seedling—willow seeds germinate in clusters, so don’t worry about planting each one individually. Store them in a paper envelope until ready to stratify.
❄️ Step 2: Cold-Stratify for 4 Weeks
Fill a shallow container (like a plastic takeout tray) with dampened peat moss or coconut coir—it should feel like a wrung-out sponge, not dripping. Sprinkle the willow seeds evenly over the surface, then cover with another ½-inch layer of moist peat moss.
Place the container in a sealed plastic bag and refrigerate for 4 weeks. Check the moisture every 7-10 days—if the peat feels dry, mist it lightly. Cold stratification mimics winter’s chill, breaking the seed’s dormancy. You’ll know it’s working when the seeds start to swell or show tiny cracks.
🌿 Step 3: Plant Stratified Seeds in Moisture-Rich Soil
Fill small pots (at least 4 inches deep) with a mix of 50% potting soil and 50% perlite or sand—willow roots need excellent drainage to avoid rot. After stratification, scatter the seeds on the soil surface and press them in just enough to cover them lightly (about ¼ inch deep).
Water gently until moisture seeps through the drainage holes. Place the pots in a bright, indirect light spot (like a north-facing window) and maintain soil moisture—never let it dry out completely. Germination can take 2-4 weeks, so patience is key. You’ll see the first sprouts as tiny, bright green shoots pushing through the soil.
☀️ Step 4: Transplant Seedlings to Outdoor Conditions
Once seedlings reach 3-4 inches tall (usually after 6-8 weeks total), they’re ready for their first taste of outdoor life. Choose a spot with full sun to partial shade and moist, well-draining soil. Dig a hole twice as wide as the root ball but only as deep as the pot.
Water the seedlings thoroughly the day before transplanting to reduce shock. Gently remove them from pots, tease apart any tangled roots, and plant them 1-2 feet apart. Mulch with 2 inches of organic matter (like wood chips) to retain moisture and protect young roots. Willow seedlings thrive near water sources, so keep the soil consistently damp but not soggy.
🪴 Step 5: Prune and Support for Healthy Growth
In their first growing season, willow seedlings grow fast—sometimes 2 feet in a single year. Once they reach 3 feet tall, trim the top ¼ of the stem to encourage bushier growth. This also prevents them from toppling in wind or rain.
Stake taller seedlings if needed, using soft ties to avoid damaging the bark. Willow trees develop a strong root system, so avoid disturbing them once planted. By their second year, they’ll be ready to handle more aggressive pruning and shaping—just wait until late winter to avoid bleeding sap.
Tips & tricks for perfect willow tree seedlings
Here's what nobody tells you about growing these fast-growing beauties—tricks that'll make your seedlings thrive.
Timing Secret: Don't rush the 2-3 day drying period in Step 1. I learned this the hard way after losing seeds to mold—those fuzzy coatings need time to soften properly. Place them on a paper towel in a single layer, away from direct sunlight, and gently flip them once daily. This ensures even drying without damaging the seeds.
Moisture Matters: When checking your peat moss every 7-10 days during the 4-week stratification (Step 2), squeeze a handful gently—it should feel like a wrung-out sponge. If it crumbles, it's too dry; if water drips, it's too wet. I keep a spray bottle handy for quick adjustments, and I always mist the sides of the container too, not just the top layer. This prevents moisture buildup that could cause mold.
Lighting Insight: For Step 3, that bright indirect light is crucial. I've found north-facing windows work best, but if you don't have one, use a grow light 6-12 inches above the pots for 12-14 hours daily. Too much direct light can scorch the delicate sprouts, while too little causes leggy, weak seedlings. I rotate my pots weekly to ensure even growth all around.
Transplanting Tip: When your seedlings reach 3-4 inches in Step 4, water them thoroughly the day before transplanting. This reduces shock and gives you a better idea of how much water they'll need after moving. I also like to trim any yellow or damaged leaves before transplanting—it helps the plant focus its energy on establishing new roots rather than repairing old damage.
Pro Tips for Willow Tree Seedling
- Here's what nobody tells you about growing these fast-growing beauties—tricks that'll make your seedlings thrive.
- Timing Secret: Don't rush the 2-3 day drying period in Step 1.
- Moisture Matters: When checking your peat moss every 7-10 days during the 4-week stratification (Step 2), squeeze a handful gently—it should feel like a wrung-out sponge.
Frequently asked questions
Got questions about growing willow tree seedlings? You’re not alone! Here are answers to the most common concerns—from timing to troubleshooting—so you can nurture your sprouts like a pro.
How long does cold stratification take for willow tree seeds?
Cold stratification for willow seeds typically takes 4–6 weeks in the fridge (34–40°F). For faster results, some gardeners use a moist paper towel method for 2–3 weeks before planting. Monitor moisture levels—damp (not soggy) is key!
Can I plant willow seedlings directly outdoors after stratification?
Yes, but timing matters! Plant after the last frost when soil temps hit 50°F+. Willow seedlings thrive in moist, well-drained soil—avoid waterlogged spots. For a head start, pre-sprout in pots under grow lights for 2–3 weeks before transplanting.
What’s the fastest way to grow a willow tree from seed?
Combine cold stratification + heat for speed:
- Stratify seeds for 4 weeks in the fridge.
- Soak in warm water for 12–24 hours to soften the seed coat.
- Plant in moist potting mix under a heat mat (70–75°F) for germination in 1–2 weeks.
Why aren’t my willow seeds germinating after stratification?
Common culprits:
- Dry seeds: Re-soak in warm water for 12 hours.
- Poor soil: Use a mix of peat + perlite for drainage.
- Temperature issues: Keep soil 60–70°F for germination.
- Old seeds: Willow seeds lose viability after 1–2 years.
Are there alternatives to growing willow trees from seed?
For faster results:
- Cuttings: Willow propagates easily from softwood cuttings (spring) or hardwood cuttings (winter). Dip in rooting hormone for a 90% success rate!
- Layering: Bend a low branch to the ground, weigh it down, and cover with soil. New roots form in 4–6 weeks.
- Transplant saplings: Buy young willow trees from nurseries (faster growth, disease-resistant varieties).
Wrapping up and next steps
Growing a willow tree seedling from cold-stratified sprouts is a rewarding journey that blends patience with nature’s magic! With the right materials and a few weeks of care, you’ll witness tiny sprouts transform into sturdy young plants—perfect for adding beauty and resilience to your garden. 🌱✨
Ready to take the next step? Start by transplanting your thriving seedlings into well-draining soil, and keep an eye on their progress as they grow into majestic willows. Your green thumb is about to shine!