
Trees
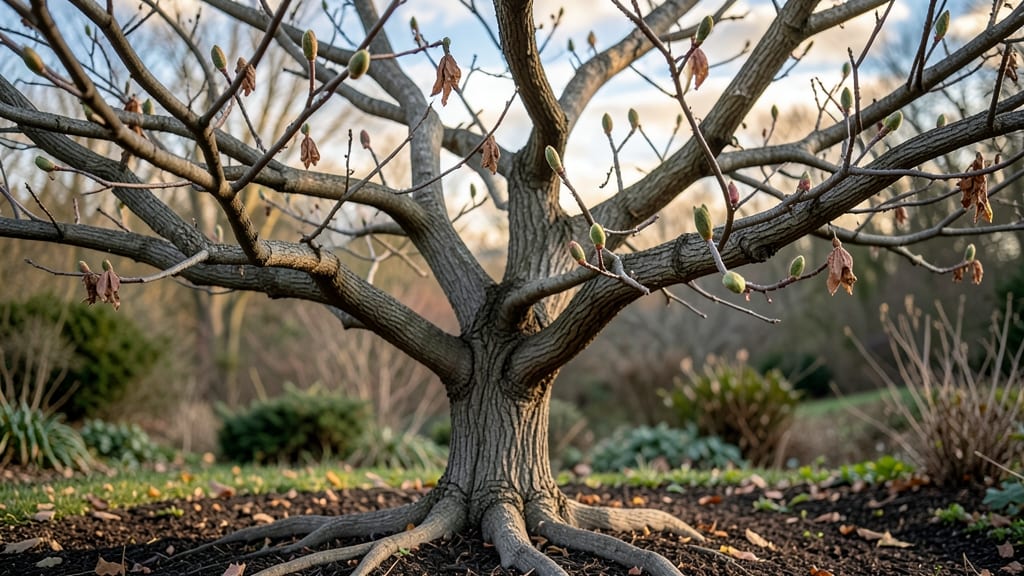
Seeing a dogwood tree without leaves might just be winter’s way of resting—or it could be a sign of trouble. The first step is telling the difference between natural dormancy and trouble, because what you do next depends entirely on why those leaves disappeared.
Start with the basics: check for leaf scars or blackened stems that signal anthracnose, or look for webbed branches that mean spider mites. If it's just seasonal, now's the time to prune for structure—thinning out crowded branches lets light reach the center and keeps the tree healthy through spring.
Winter pruning isn't just about aesthetics; it's about giving your dogwood the best shot at regrowth. Cut back 1/3 of the oldest branches to encourage new growth, and always make clean cuts at a 45-degree angle just above a bud.
The goal? A balanced shape that catches sunlight and rain evenly.
📚 In This Guide
- What you need
- Instructions
- Tips and common mistakes
- Wrapping up and next steps
What you need
- ● Pruning shears – Bypass pruners (sharp, 6-8 inch blades) for small branches (¼ inch to 1 inch in diameter).
- ● Loppers – Long-handled (18-24 inches) for medium branches (1-2 inches in diameter).
- ● Pruning saw – Curved-tooth for thick branches (2+ inches in diameter).
- ● Ladder – Sturdy, extendable (12-20 feet, depending on tree height) with non-slip feet.
- ● Gloves – Heavy-duty, cut-resistant (gardening or pruning-specific) to protect hands.
- ● Disposable pruning bags or bucket – To collect and dispose of trimmings.
- ● Rag or paper towels – For cleaning tools between cuts.
- ● Hand sanitizer or rubbing alcohol – To disinfect tools and prevent disease spread.
- ○ Marking twine or flags – Optional but helpful for tagging branches to remove.
- ● Pole saw – For high branches without a ladder.
- ● Tree wound dressing – Controversial but available for sealing larger cuts (skip if unsure).
- ● Safety glasses – To shield eyes from debris.
- ● Work vest or apron – For tool organization and comfort.
- ● Camera or sketchpad – To document the tree’s structure before pruning.
Instructions for winter pruning dogwood trees without leaves
Here's how to shape your dogwoods for year-round beauty—no leaves mean better visibility and precision.
Assess the Tree Structure and Identify Problem Areas
Begin by examining the tree's skeletal framework. Dogwoods without leaves make it easier to spot structural issues like crossing branches, dead wood, or weak crotches where limbs meet the trunk. Look for branches that grow at sharp angles—these are prone to splitting during storms. I like to walk around the tree at different angles to identify areas where sunlight doesn't penetrate or where branches create awkward shapes.
Use your hands to gently flex each branch. Healthy wood should bend slightly without snapping. If a branch feels brittle or crumbles easily, it's dead and should be removed. Mark these areas with a piece of twine or a flagging tape so you can return to them after gathering all your tools. This step ensures you don't miss any problem spots while you're working.
Gather Tools and Prepare the Work Area
You'll need a pair of sharp bypass pruners for smaller branches, loppers for thicker limbs up to 2 inches in diameter, and a pruning saw for anything larger. Disinfect your tools with rubbing alcohol to prevent spreading disease between cuts. I also recommend wearing gloves and safety glasses—dogwood bark can be rough, and branches may snap unexpectedly.
Clear the area around the tree of debris, rocks, or anything that could get in your way. Lay down a tarp or old blanket to catch falling branches and sawdust. If you're working near power lines or other hazards, consider hiring a professional. Safety first—there's no rush when it comes to pruning a dogwood properly.
Remove Dead, Diseased, or Weak Branches
Start by cutting out any branches that are dead, diseased, or rubbing against each other. Make your cuts just outside the branch collar—the swollen area where the branch meets the trunk or another limb. This ensures the tree can seal the wound properly. For larger branches, use the three-cut method: make an undercut, then an overcut, and finally remove the remaining stub.
Look for signs of disease like cankers, discolored bark, or oozing sap. If you find these, cut back to at least 6 inches of healthy wood. Avoid leaving stubs—they invite pests and disease. As you work, step back frequently to visualize the tree's new shape. The goal is to maintain an open center that allows light and air to circulate, which keeps the tree healthy year-round.
Thin and Shape the Canopy for Balance
Now focus on thinning the canopy to improve airflow and sunlight penetration. Remove branches that grow inward or downward, as these can create a dense, shaded interior that encourages fungal growth. Aim to reduce the canopy by no more than 25% in a single pruning session—this prevents stressing the tree. I like to start from the bottom and work my way up, so I can see how each cut affects the overall shape.
For shaping, prioritize maintaining the tree's natural form. Dogwoods have a graceful, layered look, so avoid cutting back too aggressively. If you're unsure about a cut, wait a few days and reassess. Pruning is an art, and sometimes less is more. The key is to create a balanced structure that looks good year-round, not just when the tree is in full leaf.
Clean Up and Apply Protective Measures
After pruning, rake up all the debris and dispose of it in a sealed bag. Never leave cuttings on the ground, as they can harbor pests and diseases. Disinfect your tools again to prevent contamination of future cuts. If you notice any large wounds, apply a layer of pruning sealant to protect the tree from infection. However, for small cuts, sealant isn't necessary—the tree's natural healing process will handle it.
Finally, water the tree deeply to help it recover from the pruning stress. Mulch the base of the tree with 2-3 inches of organic mulch, keeping it 6 inches away from the trunk to prevent rot. This step ensures your dogwood stays hydrated and protected as it prepares for spring growth. With proper care, your tree will reward you with stunning flowers and foliage next season.
Tips & tricks for perfect winter pruning of dogwood trees
Winter pruning reveals the true structure of dogwood trees—here’s how to make every cut count for long-term health and beauty.
Branch Assessment Technique: In Step 1, when testing branch flexibility, focus on the angle where the branch meets the trunk. If the branch bends more than 45 degrees from the trunk, it’s likely weak and should be removed. I’ve found that dogwoods with branches growing at sharp angles (less than 30 degrees) are particularly vulnerable to storm damage—these are prime candidates for pruning. Use a small notebook to sketch your tree’s structure before making any cuts; this visual reference helps you see the big picture and avoid over-pruning.
Tool Selection for Precision: Step 2 emphasizes tool preparation, but I’ve learned that using the right tool for each branch size makes all the difference. For branches between ½ and 2 inches thick, loppers with a bypass blade provide the cleanest cuts without crushing the wood. If you’re working with branches larger than 2 inches, a pruning saw with a fine-toothed blade will give you more control. Remember to sharpen your tools before starting—dull blades tear wood, which can slow the tree’s healing process and invite disease.
Canopy Thinning Strategy: When thinning in Step 4, prioritize removing branches that grow toward the center of the tree first. These create dense, shaded areas that trap moisture and encourage fungal growth. I recommend working in sections: start at the bottom and gradually move upward. This way, you can see how each cut affects the overall shape before making the next one. Aim to reduce the canopy by no more than 25% in a single session—this threshold prevents stressing the tree while still improving airflow and sunlight penetration.
Post-Pruning Care: After completing Step 5, don’t overlook the importance of proper wound care. For cuts larger than ½ inch in diameter, apply a thin layer of pruning sealant to protect the tree from infection. However, for smaller cuts, resist the urge to seal—dogwoods heal naturally and efficiently when left untreated. Water the tree deeply after pruning, but avoid overwatering, which can lead to root rot. Mulching with 2-3 inches of organic material (like wood chips or shredded leaves) helps retain moisture and regulate soil temperature as the tree prepares for spring growth.
Pro Tips for Dogwood Tree Without Leaves
- Winter pruning reveals the true structure of dogwood trees—here’s how to make every cut count for long-term health and beauty.
- Branch Assessment Technique: In Step 1, when testing branch flexibility, focus on the angle where the branch meets the trunk.
- Tool Selection for Precision: Step 2 emphasizes tool preparation, but I’ve learned that using the right tool for each branch size makes all the difference.
Frequently asked questions
Got questions about your dogwood tree losing leaves or needing a winter trim? Here are some of the most common concerns—and straightforward answers to keep your tree healthy and stunning year-round.
Why does my dogwood tree lose leaves in winter?
A dogwood tree naturally sheds leaves in winter to conserve energy during dormancy. This is completely normal! However, if leaves fall unexpectedly in spring or summer, check for pests (like spider mites) or fungal diseases (such as anthracnose). Prune away affected branches and improve air circulation.
Is it safe to prune a dogwood tree in winter?
Yes! Winter (late December to early March) is the ideal time to prune dogwoods because the tree is dormant. This minimizes stress, reduces disease risk, and lets you see the tree’s structure clearly. Just avoid pruning during extreme cold snaps or ice storms.
How much can I trim off a dogwood tree without harming it?
Never remove more than 25% of the tree’s canopy in one season. Dogwoods are sensitive to over-pruning. Focus on:
- Dead, diseased, or crossing branches
- Suckers at the base
- Shaping to improve airflow
What if my dogwood tree doesn’t grow leaves back in spring?
If your dogwood stays bare into late spring, it might be suffering from canker disease or bacterial leaf scorch. Prune infected branches 6 inches below the damage and sterilize tools. For severe cases, consult an arborist. Overwatering or compacted soil can also stunt growth—amend soil with compost.
Can I replace a dying dogwood with another evergreen or ornamental tree?
Consider these low-maintenance alternatives for year-round structure:
- Oakleaf Hydrangea (semi-evergreen, vibrant foliage)
- Crape Myrtle (drought-tolerant, colorful bark)
- Japanese Maple (ornamental year-round)
- Holly (evergreen, wildlife-friendly)
Wrapping up and next steps
A dogwood tree without leaves in winter isn’t just bare—it’s a blank canvas for your pruning skills! By following the right techniques, you’ll shape a stunning year-round structure that thrives with health and beauty. Remember, patience and precision are key, so take your time and enjoy the process.
Ready to transform your tree? Grab your tools and start pruning today! 🌿 For extra guidance, check out local gardening forums or consult an arborist to tailor your approach. Your dogwood’s future starts with your hands now!