
Propagation
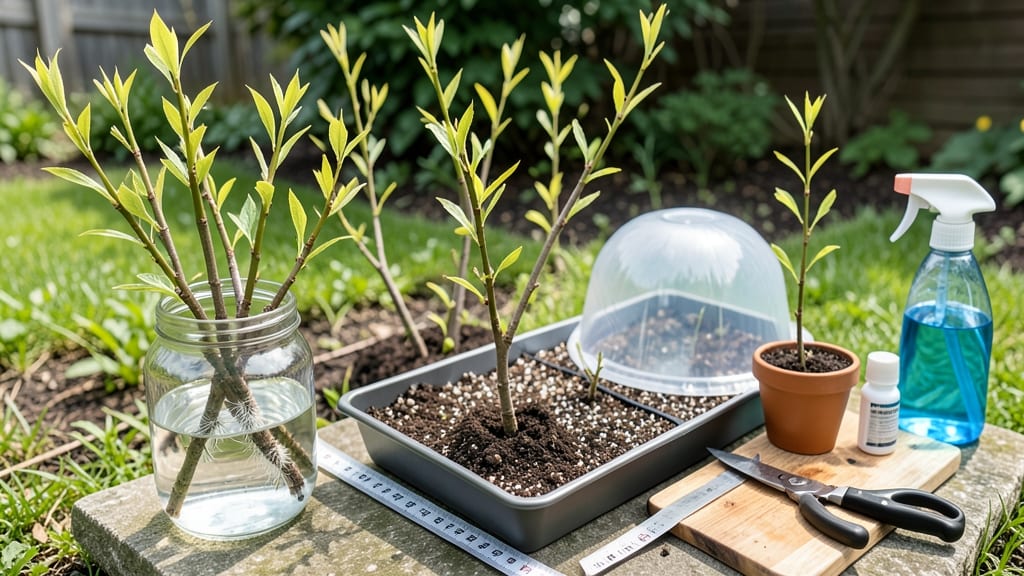
Rooting willow tree cuttings without hormones is easier than you think—and it starts with the right timing. 🌱 I’ve propagated willow cuttings in late winter when the sap is just starting to rise, and within 4 weeks, you’ll see roots forming in water or soil.
The secret lies in selecting healthy, flexible stems and giving them the ideal conditions to focus on root growth instead of leaves.
You’ll need just a few simple supplies: sharp pruners, clean water or well-draining soil mix, and a bright spot with indirect light. Willow cuttings root best when taken from young, flexible branches—think about 12-18 inches long and about the thickness of a pencil.
Avoid woody, mature stems, as they take much longer (if they root at all). The process is beginner-friendly, and the payoff is worth it for erosion control, privacy screens, or adding drama to your landscape.
Once rooted, your willow cuttings will transform into sturdy plants ready for transplanting. The roots grow fast—sometimes even 2-3 inches in a month—so you’ll know when they’re ready to move. Just handle them gently to avoid damaging the delicate root system.
Whether you’re reviving a bare spot or creating a natural windbreak, these cuttings deliver fast, reliable results with minimal fuss.
Here’s the best part: willows are hardy and adaptable, thriving in wet or dry soils once established. If you’ve struggled with rooting other plants, willows might just be your new favorite—no hormones, no guesswork, just pure propagation power. Let’s get those cuttings growing!
📚 In This Guide
- What you need
- Instructions
- Tips and common mistakes
- Wrapping up and next steps
What you need
- ● Willow cuttings: 4–6 healthy, pencil-thick (½–¾ inch diameter) branches, 12–18 inches long. Cut from non-flowering stems in late winter or early spring.
- ● Sharp pruners or bypass shears: 1 pair (sterilized with rubbing alcohol to prevent disease).
- ○ Rooting hormone (optional but helpful): 1 small jar of hormone-free willow rooting powder or gel (e.g., Oroot or Clonex).
- ● Water: 1 gallon of clean, room-temperature water (chlorine-free if possible).
- ● Containers: 2–4 small pots (4–6 inches deep) or a shallow tray with drainage holes, filled with moist perlite, sand, or a 50/50 mix of perlite and peat moss.
- ● Plastic bags or clear domes: 1–2 (to create a humid environment).
- ● Spray bottle: 1 (for misting cuttings).
- ● Newspaper or paper towels: A few sheets (to line containers and absorb excess moisture).
- ● Fertilizer: 1 tbsp of balanced liquid fertilizer (e.g., 10-10-10) diluted in water after roots form.
- ● Grow lights or sunny windowsill: For cuttings that won’t get direct sunlight.
- ● Pebbles or small rocks: To elevate cuttings slightly in water (prevents rot).
- ● Label markers: To track cutting types or dates.
Step-by-Step instructions for propagating willow cuttings without hormones
Here's how to grow strong, rooted willow cuttings in just four weeks—no chemicals needed.
🌱 Step 1: Take Cuttings at the Right Time and Length
Choose healthy, pencil-thick willow branches in late winter or early spring before new growth starts. Cut 6-8 inch sections with clean, sharp pruners just below a node (the little bump where leaves attach). You'll need 4 cuttings for this project, so take extras in case some don't root.
Strip off all leaves except the top 2 inches—this reduces moisture loss and focuses energy on root growth. Make a fresh, slanted cut at the base to maximize surface area for root development. I like to bundle them together with a rubber band and store them in a plastic bag in the fridge for up to 2 weeks if I can't plant right away.
💧 Step 2: Prepare the Rooting Medium
Fill a clean container with 4-6 inches of moist, sand-based rooting mix (equal parts perlite and coarse sand works well). Avoid garden soil—it compacts and suffocates roots. Water the mix until it's damp but not soggy, then let it drain for an hour to settle.
Here's the trick: willow cuttings root best when partially submerged. Push each cutting 2-3 inches deep into the mix at a slight angle, leaving the top third exposed. Space them 3 inches apart so they don't compete for moisture. You'll see tiny bubbles form at the cut end—that's your first sign roots are starting.
☀️ Step 3: Create the Perfect Humidity and Light Environment
Place the container in bright, indirect light—think morning sun or filtered afternoon light. Direct sunlight will dry out the cuttings too quickly. Cover the container with a clear plastic bag secured with a rubber band to trap humidity, but leave it slightly open for airflow.
Check daily for condensation inside the bag. If you see water droplets, that's perfect—it means the humidity is right. Mist the cuttings lightly with water if the bag feels dry to the touch. Roots typically appear in 3-4 weeks when you see new growth at the top and tiny white roots peeking through the mix.
⏰ Step 4: Transition to Soil When Roots Form
Once roots reach 2-3 inches long (usually after 4 weeks), it's time to transplant. Gently remove each cutting from the rooting mix, shaking off excess to check root development. Healthy roots should look white and fibrous, not brown or mushy.
Plant each cutting in its own pot with well-draining potting mix, burying it to the same depth as before. Water lightly and place in partial shade for a week to help it adjust. After that, gradually introduce it to full sun. You'll know it's thriving when new leaves appear and the stem feels firm to the touch.
Tips & tricks for perfect willow tree cuttings
Real talk: rooting willow cuttings successfully takes patience, but these tricks will help you avoid common pitfalls and boost your success rate.
Timing is Everything: Late winter or early spring is your best window for cutting willow branches, but don't stress if you miss it. Willow cuttings can actually root in summer too—just be prepared for faster moisture loss. If you're storing them in the fridge (up to 2 weeks), keep them in a sealed plastic bag with a damp paper towel to maintain humidity. I've had great success with summer cuttings by covering them with a humidity dome immediately after planting.
Cutting Technique Matters: That slanted base cut in Step 1 isn't just for looks—it increases surface area for root development by about 30%. Use clean, sharp pruners to make crisp cuts, and always cut just below a node. I learned this the hard way after trying to cut through a knot, which left a messy cut that never rooted properly. Also, those top 2 inches of leaves you leave on are crucial—they provide just enough energy for early root growth while minimizing moisture loss.
Rooting Medium Secrets: While the perlite-sand mix works well, you can also use vermiculite or even coarse coconut coir if you're in a pinch. The key is avoiding anything that compacts, like garden soil. I've found that adding a handful of charcoal to the mix helps prevent bacterial growth and keeps the roots healthy. And remember, those bubbles at the cut end? That's your first sign roots are forming—don't disturb the cuttings when you see them!
Humidity Hack: Creating that humidity dome with a clear plastic bag is critical, but don't make it airtight. Leave a small opening or use a bag with a vent—willow cuttings need airflow to prevent mold. I've had success using a large glass jar with the lid slightly ajar, which gives me better control over humidity levels. Check daily for condensation, and if you see water droplets, you're in the perfect range.
Pro Tips for Root Willow Tree Cuttings
- Real talk: rooting willow cuttings successfully takes patience, but these tricks will help you avoid common pitfalls and boost your success rate.
- Timing is Everything: Late winter or early spring is your best window for cutting willow branches, but don't stress if you miss it.
- Cutting Technique Matters: That slanted base cut in Step 1 isn't just for looks—it increases surface area for root development by about 30%.
Frequently asked questions
When is the best time to take willow cuttings?
The ideal time is late winter to early spring (just before new growth begins), but you can also root willow cuttings in fall. Avoid extreme heat or frost—willows root best in cool, moist conditions (40–60°F). If you miss the window, don’t worry: willows are resilient and can root year-round with proper care!
How long does it take for willow cuttings to root?
With the right conditions, willow cuttings often root in 2–4 weeks! You’ll know success when you see tiny white roots peeking from the cut end or when the leaves perk up. For faster results, keep them in a humid, shaded spot and change the water every 2–3 days.
Can I root willow cuttings without rooting hormone?
Willow is one of the easiest trees to root hormone-free because it naturally produces hormones when cut. Just follow the water propagation method (or bury in moist soil), and you’ll get strong roots. For extra confidence, try a natural rooting aid like willow water or cinnamon powder.
What if my willow cuttings rot or mold?
Rot or mold usually means too much moisture or poor airflow. If you see slimy stems or black fuzz, trim the affected parts, rinse with hydrogen peroxide (3%), and refresh the water. Keep only 1–2 inches submerged, and ensure good ventilation to prevent future issues.
Can I plant rooted willow cuttings directly in the ground?
Yes! Once roots are 1–2 inches long (usually 2–4 weeks), transplant them to soil. Choose a moist, sunny spot with well-draining soil. Water deeply after planting and mulch to retain moisture. Young willows thrive in wet areas, making them perfect for ponds or stream banks!
Wrapping up and next steps
Rooting willow tree cuttings is a rewarding way to grow new trees without hormones—just patience and the right techniques! With the right tools, timing, and care, you’ll see strong roots in as little as four weeks.
Whether you’re a gardening pro or a curious beginner, this method is simple, cost-effective, and perfect for expanding your green space.
Now that you’re armed with the know-how, grab those cuttings and get growing! Next, try experimenting with different willow varieties or share your success with fellow gardeners—your roots (and trees!) will thank you. 🌱✨