
Propagation
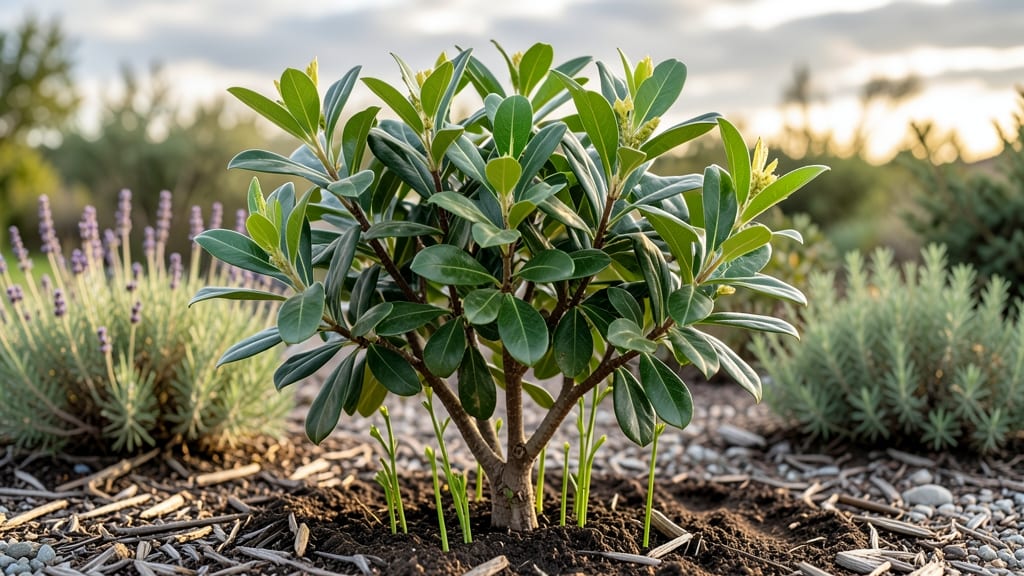
Bay tree shoots from roots is the free way to multiply your favorite plant without buying new ones. 🌱 I’ve propagated bay trees this way three times, and every time, I end up with bushier plants than store-bought seedlings. The key?
Knowing which roots to choose and how to coax them into growing leaves. You’ll need sharp pruners, a small pot, well-draining soil mix, and patience—this isn’t a quick process, but the results are worth it. Healthy roots should be thick (about ¼-inch diameter) and free of soft spots or rot.
Once you’ve selected them, the real magic happens in the next steps. By the time you see those first tiny leaves, you’ll be hooked on this method. The new shoots grow just like the parent plant, so you get the same fragrant foliage and sturdy branches.
Perfect for expanding your kitchen garden or gifting cuttings to fellow plant lovers. Works equally well indoors or outdoors, though indoor bay trees will grow slower without strong sunlight. Here’s how to do it right the first time!
📚 In This Guide
- What you need
- Instructions
- Tips and common mistakes
- Wrapping up and next steps
What you need
- ● Bay tree roots: Healthy, mature roots (1–3 inches long) from an existing bay tree. Look for roots with small buds or "eyes" (nodes) where new shoots will emerge.
- ● Potting soil: Well-draining, nutrient-rich mix (e.g., cactus/succulent blend or a 50/50 mix of peat moss and perlite). Quantity: Enough to fill a 6–8 inch pot (about 2–3 gallons).
- ● Small pots or containers: 6–8 inch pots with drainage holes (or a single larger container if propagating multiple roots). Material: Terracotta or plastic (terracotta helps prevent root rot).
- ● Watering can or spray bottle: For gentle hydration (avoid soaking the roots).
- ○ Rooting hormone (optional but helpful): A powder or gel to encourage faster growth (e.g., clonex or rootone).
- ● Plastic wrap or humidity dome: To retain moisture while roots establish (e.g., a clear plastic bag or propagator lid).
- ● Scissors or pruning shears: Sterilized to cut roots cleanly (if harvesting from an existing plant).
- ● Misting bottle: For maintaining humidity without overwatering.
- ● Grow lights or sunny windowsill: Bay trees thrive in bright, indirect light (6+ hours/day).
- ● Fertilizer (light dose): A balanced houseplant fertilizer (diluted to ¼ strength) after 4–6 weeks.
- ● Pebbles or sand: For the bottom of pots to improve drainage.
Step-by-Step instructions for propagating bay trees from roots
Here's how to turn your existing bay tree's roots into thriving new plants—no fancy tools needed.
🌱 Step 1: Identify and Prepare Healthy Root Sections
Look for thick, pencil-sized roots with visible growth nodes or small rootlets along their length. These are your propagation points. Use clean, sharp pruners to cut a 4-6 inch section from a healthy root, making sure each piece has at least 2-3 nodes.
Real talk: if the root feels soft or mushy, skip it—those sections won't root well. Healthy roots should feel firm with a slight woody texture. After cutting, let the root sections dry and callus over for 1-2 hours at room temperature. This prevents rot when you plant them later.
💧 Step 2: Plant Root Cuttings in Moistened Growing Medium
Fill small pots or trays with a mix of 50% perlite and 50% potting soil—this ensures fast drainage while keeping moisture. Dip each root cutting in rooting hormone (optional but helpful) and press the nodes 1 inch deep into the medium, spacing them 2 inches apart.
Water gently until the surface looks damp but not soggy. You'll know it's right when water runs out the bottom holes but doesn't pool on top. Cover the container with clear plastic wrap or a humidity dome to trap moisture—bay roots need high humidity to sprout.
☀️ Step 3: Provide Warmth and Indirect Light
Place the container in a spot with bright, indirect light (think east-facing window or under fluorescent lights). Bay root cuttings thrive at 70-75°F—a warm spot like on top of the fridge works well. Avoid direct sun, which can dry out the cuttings too quickly.
Check moisture daily by lifting the pot—if it feels light, mist the soil lightly. Roots typically emerge in 4-8 weeks, but don't rush it. Patience here means stronger plants later. Once you see tiny green shoots, remove the plastic cover gradually over 3-5 days to acclimate them.
🌿 Step 4: Transplant Established Shoots into Soil
When shoots reach 2-3 inches tall and have 2-3 sets of leaves, they're ready to move. Gently dig around the base to loosen the roots, then transplant into individual pots with regular potting mix. Keep the soil slightly moist for the first 2 weeks to help them establish.
Here's the thing—bay trees grow slowly at first, so don't expect rapid growth. Focus on keeping the soil consistently moist (but not soggy) and providing medium to bright indirect light. After 6-12 months, your new bay trees will be ready to prune and shape like mature plants.
Tips & tricks for perfect bay tree propagation
Here's what I've learned from years of propagating bay trees—these little tricks make all the difference between success and disappointment.
Root Selection: In Step 1, don't just grab any root—look for ones with visible growth nodes that feel firm like a pencil. I've tried soft, mushy roots before, and they always rot within days. The nodes are where new roots will form, so you need at least 2-3 of them per cutting. If you're unsure, press gently—they should spring back instead of leaving a dent.
Callusing is Non-Negotiable: That 1-2 hour drying period in Step 1 isn't optional! I skipped this once and lost half my cuttings to rot. The callus forms a protective layer that prevents disease when you plant. Just lay them on a clean paper towel in a warm spot—no fancy equipment needed. You'll know they're ready when the cut ends look slightly dry and dull.
Medium Mix Matters: The 50/50 perlite-to-soil mix in Step 2 is crucial for drainage. Too much soil holds too much moisture and suffocates the roots, while too much perlite dries out too fast. I like to add a handful of coarse sand to improve aeration. After planting, give the medium a gentle squeeze—it should feel like a damp sponge, not a dripping wet rag.
Lighting Strategy: That bright indirect light in Step 3 is key—direct sun will fry your cuttings while too little light means weak, leggy growth. I place mine under my kitchen lights (about 6 inches away) when natural light is weak. If you notice the leaves turning pale or stretching, it's time to move them closer to the light source. The 70-75°F range is important too—this mimics the warm greenhouse conditions bay roots love.
Pro Tips for Bay Tree Shoots From Roots
- Here's what I've learned from years of propagating bay trees—these little tricks make all the difference between success and disappointment.
- Root Selection: In Step 1, don't just grab any root—look for ones with visible growth nodes that feel firm like a pencil.
- Callusing is Non-Negotiable: That 1-2 hour drying period in Step 1 isn't optional!
Frequently asked questions
Got questions about propagating bay trees from roots? You're not alone! Here are some of the most common concerns—plus straightforward answers to help you succeed.
Can I propagate a bay tree from roots even if it’s not in water?
Bay trees can sprout from roots even when planted directly into soil. Simply dig up a healthy root section with at least one "eye" (a small bump), trim excess roots, and replant it in moist, well-draining soil. Keep it shaded and watered until new shoots appear—usually within 4-6 weeks.
How long does it take for bay tree roots to sprout new shoots?
Patience is key! With the right conditions (moisture, warmth, and indirect light), you’ll often see tiny shoots emerging in 4-8 weeks. Some stubborn roots may take up to 3 months, especially in cooler climates. Monitor soil moisture—never let it dry out completely during this phase.
What if my bay tree roots don’t sprout? Troubleshooting tips?
If roots refuse to sprout, check these common issues:
- Dormant roots: Bay trees may need warmth (70°F+) to activate. Try a heat mat or move pots to a sunny windowsill.
- Rot: Overwatering or soggy soil can kill roots. Let soil dry slightly between waterings.
- No "eyes": Roots need growth nodes (bumps) to sprout. Trim and replant only sections with visible buds.
If all else fails, try rooting in water first—it speeds up the process!
Can I propagate bay trees from roots outdoors in winter?
Outdoor propagation in winter is tricky! Bay trees thrive in USDA Zones 7-10 and need consistent warmth (above 50°F) to sprout. If you must try it, plant root cuttings in a protected spot (like a cold frame) and mulch heavily. Otherwise, wait until spring or propagate indoors under grow lights.
Are there other ways to propagate bay trees besides roots?
Yes! Here are 3 easy alternatives:
- Stem cuttings: Snip 4-6" tips in spring/summer, strip leaves from the bottom half, and root in water or moist perlite.
- Layering: Bend a low branch to the ground, bury it, and wait for roots to form before separating.
- Seed propagation: Slow but rewarding—plant seeds in warm soil and keep them moist until germination (6-12 months!).
Root propagation is fastest, but stem cuttings are the most reliable for beginners.
Wrapping up and next steps
Watching a bay tree sprout from its roots is like unlocking nature’s secret to endless propagation—and you’re now part of the magic! 🌱 Whether you’re a seasoned gardener or a curious beginner, this method proves that patience and a little know-how can turn scraps into thriving plants.
The best part? You’ve got everything you need to keep growing.
Ready to turn your green thumb into a green forest? Start by gifting your new root-sprouted bay tree to a friend, or use the same technique to propagate other herbs or shrubs. Your next adventure could be just a cutting away!