Pruning
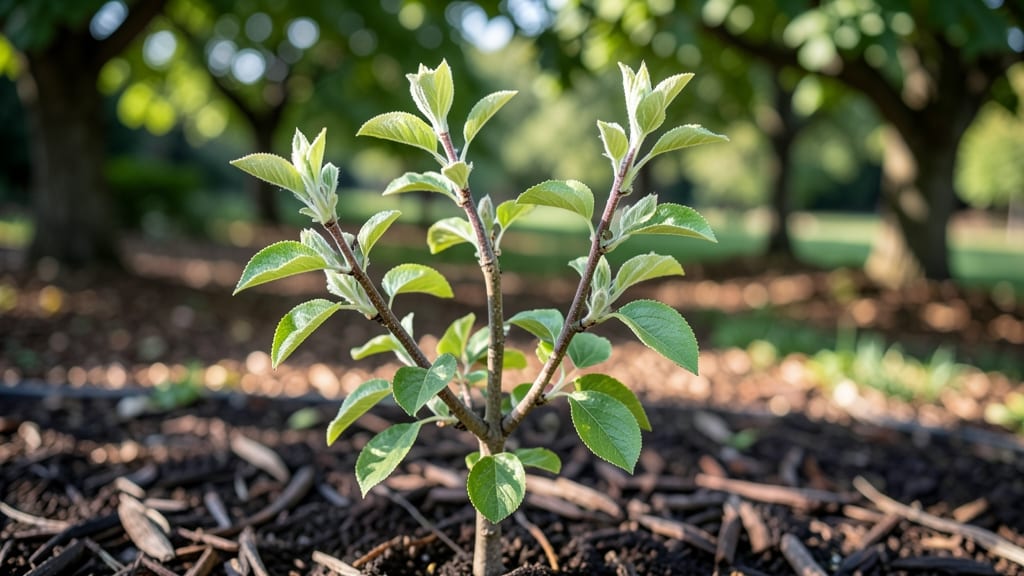
Fast root growth starts with a simple trick you’ve probably overlooked. 🌱 Those apple tree shoots you’ve been pruning away might hold the secret to multiplying your orchard without digging up a thing—layering turns them into self-rooted trees in just a few months.
The magic happens when you bend a low-growing shoot into the soil while it’s still attached to the parent tree. Roots form at the buried section, and once they establish, you can sever the connection. No rooting hormone needed, no complicated setups—just patience and a little elbow grease.
By summer’s end, you’ll have sturdy young trees ready to transplant, all while the original tree keeps producing fruit. It’s how I doubled my orchard last season with zero extra work beyond what I was already doing. Works for any apple variety, even dwarf types.
Here’s exactly how to do it without killing your shoots—or your patience.
📚 In This Guide
- What you need
- Instructions
- Tips and common mistakes
- Wrapping up and next steps
What you need
- ● Apple tree shoots: Healthy, flexible 1-year-old shoots (about pencil-thick) with no flowers or fruit—aim for 6-12 inches long.
- ● Rooting hormone: A powder or gel (e.g., Clonex or Dip 'N Grow) to boost root development.
- ● Plastic wrap or clear plastic bags: 6-inch-wide to create a humid microclimate (1-2 rolls).
- ● Twist ties or zip ties: Small, flexible (10-20) to secure the layering setup.
- ● Sharp pruning shears: Bypass-style (sterilized with rubbing alcohol) for clean cuts.
- ● Moist sphagnum moss: 2-3 inches thick per layering site (or a 5-gallon bag for multiple shoots).
- ● Garden twine or raffia: 10-15 feet to anchor the layered shoot to the moss.
- ● Gloves: Garden or work gloves to protect hands from thorns and sap.
- ○ Spray bottle: With water to keep moss damp (optional but handy).
- ● Stakes or small rocks: 1-2 per shoot to weigh down the plastic wrap (prevents wind damage).
- ● Notebook & pen: To track progress (e.g., dates, shoot health, root growth).
- ● A healthy apple tree (disease-free, well-established, 3+ years old).
- ● Timing: Late spring to early summer (when shoots are growing actively but not flowering).
- ● Partial shade: A spot with dappled sunlight (e.g., near the tree) for the layered shoots.
- ● Patience: Roots typically form in 4-8 weeks, but full separation may take months!
Step-by-Step guide to layering apple tree shoots
Here’s how to coax roots from your tree’s branches—no digging required.
🌱 Step 1: Select Healthy Shoots for Layering
Choose 12-18 inch long shoots that are flexible but sturdy—they should bend easily without snapping. Look for new growth with thick stems (about ¼ inch diameter) and no signs of disease like spots or cracks. I like to pick shoots that are slightly lower on the tree (around 3-4 feet from the ground) because they’re often more vigorous.
Use a clean, sharp pruning shears to make a small notch about ½ inch deep on the underside of the shoot, just above a leaf node. This tiny cut will encourage root formation later. Avoid notching too deep—you’re just breaking the outer layer, not the cambium. Think of it like giving the shoot a gentle nudge to wake up.
🌿 Step 2: Bend and Secure the Shoot
Gently bend the shoot downward until it’s horizontal to the ground. You’ll feel resistance at first—that’s normal. The goal is to create light tension without breaking the stem. For shoots that are too stiff, you can make a second small notch a few inches down to help it bend more easily.
Once the shoot is in position, secure it with flexible plant ties or soft wire (like florist wire). Bury the notched section under 2-3 inches of moist soil, leaving the top of the shoot exposed. I like to mound the soil around the shoot like a little trench—this keeps it stable and encourages root growth. Water the area lightly to settle the soil and remove any air pockets.
💧 Step 3: Keep Soil Moist and Monitor Progress
Water the layered shoot every 2-3 days until the soil feels moist 1 inch down. Overwatering here is tricky—too much can suffocate the roots, while too little slows growth. You’ll know it’s right when the soil surface looks damp but not soggy. A good trick is to stick your finger in: if it comes out clean, you’re golden.
After 4-6 weeks, gently tug on the shoot near the buried section. If you feel resistance (even slight), roots are forming! If it pulls out easily, wait another week and check again. This is the moment that matters: patience pays off. Avoid disturbing the shoot too much—roots are delicate and can break easily.
✂️ Step 4: Separate and Transplant the New Tree
Once roots are confirmed (usually 6-8 weeks after layering), cut the shoot just below the new root zone with clean pruners. Dig carefully around the buried section to loosen the soil and expose the roots. You’ll see a tangled mass of white or tan roots—this is your new tree’s foundation.
Transplant the rooted shoot into its own pot or directly into the ground, mimicking the depth it was layered at. Water deeply right after planting to help the roots settle. The first few weeks are critical—keep the soil consistently moist but not waterlogged. You’ll see new leaves emerge within 2-3 weeks, signaling the tree is thriving on its own.
☀️ Step 5: Care for Your New Apple Tree
Place your new tree in full sun (at least 6-8 hours daily) and protect it from strong winds, which can stress young roots. Mulch around the base with 2-3 inches of organic mulch (like wood chips) to retain moisture and regulate soil temperature. Avoid piling mulch against the trunk—keep it 2-3 inches away to prevent rot.
Fertilize lightly in the first growing season with a balanced, slow-release fertilizer (like 10-10-10). Too much fertilizer now can burn tender roots. Watch for yellowing leaves—this usually means either overwatering or nutrient deficiency. Adjust your care based on what you see: wilted leaves? Check soil moisture. Pale leaves? Time for a light feeding.
Tips & tricks for perfect apple tree shoot layering
These little-known tricks will help your apple tree shoots root faster and stronger—without the guesswork.
Shoot Selection is Key: Don't just grab any branch! Look for shoots that are 12-18 inches long with stems about ¼ inch thick—thinner shoots often struggle to root. I focus on those 3-4 feet from the ground because they're usually more vigorous. The best candidates have a slight bend already—they'll be easier to work with. Confession: I skipped this step for years and wondered why my shoots kept failing.
The Notch Makes All the Difference: When making that ½-inch deep notch in Step 1, angle your pruning shears slightly downward to create a clean break. This tiny wound signals the shoot to start producing roots. Too deep? You risk damaging the cambium layer. Too shallow? The shoot might not respond. Think of it like giving the tree a gentle wake-up call—just enough to get things moving without causing stress.
Bending Technique Matters: In Step 2, the goal is light tension, not brute force. If a shoot feels too stiff, make a second notch 1-2 inches below the first—this creates a natural bend point. I've found that wrapping the shoot with a plastic bag (after securing) helps maintain humidity around the buried section, which speeds up root formation. Just make sure the bag doesn't touch the shoot directly to prevent rot.
Root Check Hack: At the 4-6 week mark, test for roots by gently tugging near the buried section. If you feel even slight resistance, roots are forming! I've learned to check in the morning when soil is moistest—this gives the most accurate reading. If it pulls out easily, wait another week. The difference between a mediocre result and an absolutely stellar one often comes down to this single, seemingly insignificant step.
Pro Tips for Apple Tree Shoots
- These little-known tricks will help your apple tree shoots root faster and stronger—without the guesswork.
- Shoot Selection is Key: Don't just grab any branch!
- The Notch Makes All the Difference: When making that ½-inch deep notch in Step 1, angle your pruning shears slightly downward to create a clean break.
Frequently asked questions
Got questions about growing apple tree shoots with layering? You’re not alone! Here are some of the most common concerns—and straightforward answers—to help you get started confidently.
What’s the best time of year to layer apple tree shoots?
The ideal window is late spring to early summer (May–June in most climates). This gives shoots 6–8 weeks of warm weather to root before winter. Avoid layering in fall—new roots won’t harden off in time. For tropical zones, aim for the wetter season when soil stays consistently moist.
How long does it take for layered apple shoots to root?
Root formation usually takes 4–8 weeks, depending on warmth, moisture, and shoot size. You’ll know it’s working when you see tiny roots peeking from the soil or the layered section feels slightly anchored. Patience pays off—rushing can stress the shoot. Pro tip: Gently tug the shoot after 6 weeks to test root strength!
Can I layer apple tree shoots in containers instead of the ground?
Use a well-draining pot (10+ inches deep) with a mix of potting soil and perlite. Keep the pot in partial shade and water consistently. Containers are great for small spaces or if your soil drains poorly. Just ensure the pot stays stable—wind can topple lightweight setups.
What should I do if my layered apple shoot turns yellow or wilts?
Yellowing leaves often signal overwatering or poor drainage. Let the soil dry slightly between waterings and check for root rot (mushy, foul-smelling roots). Wilting can also mean underwatering or stress. Trim damaged leaves, adjust watering, and provide light shade until the shoot recovers. If the stem feels mushy, prune it back to healthy tissue.
Will layered apple shoots produce fruit faster than grafting?
Not necessarily! Layering creates a genetically identical clone of the parent tree, but fruit production depends on the tree’s maturity. Dwarf varieties may fruit in 3–5 years, while standard trees take 5–10+ years. Grafting can speed up fruiting for specific cultivars, but layering is simpler and great for propagating existing favorites.
Wrapping up and next steps
Growing apple tree shoots with layering tricks is a game-changer—no digging required! 🌱 Whether you’re a beginner or a seasoned gardener, these techniques help jumpstart root growth efficiently. With the right tools and patience, you’ll soon have a thriving tree ready to bear fruit.
Now that you’re armed with knowledge, take action! Start layering a shoot this season and watch your apple tree flourish. And if you’re eager to expand your skills, explore other propagation methods like grafting or air layering for even more gardening success. Happy growing! 🍏✨