
Pruning
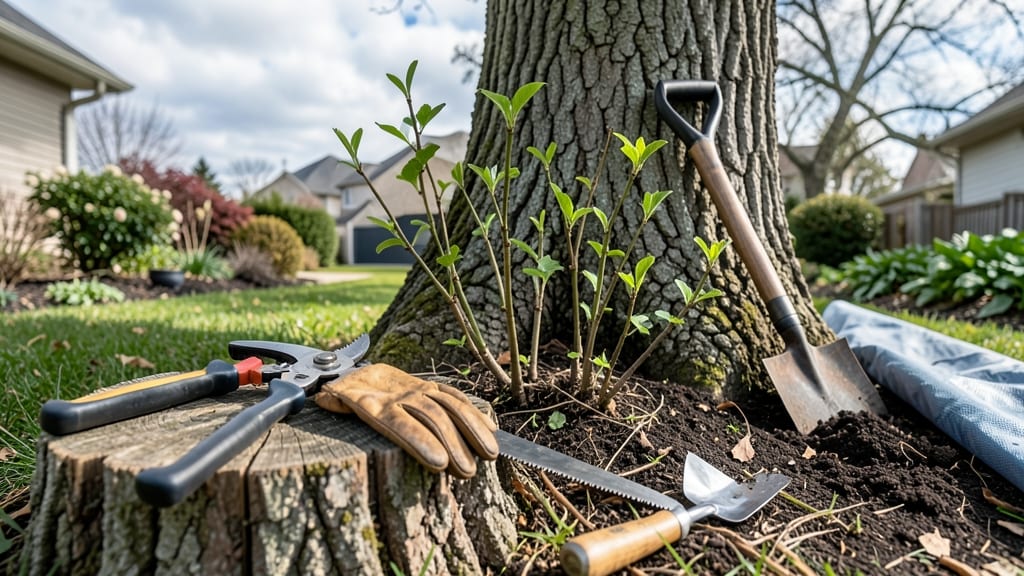
Removing tree shoots—those stubborn suckers—without damaging your tree starts with the right cut. ✂️ I’ve wrestled with these aggressive growths for years, and I finally cracked the code: timing, technique, and a sharp pair of pruners make all the difference.
The key is cutting at the root collar, not the base, to avoid wounding the parent tree. Gloves and a clean pruner are your best friends here—no jagged edges, no hesitation.
If you wait too long, those shoots thicken into impossible-to-remove stumps, and the tree’s energy gets drained fighting them. You’ll see a noticeable difference in just one growing season—fewer shoots, stronger roots, and a healthier tree overall. The secret?
Repeat the process in early spring or late fall when the tree’s dormant, and always sterilize your tools between cuts. Common mistakes? Cutting too deep, leaving stubs, or using dull tools. Avoid these, and your tree will thank you with fewer battles next year. Let’s get started!
📚 In This Guide
- What you need
- Instructions
- Tips and common mistakes
- Wrapping up and next steps
What you need
- ● Pruning shears (bypass or anvil type): Choose sharp, clean shears with a 2- to 4-inch blade for small shoots (¼ to ½ inch thick). Disinfect with rubbing alcohol before and after use to prevent disease spread. 🌿
- ● Loppers: For thicker shoots (½ to 1½ inches), opt for bypass loppers with 6- to 8-inch blades and a ratcheting mechanism for leverage.
- ● Pruning saw: A curved-tooth handsaw or folding pruning saw for shoots larger than 1½ inches. Look for a 7- to 10-inch blade for precision.
- ● Gloves: Wear cut-resistant gloves (like those rated ANSI A3) to protect your hands from thorns or sharp edges.
- ● Safety glasses or goggles: Essential to shield your eyes from debris, sap, or accidental cuts.
- ● Ladder or step stool: A stable, extendable ladder (with non-slip feet) or a fiberglass step stool for reaching higher shoots. Never stand on the top rung! ⚠️
- ○ Disposable pruning sealant (optional): A latex-based sealant to coat cuts larger than ½ inch, reducing sap loss and disease risk.
- ● Heavy-duty trash bags or bucket: For collecting debris. A 5-gallon bucket with a lid works well for small jobs.
- ● Rubbing alcohol (70% isopropyl) or bleach solution: Mix 1 part bleach to 9 parts water to disinfect tools between cuts.
- ● Pole saw: Extendable for high or hard-to-reach shoots (ideal for large trees).
- ● Extension cord + electric trimmer: For dense clusters of small shoots (use with caution near water or flammable materials!).
- ● Tree wound dressing (controversial): Some gardeners swear by asphalt-based dressings, but research suggests they’re often unnecessary for healthy trees.
- ● Work gloves with grip: If your tree has sticky sap, nitrile-coated gloves make cleanup easier.
- ● First-aid kit: Just in case! Include bandages, antiseptic wipes, and tweezers for splinters.
Step-by-step instructions for removing tree shoots safely
Here’s how I tackle unwanted tree shoots without damaging the parent tree or inviting pests.
✂️ Step 1: Identify and Time Your Cut
First, examine the shoot carefully—look for a small bump or swelling at its base where it meets the trunk or ground. This is the bud union, where the shoot connects to the tree. The best time to cut is late winter or early spring, just as new growth begins. You’ll notice tiny green swellings forming on the tree’s branches or trunk, signaling it’s ready for pruning.
Never remove shoots in summer or fall—this stresses the tree and invites disease. If you must prune outside the ideal window, do it on a cool, overcast day to reduce stress. Use sharp pruning shears (not hedge trimmers) to make clean cuts—dull tools crush tissue, slowing healing.
🌱 Step 2: Cut at the Right Angle and Depth
Position the shears at a 45-degree angle, cutting just ¼ inch above the bud union (that little bump at the shoot’s base). This angle helps water run off the cut, preventing rot. If you cut too close to the tree, you’ll damage the parent’s bark; too far away, and the shoot will regrow. For thick shoots over ½ inch, use loppers instead of shears to avoid tearing.
After cutting, inspect the wound. It should expose a smooth, white layer of healthy tissue—not brown or stringy. If you see brown streaks, the tree may already be infected, and you’ll need to sterilize your tools with rubbing alcohol before continuing. Discard any shoots showing signs of disease (black spots, oozing sap) immediately.
🪴 Step 3: Clean Up and Monitor for Regrowth
Remove all cuttings from the area—leaving them behind can harbor pests or fungi. Bag the debris and dispose of it in yard waste. If the shoot was near the base of the tree, apply a 2-inch layer of mulch (like wood chips) around the trunk but keep it 6 inches away to prevent rot. Water the tree deeply afterward to help it recover.
Watch for new shoots sprouting from the same spot within 4-6 weeks. If they appear, repeat the cutting process—persistent regrowth means the bud union wasn’t fully removed. For stubborn cases, apply a horticultural sealant to the cut area to deter future shoots. Avoid chemical treatments unless absolutely necessary; they can harm the tree’s roots.
☀️ Step 4: Maintain the Tree’s Health Long-Term
After pruning, focus on watering and feeding the tree to support recovery. Young trees need 1-2 inches of water weekly, while mature trees benefit from deep watering every 10-14 days. Fertilize in early spring with a balanced, slow-release formula (like 10-10-10) to encourage strong growth elsewhere on the tree.
Regularly inspect the tree for new shoots, especially in spring and summer. If you notice a pattern of shoots appearing in the same spots, the tree may be stressed—check for compacted soil, root damage, or pests. A healthy tree with proper sunlight and nutrients will naturally resist unwanted shoots. Prune again in late winter to stay ahead of regrowth.
Tips & tricks for precision tree shoot removal
These small details make all the difference between a clean cut and a stressed tree. I've learned these the hard way after seeing too many trees suffer from improper pruning.
Timing is Everything: The late winter or early spring window isn't just ideal—it's critical. This is when trees naturally enter their active growth phase, making them far more resilient to pruning. I've seen trees develop fungal infections from summer pruning because the hot weather creates perfect conditions for pathogens to enter through fresh cuts. The tiny green swellings you notice are your visual cue that the tree is ready.
The 45-Degree Angle Secret: That angle isn't arbitrary—it's about water management. When you cut at 45 degrees just above the bud union, you create a slope that directs water away from the wound, preventing rot. I've made the mistake of cutting straight across, and within weeks those cuts would develop blackened edges. The angle also exposes more healthy tissue, giving the tree a better chance to seal the wound naturally.
Tool Sharpness Matters More Than You Think: Dull pruning shears don't just make work harder—they crush the tree's cells, creating jagged edges that take much longer to heal. I keep a small file in my tool kit specifically for maintaining the sharpness of my pruning shears. For shoots over half an inch thick, switch to loppers—they provide the leverage needed for clean cuts without tearing. And always sterilize your tools with rubbing alcohol between cuts, especially if you see any signs of disease.
Mulching Strategy: That 2-inch layer of mulch isn't just decorative—it's a protective barrier. When applied correctly (keeping it 6 inches away from the trunk), it helps maintain consistent soil moisture while preventing rot. I've noticed that trees with proper mulching recover faster and show fewer signs of stress after pruning. Just remember to water deeply after pruning to help the tree recover from the shock.
Pro Tips for Remove Tree Shoots
- These small details make all the difference between a clean cut and a stressed tree.
- Timing is Everything: The late winter or early spring window isn't just ideal—it's critical.
- The 45-Degree Angle Secret: That angle isn't arbitrary—it's about water management.
Frequently asked questions
about removing tree shoots—because even the pros need a little extra help sometimes!When is the best time to remove tree shoots?
The ideal time to tackle tree shoots is late winter to early spring (just before new growth begins) or summer (after flowering). Avoid pruning in fall—it can stimulate new growth that won’t harden off before winter, leaving it vulnerable to frost damage. For fast-growing species, like willows or poplars, trim shoots as soon as they appear to prevent them from draining the tree’s energy.
What if I accidentally damage the tree while removing shoots?
Don’t panic! Minor cuts heal quickly, but avoid over-pruning (never remove more than 25% of the tree’s foliage in one go). If you nick the main trunk or large branches, sterilize your tools with rubbing alcohol, make clean cuts at a slight angle, and apply pruning sealant (optional for small wounds). Monitor the area for signs of infection (oozing sap, discoloration) and contact an arborist if issues persist.
Can I use herbicide instead of manual removal?
Yes, but proceed with caution! Herbicides (like glyphosate) can kill unwanted shoots, but they may also harm nearby plants or the parent tree if misapplied. For spot treatment, use a hormone-based herbicide (like triclopyr) on a brush or wick. Always follow label instructions, and avoid herbicides if the tree is young or stressed. Manual removal is often safer and more precise for small-scale pruning.
Why do tree shoots keep coming back after I remove them?
Persistent shoots often return due to stump sprouting (from the root collar) or vigorous regrowth (common in species like maples or oaks). To stop them:
- Cut deeper—aim for just above a bud or lateral branch (not flush with the trunk).
- Apply a vinegar or copper-based spray to the stump to deter regrowth.
- Consider root barriers for aggressive trees (like Bradford pears).
What’s the difference between tree shoots and suckers?
Shoots
are new growth from the tree’s root system (often at the base) or from dormant buds on the trunk/branches. Suckers are a type of shoot that grow below the graft union (common in grafted trees like fruit trees). While both are unsightly, suckers drain energy from the main tree, so remove them as close to the base as possible to prevent regrowth.
Wrapping up and next steps
Removing tree shoots doesn’t have to be a daunting task—with the right tools, techniques, and timing, you can keep your yard tidy while ensuring your tree stays healthy and thriving. 🌱 Whether you’re tackling stubborn suckers, young saplings, or overgrown branches, precision trimming is key to avoiding damage and promoting strong growth.
Now that you’re equipped with the know-how, grab your gloves and get ready to transform your outdoor space with confidence!
Ready to take on your next pruning project? Start small, assess your tree’s needs, and gradually work your way through the process. Happy trimming!