
Propagation
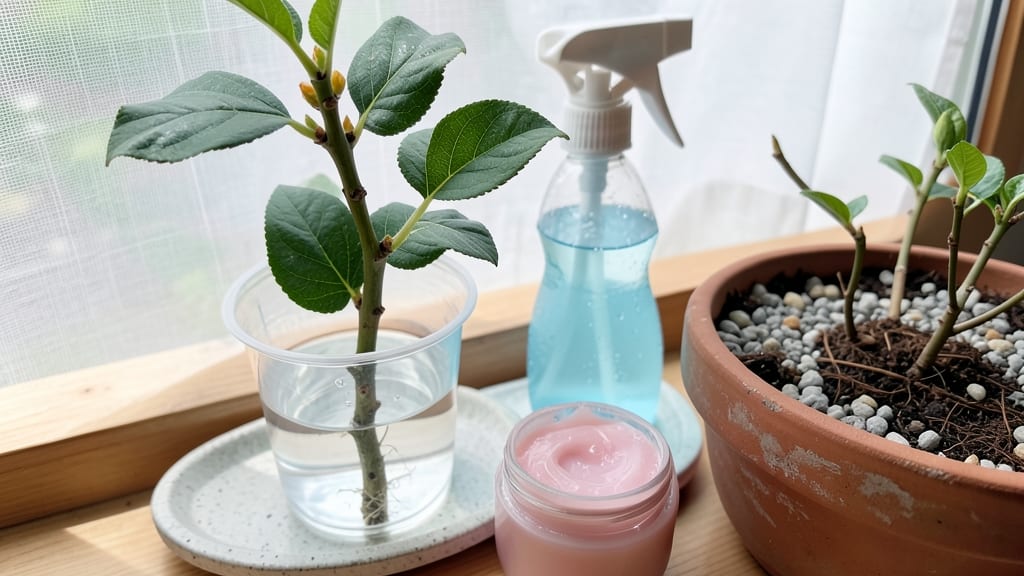
Propagating a loquat tree from cuttings is the fastest way to grow your own fruit tree—4-6 weeks to root-bound success. 🌱 I’ve rooted loquats in both water and soil, and the right timing (late spring or early summer) makes all the difference.
The key is choosing healthy, semi-hardwood cuttings and keeping humidity high while roots form.
You’ll need sharp pruners, rooting hormone, a humidity dome (or plastic bag), and either water or moist potting mix. Loquats root best in warm, humid conditions, so a heat mat helps speed things up.
Mist cuttings daily to prevent drying, and avoid direct sunlight until roots appear—usually within 3-4 weeks if done right.
Once roots form, transplant carefully into pots with well-draining soil. Keep them in bright, indirect light for the first month, then gradually introduce more sun. Within 6-8 weeks, you’ll have sturdy young trees ready for planting—or you can keep them in containers for another year.
Watch for rot (too much water) or wilting (too dry), and don’t rush—patience is key. Loquats are finicky but rewarding; with this method, you’ll bypass the years it takes from seed. Ready to grow your own? Let’s get those cuttings rooted!
📚 In This Guide
- What you need
- Instructions
- Tips and common mistakes
- Wrapping up and next steps
What you need
- ● Loquat cuttings: 6–10 healthy, semi-hardwood cuttings (4–6 inches long, pencil-thick, taken from current season’s growth).
- ● Rooting hormone: 1 small container (powder or gel formula, like Rootone or Clonex).
- ● Well-draining potting mix: 1 bag (50% perlite or sand + 50% peat moss or coconut coir).
- ● Small pots or trays: 4–6 (4–6 inches deep, with drainage holes).
- ● Plastic bags or clear domes: 1–2 (to create humidity).
- ● Spray bottle: 1 (for misting).
- ● Pruning shears: 1 (sterilized with rubbing alcohol).
- ● Sharp knife or razor blade: 1 (for clean cuts).
- ● Heating mat (to speed up rooting, especially in cooler climates).
- ● Fungicide (like Mycorrhizal inoculant to prevent rot).
- ● Labeling tags (to track cutting dates and progress).
- ● Grow lights (if natural light is limited).
- ● Hydrogen peroxide (3%, diluted to 10% for sterilizing water or tools).
Step-by-step instructions for propagating a loquat tree from cutting
Here’s how I’ve rooted loquat cuttings reliably—no fancy tools, just patience and the right timing.
🌱 Step 1: Select and Prepare Healthy Cuttings
Choose 4-6 inch long semi-hardwood cuttings from new growth in late winter or early spring. Look for pencil-thick stems with at least 2-3 leaf nodes—these are the spots where roots will sprout. Use clean, sharp pruners to make a 45-degree angle cut just below a node. This angled cut increases surface area for root growth.
Strip off all but the top 2 leaves—too many leaves mean the cutting will lose too much moisture before roots form. Dip the cut end in rooting hormone (optional but helpful for faster results). I like to work in the morning when humidity is high, giving the cuttings the best start.
💧 Step 2: Plant Cuttings in Moistened Propagation Medium
Fill a 4-inch pot with well-draining potting mix—I blend 50% perlite and 50% peat moss for the perfect balance. Moisten the mix until it’s damp but not soggy—think of it like a wrung-out sponge. Make a 1-inch deep hole with your finger and insert the cutting, burying half the stem (about 1-2 nodes below soil). Gently firm the soil around it to remove air pockets.
Place 2-3 cuttings per pot (since loquats root slowly) and water lightly from the bottom. This keeps the soil evenly moist without disturbing the cuttings. Cover the pot with a clear plastic bag secured with a rubber band—this traps humidity and mimics the tropical conditions loquats love. Check daily for condensation inside; if it’s foggy, you’re golden.
☀️ Step 3: Provide Warmth, Humidity, and Indirect Light
Loquat cuttings root best in 70-75°F warmth. A seedling heat mat under the pot keeps roots cozy, or place it on top of your fridge (the heat rises naturally). Avoid direct sunlight—bright, indirect light is key. A south-facing window with sheer curtain works, or use a grow light 6 inches above the cuttings for 12 hours daily. Too much sun will dry out the leaves before roots form.
Keep the plastic bag on for 4-6 weeks—this is critical. Without it, the cuttings dry out too fast. Mist the leaves every 2-3 days to maintain humidity, but avoid wetting the leaves directly (that invites fungus). You’ll know it’s working when you see tiny white roots at the soil line after 3-4 weeks.
✂️ Step 4: Transplant and Care for New Roots
Once roots are 1-2 inches long (gently tug the cutting—if resistance meets your fingers, it’s ready), remove the plastic and transplant into a 6-inch pot with regular potting mix. Water thoroughly and place in partial shade for a week to help it adjust. Loquats are sensitive to shock, so gradual changes are key.
After two weeks, move it to morning sun only, slowly increasing exposure over 2-3 weeks. Fertilize lightly with half-strength balanced fertilizer (10-10-10) 4 weeks after transplanting. By 6 months, your cutting should be a bushy 12-inch sapling—ready to move outdoors in USDA Zones 8-11 or overwinter indoors if you’re in a cooler climate.
Tips & tricks for propagating loquat trees from cuttings
Real talk: The difference between thriving loquat cuttings and sad, wilted failures often comes down to these small but critical details.
Timing is Everything: Late winter or early spring is your sweet spot for cutting propagation—this aligns with the tree's natural growth cycle. If you miss this window, you can try again in summer, but success rates drop significantly. I've found that cutting in the morning (when humidity is naturally higher) gives the stems a head start before they lose moisture. The 4-6 inch length is non-negotiable—shorter cuttings struggle to establish roots, while longer ones are harder to manage in small pots.
Rooting Hormone Hack: While rooting hormone isn't strictly necessary, it cuts your waiting time by about 30%. I like to use a gel formula—it's messier than powder but stays put on the cut end. If you skip it, make absolutely sure your cuttings are perfectly moist and your environment is consistently humid. Pro tip: Wipe the cut end with a damp paper towel before applying hormone to remove any resin that might block root growth.
Soil Science: That 50/50 perlite to peat moss mix isn't arbitrary—perlite creates air pockets that prevent rot while peat moss holds moisture without suffocating roots. I've had failures when people use straight peat moss (too dense) or straight perlite (too dry). Test your mix by squeezing a handful: it should hold its shape but crumble easily when pressed. If it sticks together, add more perlite; if it falls apart, add a bit more peat moss.
Lighting Strategy: The 6 inches of distance between your grow light and cuttings is crucial—too close and you'll scorch tender leaves, too far and they'll stretch pitifully toward the light. I've seen people use regular desk lamps (even LED ones) and wonder why their cuttings fail. Invest in a basic fluorescent grow light if you can; it's the difference between weak, leggy growth and sturdy, healthy stems. And remember: indirect light only during the rooting phase!
Pro Tips for Loquat Tree From Cutting
- Real talk: The difference between thriving loquat cuttings and sad, wilted failures often comes down to these small but critical details.
- Timing is Everything: Late winter or early spring is your sweet spot for cutting propagation—this aligns with the tree's natural growth cycle.
- Rooting Hormone Hack: While rooting hormone isn't strictly necessary, it cuts your waiting time by about 30%.
Frequently asked questions
Got questions about propagating a loquat tree from cuttings?
You’re not alone! Here are answers to the most common queries to help you succeed—no guesswork required.
When is the best time to take loquat cuttings?
For best results, take semi-hardwood cuttings in late winter to early spring (just before new growth starts) or softwood cuttings in summer (June–July). Avoid extreme heat or cold—aim for mild, humid conditions. Pro tip: Morning hours are ideal for cutting to reduce stress on the plant!
How do I know if my cutting is healthy enough to root?
A healthy cutting should be 1–2 feet long, with 2–3 nodes (bumps where leaves grow) and no flowers or fruit. Look for flexible, green stems—avoid woody or brittle branches. If the stem snaps easily, it’s too mature. Quick check: Squeeze gently; it should bend slightly but not break.
Why aren’t my loquat cuttings rooting? Troubleshooting tips!
No roots? Check these common issues:
- Low humidity: Cover cuttings with a plastic bag or use a humidity dome.
- Overwatering: Keep soil moist but not soggy—root rot is a silent killer!
- Poor lighting: Place cuttings in bright, indirect light (no harsh sun).
- Wrong cutting type: Semi-hardwood works best—avoid fully hardened wood.
Still struggling? Try a rooting hormone or adjust your watering routine.
Can I propagate a loquat tree from a leaf cutting?
Nope! Loquat trees require stem cuttings with nodes to root successfully. Leaf cuttings lack the energy and structure needed to form roots. Stick to 4–6 inch stem sections for the best chance at success. Fun fact: Some trees (like African violets) root from leaves, but loquats aren’t one of them!
How long does it take for loquat cuttings to root?
With proper care, you’ll see roots in 4–6 weeks, though some may take longer. Monitor progress by gently tugging the cutting—if resistance feels like light suction, roots are forming! Patience is key—keep humidity and moisture consistent. Celebrate small wins: Tiny root hairs appear first, followed by stronger roots in weeks!
Wrapping up and next steps
Growing a loquat tree from a cutting is a rewarding journey that blends patience with nature’s magic! 🌱 With the right tools, care, and a little green thumb effort, you’ll soon enjoy root-bound success—ready to transplant and thrive in just 4-6 weeks.
Whether you’re a seasoned gardener or a curious beginner, this method opens doors to lush, fragrant fruit trees right from your backyard.
Ready to take the next step? Start with healthy cuttings this season, monitor their progress, and soon you’ll be harvesting sweet loquats of your own. Happy propagating! 🌿