
Pruning
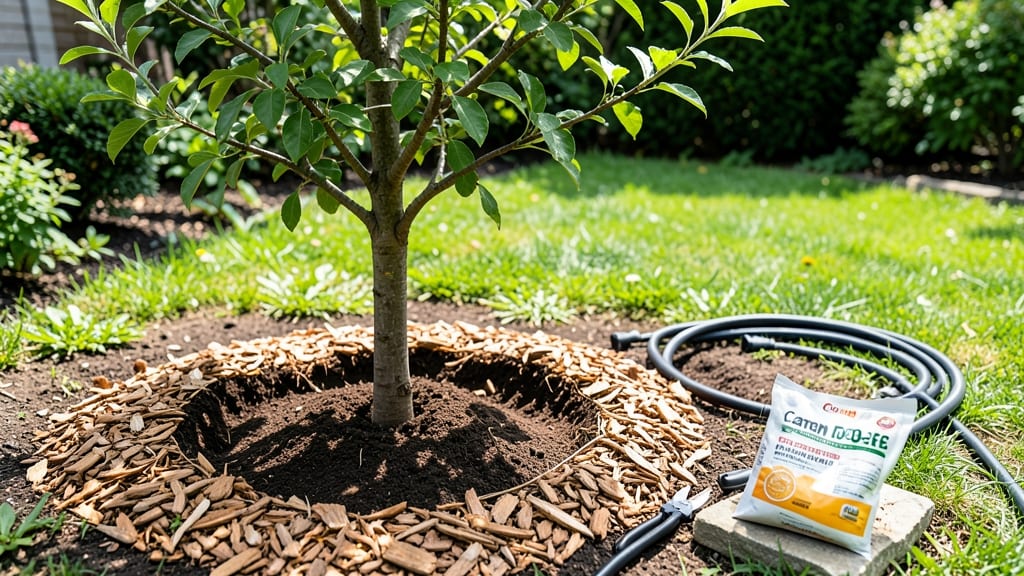
Japanese plum tree care rewards you with stunning spring blooms and sweet summer fruit—but only if you prune them right. ✨ I’ve learned the hard way that skipping winter cuts leads to dense canopies, fewer flowers, and smaller harvests. The key is understanding when to prune for blooms versus when to prune for fruit, and how to shape the tree so air circulates properly.
You’ll need basic tools—a sharp bypass pruner, loppers for thicker branches, and rubbing alcohol to sterilize cuts.
Japanese plums bloom on both old and new wood, so timing matters: prune in late winter (before buds swell) to encourage next year’s flowers, then do light summer pruning to remove dead growth. The goal? A tree that’s open enough for sunlight but structured enough to support heavy fruit.
By summer, you’ll see the payoff—vibrant pink blossoms turning into juicy plums, with fewer pests and diseases thanks to better airflow. The tree stays productive for decades if you keep up with annual trims. I’ve watched mine go from a tangled mess to a showstopper in just three seasons.
Works for backyard orchards, urban yards, or even large containers (with proper support). Here’s how to keep yours thriving year after year—without the guesswork.
📚 In This Guide
- What you need
- Instructions
- Tips and common mistakes
- Wrapping up and next steps
What you need
- ● Pruning shears – Sharp, bypass-style (for clean cuts), size 6-8 inches (for small branches).
- ● Loppers – Bypass or anvil type, with 18-24 inch handles (for thicker branches, up to 1.5 inches in diameter).
- ● Pruning saw – Bow or folding saw, with a 10-12 inch blade (for branches 2+ inches thick).
- ● Disinfectant – 70% isopropyl alcohol or bleach solution (1 part bleach : 9 parts water) (to sterilize tools and prevent disease).
- ● Gloves – Heavy-duty, cut-resistant (to protect hands from thorns and rough branches).
- ○ Pruning sealant – Optional but recommended for large cuts (e.g., tree wound paint or pruning wax).
- ● Ladder or step stool – Sturdy, extendable (if your tree is taller than 6 feet).
- ● Trash bags or bucket – For collecting pruned branches and debris.
- ● Knowledge of tree anatomy – Familiarize yourself with terminal buds, water sprouts, and scaffold branches (watch a quick YouTube tutorial if needed!).
- ● Weather check – Prune on a dry, cloudy day (avoid pruning when the tree is wet or in direct sunlight).
- ● Safety first! – Wear closed-toe shoes and avoid pruning near power lines.
- ● 🔥 Sharpen your tools before starting—dull blades tear bark and damage the tree.
- ● ✨ Test your ladder on stable ground to avoid accidents while reaching high branches.
- ● 🌡️ Time it right: Late winter/early spring (just before buds swell) is ideal for major pruning.
Step-by-step guide to pruning your Japanese plum tree
Here's the seasonal approach I've used to keep my Japanese plum trees flowering beautifully for over a decade.
✂️ Step 1: Late Winter Dormant Pruning (Best Time: January-February)
This is the most critical pruning time for Japanese plums. Wait until after the worst winter cold passes but before buds begin to swell—usually in late January or early February. You'll know it's time when the tree looks dormant but the ground isn't frozen solid. Remove any dead, diseased, or crossing branches first using clean, sharp pruners. Make cuts just outside the branch collar where it meets the trunk.
Open the center of the tree to improve airflow and sunlight penetration. Japanese plums bloom on both old and new wood, so don't be too aggressive with thinning—remove no more than 25% of the canopy in any single year. Look for branches growing inward or rubbing against others; these compete for energy and should go first. You'll see the tree's natural structure emerge as you work.
✂️ Step 2: Post-Bloom Summer Pruning (Best Time: June-July)
After the spring blooms fade but before new growth hardens, do a light pruning to maintain shape and remove any suckers that appear at the base. Focus on cutting back any vigorous shoots that grew too long during the bloom period. These summer prunings should be minimal—just enough to maintain the tree's form and remove any dead or diseased wood that appeared after flowering.
This is also when you'll want to thin out some of the fruit if your tree is overloaded. Leave about 12-15 plums per branch for optimal size and ripening. You'll notice the remaining fruit will develop more evenly and have better flavor. Use sharp pruners to make clean cuts just above outward-facing buds. Avoid heavy pruning in summer as it can stimulate too much late-season growth that won't harden off before winter.
✂️ Step 3: Light Spring Cleanup (Best Time: March-April)
Do a quick inspection in early spring before buds break to remove any water sprouts that appeared over winter. These are the fast-growing, vertical shoots that steal energy from fruit production. Cut them back to the main branch or trunk. Also remove any branches that died over winter—they'll be completely brown and brittle, making them easy to spot.
This light pruning helps the tree focus its energy on producing blooms rather than supporting dead or weak growth. You might also want to thin out some of the smaller branches to improve air circulation, especially if you noticed any fungal issues last year. The goal here is subtle maintenance—no more than 10% of the canopy should be removed during this pass. You'll see fresh green growth emerging from the pruned areas within a few weeks.
✂️ Step 4: Fall Pruning (Best Time: October-November)
In fall, do a very light pruning to remove any dead wood that appeared over the summer or any branches that grew too vigorously after the summer pruning. This is also when you should remove any suckers that appeared at the base of the tree. Avoid heavy pruning in fall as it can stimulate new growth that won't harden off before winter.
Focus on cleaning up the tree's structure rather than making major cuts. Remove any branches that crossed or rubbed together during the growing season. You'll notice the tree looks more open and less dense after this final cleanup. This fall pruning helps the tree enter dormancy in good shape, ready to produce another round of beautiful blooms next spring.
💧 Step 5: Year-Round Maintenance Checks
Between pruning seasons, do monthly inspections to catch any new disease or pest issues early. Japanese plums are susceptible to silver leaf fungus and plum pocket borer, so watch for any unusual leaf spots, wilting, or sawdust-like frass at branch junctions. Remove any affected branches immediately using clean pruners and dispose of them away from the tree.
Keep the area under the tree clear of debris and mulch with 2-3 inches of organic mulch (like shredded bark) to retain moisture and prevent weed competition. Water deeply once a week during dry periods, aiming for 1-1.5 inches of water per week. You'll see the tree's overall health improve with consistent care, leading to more abundant blooms and better fruit production each year.
Tips & tricks for perfect Japanese plum tree trimming
Here's what I've learned after years of keeping my Japanese plum trees thriving—these small details make all the difference.
Timing is Everything: The late January-February window for dormant pruning is non-negotiable. I've seen trees bloom poorly when pruned too early (still cold) or too late (buds swelling). Check the ground—it should be unfrozen but not yet warm. If you're unsure, wait until you see the first tiny buds starting to swell, then prune immediately. This ensures the tree has maximum energy for spring growth.
The 25% Rule: Never remove more than 25% of the canopy in any single year, especially during the critical winter pruning. I learned this the hard way when I over-pruned and my tree struggled to bloom the following spring. Think of it like giving your tree a haircut—you want to shape it, not shave it. Focus on removing dead, crossing, or inward-growing branches first, as these are the biggest energy drains.
Branch Collar Matters: Always make cuts just outside the branch collar where the branch meets the trunk. I used to cut too close and create ugly wounds that took years to heal. The collar is the tree's natural healing point—it contains protective tissue that helps the wound seal properly. If you accidentally cut into the collar, don't panic. Just make a second cut slightly higher to create a proper collar and the tree will recover.
Fruit Thinning Technique: When thinning fruit in summer, aim for 12-15 plums per branch. I use a simple visual method: look for plums that are evenly spaced along the branch, leaving room for air circulation. Remove any that are too close together or show signs of disease. You'll notice the remaining fruit develops more evenly and ripens more consistently. This also prevents branches from breaking under the weight of too many plums.
Pro Tips for Japanese Plum Tree Care
- Here's what I've learned after years of keeping my Japanese plum trees thriving—these small details make all the difference.
- Timing is Everything: The late January-February window for dormant pruning is non-negotiable.
- The 25% Rule: Never remove more than 25% of the canopy in any single year, especially during the critical winter pruning.
Frequently asked questions
Got questions about keeping your Japanese plum tree thriving?
Here are answers to the most common ones—so you can prune with confidence and enjoy those stunning blooms all year long!
When is the best time to prune a Japanese plum tree?
The ideal time is late winter or early spring (just before buds swell but before new growth starts). This helps avoid diseases and encourages strong blooms. Never prune after flowering—you’ll cut off next year’s blossoms! For light shaping, you can also prune in summer after fruit sets.
Can I prune a Japanese plum tree in winter?
Yes, but only if it’s dormant (no leaves, no buds). Avoid heavy pruning in freezing temps—it stresses the tree. If you must prune in winter, do it on a mild day (above 40°F) and focus on removing dead or diseased branches. Pro tip: Wait until late winter for best results!
Why aren’t my Japanese plum tree blooms as abundant as last year?
Fewer blooms often mean over-pruning (cutting too many branches) or nutrient imbalance. Japanese plums bloom on old wood, so avoid heavy summer pruning. Fix it: Fertilize in early spring with citrus-specific food (high in nitrogen) and prune lightly in late winter.
What should I do if my Japanese plum tree has brown spots or holes?
Brown spots or holes usually signal pests (like borers) or fungal issues. Act fast:
- Prune infected branches 6+ inches below damage.
- Clean tools with rubbing alcohol to prevent spread.
- Apply neem oil or copper fungicide if needed.
For borers, inject beneficial nematodes into holes.
Can I grow a Japanese plum tree in a container?
Yes, but choose a dwarf variety (like ‘Okame’) and a large pot (15+ gallons) with drainage. Prune roots every 2–3 years to prevent circling. Key tip: Move containers indoors or to a sheltered spot in winter if temps drop below 10°F.
How often should I prune a mature Japanese plum tree?
Mature trees need light pruning yearly (late winter) to remove deadwood and shape. Every 3–5 years, do a thorough structural prune to open the canopy for airflow (reduces disease). Never remove more than 25% of foliage in one season!
Does pruning affect fruit production?
Pruning improves fruit quality by boosting airflow and sunlight—but over-pruning can reduce yield. Focus on:
- Removing crossing or weak branches.
- Avoiding cuts near fruit clusters.
- Thinning dense areas to prevent disease.
Less is more!
Wrapping up and next steps
Caring for your Japanese plum tree is a rewarding journey that yields stunning blooms and delicious fruit—when you master the art of year-round trimming! 🌸 With the right tools, timing, and techniques, you’ll keep your tree healthy, productive, and full of life.
Start small, stay consistent, and don’t hesitate to consult local experts or gardening communities for tailored advice.
Now that you’re equipped with the knowledge, roll up your sleeves and give your tree the love it deserves! Whether you’re pruning for the first time or refining your skills, every cut brings you closer to a flourishing, bountiful harvest. Happy gardening! 🌿