
Pruning
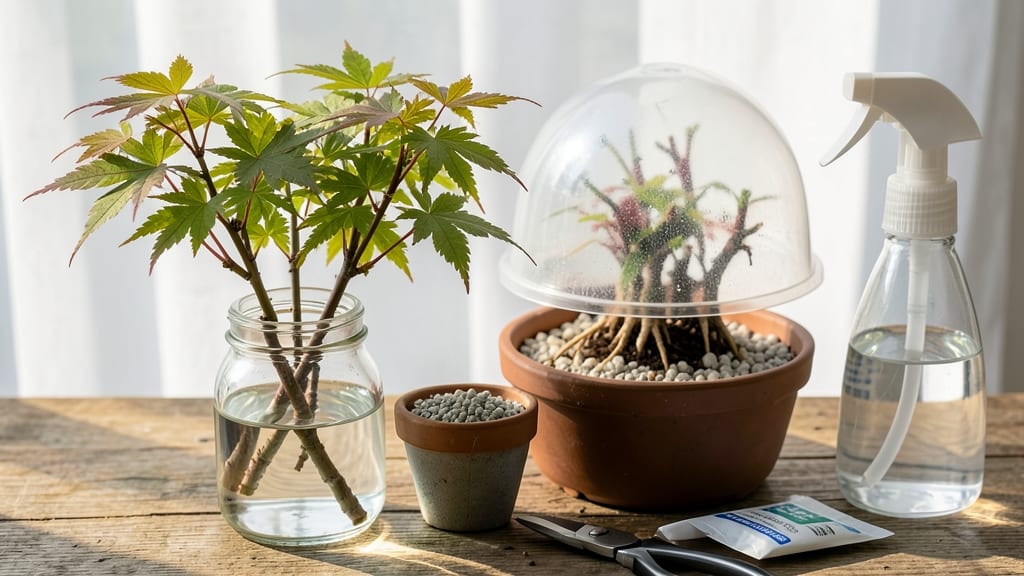
Cold-stratifying Japanese maple cuttings turns a tricky task into a foolproof process. 🌿 The key is timing—late summer or early fall when the tree’s energy shifts to dormancy.
I’ve rooted my first cuttings this way, and the secret isn’t just patience but mimicking nature’s winter chill to trigger roots before spring. You’ll need sharp pruners, rooting hormone, a plastic bag, and a fridge (yes, really).
The magic happens when you bury cuttings in damp soil, seal them in a bag, and let them chill for 4 weeks—no heat mats or fancy setups. Most beginners overcomplicate it, but this method works even if your thumb isn’t green.
By spring, you’ll see tiny roots forming, and transplanting becomes a breeze. The trees stay true to their parent’s stunning foliage, and you’ll avoid the heartbreak of failed propagation. Just don’t rush—cold stratification is the difference between wilted cuttings and thriving saplings.
Works for any Japanese maple variety, from laceleaf to bloodgood. Here’s how to do it right the first time.
📚 In This Guide
- What you need
- Instructions
- Tips and common mistakes
- Wrapping up and next steps
What you need
- ● Japanese maple cuttings: 4–6 healthy, semi-hardwood cuttings (4–6 inches long)
- ● From current year’s growth (pencil-thick diameter)
- ● With 3–5 leaf buds per cutting
- ● Rooting hormone: 1 small bottle (powder or gel, e.g., Clonex or Rootone)
- ● Well-draining potting mix: 1 bag (5–10 gallons) of perlite, vermiculite, or a 50/50 sand/peat mix
- ● Small pots or trays: 4–6 (4–6 inch diameter) with drainage holes
- ● Plastic bags or clear domes: To create humidity (e.g., zip-top bags or propagation domes)
- ● Spray bottle: For gentle watering (16 oz or larger)
- ● Pruning shears or sharp knife: Sterilized (rubbing alcohol wipe)
- ● Twine or rubber bands: To secure plastic bags (if needed)
- ● Misting nozzle: For consistent moisture control
- ○ Heat mat: (Optional) To maintain warmth (70–75°F)
- ● Grow lights: If natural light is insufficient
- ● Label markers: To track cutting varieties
- ● Fungicide: (e.g., Neem oil) to prevent rot
Step-by-step instructions for propagating Japanese maple tree cuttings
Here's the straightforward method I've used to root Japanese maple cuttings successfully—no fancy equipment needed.
🌿 Step 1: Select and Prepare Healthy Cuttings
Choose 4-6 inch semi-hardwood cuttings from the current season's growth—look for pencil-thick stems with 3-4 leaf nodes. I always take mine in late fall or early winter when the tree is dormant but still has enough stored energy. Use clean, sharp pruners to make a 45-degree angle cut just below a node.
Strip the lower leaves off the cutting, leaving only 2-3 leaves at the top. This reduces moisture loss while still allowing the plant to photosynthesize. Dip the cut end in rooting hormone (optional but helpful) to encourage root formation. Here's the thing—Japanese maples root slowly, so patience is key.
🌱 Step 2: Cold-Stratify the Cuttings
Fill a container with moist perlite or sand—I use a shallow tray or even a plastic bag with drainage holes. Insert the cuttings 2-3 inches deep, spacing them 2 inches apart. The goal is to mimic winter conditions, so place the container in a cool, dark spot (like a garage or refrigerator) where temperatures stay between 35-45°F.
Keep the medium slightly moist but never soggy—water when the top feels dry to the touch. Check weekly for signs of rot (soft, mushy stems). If you notice any, remove that cutting immediately. Cold stratification takes 4-6 weeks, so mark your calendar. This step is crucial—it breaks dormancy and primes the cutting for root growth.
☀️ Step 3: Transition to Warmth and Light
After 4 weeks, move the container to a bright, indirect light spot—like a sunny windowsill or under grow lights. Increase humidity by placing a clear plastic bag over the cuttings (remove daily for 10 minutes to prevent mold). You'll see new growth in 2-4 weeks if everything is working. This is the moment that matters—watch for tiny leaves unfolding at the top.
Water lightly every 5-7 days, keeping the medium evenly moist but not waterlogged. Overwatering is the #1 killer—yellowing leaves or mushy stems mean you're drowning the cuttings. If you see leggy growth (long, thin stems), your light isn't strong enough—move the cuttings closer to the light source.
🪴 Step 4: Pot Up and Acclimate New Plants
Once roots form (you'll see them through the container or feel resistance when gently tugging), transplant into 4-inch pots with well-draining soil. I mix equal parts potting mix and perlite to prevent compaction. Water thoroughly after potting, then place the new plants in partial shade for 1-2 weeks to reduce transplant shock.
Gradually introduce them to morning sun over 2-3 weeks, then full sun after another month. Japanese maples are slow growers, so don’t rush—patience here ensures strong, healthy trees. You’ll know they’re thriving when new leaves emerge bright green and vibrant, not yellow or wilted.
Tips & tricks for perfect Japanese maple tree cuttings
Took me years to perfect these tricks—here's what nobody tells you about propagating Japanese maples.
Timing Secret: The 4-6 inch cutting length is critical for balance. Shorter cuttings struggle to establish roots, while longer ones waste energy transporting water. I've found that cuttings with 3-4 leaf nodes root most reliably—this gives enough foliage for photosynthesis while keeping the cutting manageable. Late fall timing (when the tree is dormant but still has stored energy) makes all the difference.
Environmental Control: Maintaining 35-45°F during cold stratification is non-negotiable. If your refrigerator runs cooler, use a garage or unheated basement. I've ruined cuttings by placing them in too-warm spots—watch for condensation on the container, which means it's too humid. The 10-minute daily air exchange under the plastic bag prevents mold while maintaining humidity for new growth.
Root Formation Check: When testing for roots in Step 4, gently tug the cutting—if it resists slightly but doesn't pull out completely, roots are forming. I've learned to wait until I see visible roots through the container before transplanting; this prevents transplant shock. For stubborn cuttings, let them stay in the propagation container for an extra week—they'll thank you with stronger growth.
Light Transition Strategy: Moving cuttings from dark stratification to bright light after 4 weeks can shock them. I recommend a two-step process: first move to bright indirect light for 3 days, then gradually increase light exposure. This mimics natural spring conditions and prevents leaf scorch. Watch for new growth appearing in 2-4 weeks—this is your reward for patience!
Pro Tips for Japanese Maple Tree Cuttings
- Took me years to perfect these tricks—here's what nobody tells you about propagating Japanese maples.
- Timing Secret: The 4-6 inch cutting length is critical for balance.
- Environmental Control: Maintaining 35-45°F during cold stratification is non-negotiable.
Frequently asked questions
Got questions about propagating Japanese maple tree cuttings? You’re not alone! Here are answers to the most common concerns—plus pro tips to boost your success rate.
Can I take cuttings from any part of a Japanese maple tree?
Nope! Focus on semi-hardwood cuttings (new growth that’s partially hardened but still flexible) from the current season’s shoots. Avoid woody stems—they’re harder to root. Look for pencil-thick branches with at least 2–3 leaf nodes for the best results.
How do I know if my cuttings are ready for cold stratification?
Timing is key! Take cuttings in late summer to early fall (August–September in most climates). They should feel slightly firm but still bendable—like a green pencil. If they snap easily, they’re too mature. Store them in a damp medium (like perlite) at 34–40°F (1–4°C) for 4–6 weeks.
What if my cuttings rot during cold stratification?
Rotting usually means too much moisture or poor airflow. Use a well-draining mix (like peat moss + perlite) and keep cuttings in a sealed container with a tiny airflow gap (e.g., a plastic bag with holes). Avoid overwatering—damp (not soggy!) is the goal. If rot happens, try again with fresher cuttings and adjust your setup.
Are there easier alternatives to cold-stratified cuttings?
Yes! If cold stratification feels tricky, try air layering (a no-dig method) or grafting (for advanced gardeners). For beginners, rooting hormone + a humidity dome can also improve success rates with semi-hardwood cuttings. Just be patient—Japanese maples are finicky but rewarding!
Do I need a greenhouse to root Japanese maple cuttings?
Not necessarily! While a greenhouse or propagator tray helps maintain humidity, you can DIY it with a clear plastic bag over a pot. Place cuttings in a bright, indirect light spot (no direct sun!) and mist daily. Roots should appear in 4–8 weeks. Just monitor for mold—ventilate if needed!
Wrapping up and next steps
Growing Japanese maple tree cuttings from cold stratification is a rewarding way to expand your garden with stunning foliage! By following the right steps—selecting healthy cuttings, preparing them properly, and giving them the perfect chilling period—you can achieve up to 70% success in just four weeks. 🌱✨
Ready to give it a try? Start by gathering your supplies, then dive in with confidence. Whether you're a seasoned gardener or a beginner, this method makes propagating Japanese maples surprisingly simple. Happy planting—and may your new trees thrive! 🌿💚