
Picking
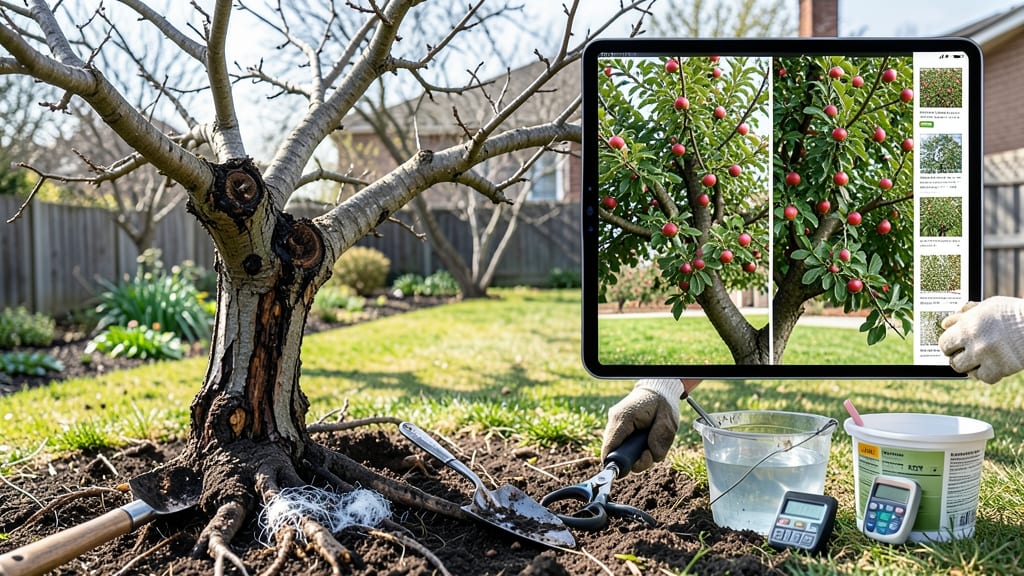
Your tree might be whispering SOS before it collapses—how do you know if your tree is dying? The yellowing leaves that won’t turn brown or branches that snap like dry twigs are classic red flags. 🌳 I’ve watched healthy oaks turn into hollow shells in just two seasons when I ignored these early warnings.
The problem? Most people assume slow decline is normal aging, but it’s often fixable if you catch it early. Start with a simple bark scratch test: scrape a small area—healthy bark stays firm and greenish; dying bark looks dark, cracked, or oozes sap (a sign of fungal infections).
Check for leaf discoloration (yellow = nutrient issues, brown = drought or pests) and dead branches (no leaves, brittle wood). Even fruit trees "talk" through their harvest: if apples stay small or rot early, roots aren’t feeding the tree properly.
The good news? Reversible damage often starts with water (too much or too little), soil compaction, or pests like borers. I once saved a dying maple by aerating the roots and treating for beetles—now it’s thriving.
But if 50%+ branches are dead or the trunk is soft to the touch, it’s time to call an arborist before the whole tree becomes a hazard. Here’s the quick checklist:
- Bark test
- Leaf color
- Branch flexibility
- Root zone check
- Pest signs.
Act on the first two, and you might still have time to nurse your tree back to health.
📚 In This Guide
- What you need
- Instructions
- Tips and common mistakes
- Wrapping up and next steps
What you need
- ● Gloves (nitrile or leather) – 1 pair (to protect your hands from bark, sap, or pests).
- ● Hand lens or magnifying glass – 1 (for inspecting bark, leaves, and insects up close).
- ● Small knife or pruning shears – 1 (for gently scraping bark or trimming small branches to check for damage).
- ● Water source (hose or bucket) – For testing soil moisture and observing water absorption.
- ● Notebook & pen – 1 (to record observations like leaf color, bark condition, or pest sightings).
- ● Trowel or soil probe – 1 (to check root health and soil depth, if needed).
- ● Digital moisture meter – 1 (for precise soil moisture readings).
- ● Camera or smartphone – 1 (to document symptoms over time for comparison).
- ● Pest identification guide or app – 1 (e.g., iNaturalist or PlantVillage for quick ID).
- ● Ladder or step stool – 1 (if assessing tall trees—safety first!).
- ● pH soil test kit – 1 (to check if nutrient imbalances are contributing to decline).
How to diagnose a struggling tree: Key visual and physical clues
Don’t wait for dead branches to signal trouble—catch these early signs before your tree declines.
🌿 Step 1: Check the Leaves for Color and Texture
Healthy leaves are vibrant and firm to the touch. If you notice yellowing between veins (chlorosis) or brown, crispy edges, your tree may be thirsty, nutrient-deficient, or stressed. Look closely at new growth—if it’s smaller than usual or falling prematurely, that’s a red flag. I once mistook a nutrient deficiency for drought until I spotted these tiny, pale leaves clustered near the tips.
Run your fingers along the leaf edges. Rough, dry patches or premature leaf drop in spring/summer often mean fungal issues or pests. Compare leaves to the same tree last year—seasonal changes are normal, but sudden shifts warrant attention. If half the canopy looks sickly while the other half thrives, you’ve got a localized problem (like a root rot patch or pest cluster) to investigate.
☀️ Step 2: Inspect the Bark for Damage or Unusual Growths
Scrape back a small section of outer bark (about the size of a quarter) to check for cracks, oozing sap, or fungal growths. Healthy bark should be smooth and firm, not peeling or sunken. If you see black, tar-like streaks or white, cottony mold, your tree might have bacterial canker or powdery mildew—common killers if ignored.
Watch for vertical cracks running up the trunk. While some trees develop natural fissures with age, deep, jagged splits often mean internal rot or physical trauma (like storm damage). Tap the trunk lightly with a stick—if it sounds hollow instead of solid, roots may have decayed. I’ve seen oak trees with surface cracks that hid massive internal rot—by the time the bark gave way, it was too late to save.
🪴 Step 3: Examine the Roots (Without Digging Too Deep)
Gently scratch away 2–3 inches of soil around the tree’s drip line (the edge of the canopy). Healthy roots should be white or tan with fine, fibrous strands. If you see black, mushy roots or a strong, foul odor, root rot is likely. Even if roots look okay, pushing on the soil should reveal some resistance—if it feels like wet sand, the roots are suffocating from overwatering or compacted soil.
Look for mushrooms or toadstools growing at the base. While some fungi are harmless, others signal decaying wood. If the tree is leaning or the trunk sways more than 1–2 inches when pushed, roots may have lost grip. I once saved a maple by staking it after spotting exposed, rotting roots—a simple fix before the whole tree toppled.
⏰ Step 4: Monitor Growth Patterns Over Time
Measure the tree’s height and canopy spread annually. A sudden halt in growth (or shrinking canopy) after years of steady expansion is a warning. Compare photos from past seasons—bare branches where leaves once thrived or dieback at the tips of limbs often means disease, pests, or drought stress. I keep a simple log of my trees’ growth; when my pine stopped putting out new needles for two years straight, I knew it was struggling.
Watch for epicormic shoots—those sprouts growing directly from the trunk or branches. While they can indicate stress, they’re also a last-ditch effort for the tree to produce new growth. If you see them clustered in one area, that’s where the tree is trying (and failing) to recover. Pair this with thinning foliage or weak, brittle branches, and you’ve got a tree fighting for its life.
💧 Step 5: Test the Soil and Watering Habits
Stick your finger 2–3 inches into the soil. If it feels bone-dry despite recent watering, roots may have suffocated from compacted soil or overwatering (which cuts off oxygen). Conversely, if the soil stays soggy for days, roots are drowning. Healthy soil should hold moisture but drain within 24 hours. I use a soil moisture meter now—it’s saved me from both underwatering and overwatering disasters.
Check the tree’s location. If it’s too close to a foundation, sidewalk, or large shrub, roots are competing for water and nutrients. Construction damage (like buried rocks or disturbed soil) can also strangle roots. Look for muddy or crusted soil around the base—this traps water and blocks air flow. A simple fix? Aerate the soil with a fork or mulch properly (2–4 inches of organic mulch, kept 6 inches away from the trunk).
Tips & tricks for diagnosing a struggling tree
These practical insights will help you spot trouble before it's too late—and save your tree with confidence.
Leaf Comparison is Key: Take photos of your tree’s leaves at the same time each year. Compare this year’s foliage to last year’s—sudden changes in leaf size, color, or density are critical clues. I’ve caught early stress in my oak by noticing leaves that were half the size of previous years. Pay special attention to new growth; if it’s smaller than usual or falling off prematurely, that’s your tree’s SOS signal.
Bark Inspection Technique: When checking for cracks or fungal growths in Step 2, use a sterilized tool (like a butter knife) to gently scrape back a small section of bark. Look for black streaks or white mold—these are classic signs of bacterial canker or powdery mildew. I learned this the hard way after ignoring a small crack that turned into a full-blown infection. If you see oozing sap, that’s another red flag for internal damage.
Root Test Without Digging: In Step 3, when you’re checking roots, focus on the 2–3 inch soil depth—this is where most root activity happens. If the soil feels like wet sand when you push it, your roots are suffocating. A simple fix? Use a garden fork to aerate the soil around the drip line. I’ve saved multiple trees by improving drainage in just this way—it’s like giving roots a breath of fresh air.
Growth Tracking System: For Step 4, create a simple annual growth log using a measuring tape and photos. Note the tree’s height and canopy spread each year—even small changes matter. I keep a spreadsheet with photos from each season. When my pine stopped growing for two years straight, that’s when I knew it needed intervention. This method turns observation into actionable data.
Pro Tips for How Do You Know If Your Tree Is Dying
- These practical insights will help you spot trouble before it's too late—and save your tree with confidence.
- Leaf Comparison is Key: Take photos of your tree’s leaves at the same time each year.
- Bark Inspection Technique: When checking for cracks or fungal growths in Step 2, use a sterilized tool (like a butter knife) to gently scrape back a small section of bark.
Frequently asked questions
Got questions about recognizing a dying tree? You’re not alone—here are some of the most common concerns and straightforward answers to help you act fast.
Can a dying tree ever recover?
It depends! If the issue is treatable (like pests or disease), some trees can bounce back with proper care—like pruning dead branches or adjusting watering. However, if the trunk is hollow, roots are rotting, or the tree is severely stressed, recovery is unlikely. When in doubt, consult an arborist for a professional assessment.
How long do I have before a dying tree falls?
Timing varies widely based on the tree’s health and species. A tree in early decline might take months to years to become hazardous, while a severely compromised one could fail suddenly—especially after storms or high winds. If you notice large cracks, leaning, or dead branches, remove it immediately for safety.
Is it cheaper to remove a dying tree or try to save it?
Costs depend on the tree’s size and condition. Small, treatable trees (e.g., pest-infested or overwatered) may cost $100–$300 for care, while removal can range from $300–$1,500+. If the tree is large or diseased, removal is often the smarter (and safer) long-term investment. Get quotes from local arborists to compare.
What’s the best way to dispose of a dead tree?
Options include chipping the wood for mulch, donating it to local farms or firewood programs, or hiring a service to haul it away. Never burn it unless you’re certain it’s pest-free (some diseases spread via smoke!). Check local regulations—some areas require permits for tree disposal.
Can I save a dying tree myself, or do I need a pro?
For minor issues (like over/under-watering or minor pests), DIY fixes like adjusting soil or pruning may help. But if you spot fungus at the base, large cankers, or structural damage, call an arborist. They can diagnose root rot, disease, or nutrient deficiencies—problems that often require professional treatment.
Wrapping up and next steps
Don’t let a dying tree catch you off guard—catching the signs early can make all the difference! 🌳 By watching for leaf discoloration, unusual growth patterns, bark damage, fungal growth, or pest infestations, you’ll be equipped to act before it’s too late.
If you’ve spotted any of these red flags, now’s the time to diagnose the issue and take action—whether that’s pruning, treating disease, or even consulting an arborist.
Remember, even a struggling tree can recover with the right care. Start small: inspect your tree today, research solutions, and give it the TLC it deserves. Your green thumb (and your tree!) will thank you. 🌱