
Pruning
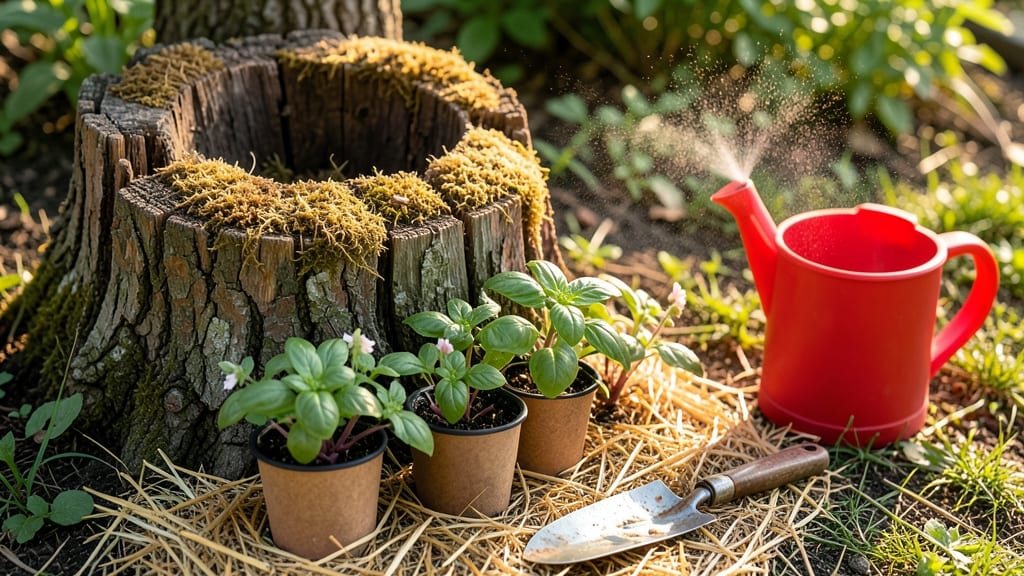
Transforming a hollowed-out tree stump into a planter turns dead wood into a living garden statement that no one will ignore. ✨ I've turned three stumps into thriving mini-gardens—each one a conversation starter in my backyard, and the process takes less than an hour once you know the tricks.
The secret lies in prep: clean out debris, drill drainage holes, and seal the edges to keep moisture in. Skip this step, and your plants will drown in soggy wood.
For drainage, I use 1/4-inch holes spaced every 4 inches around the base—just enough to let water escape without washing out soil. Fill with lightweight potting mix and choose plants that love humidity, like ferns, moss, or small shrubs.
A coat of outdoor paint or natural wood stain can elevate the rustic charm, or leave it raw for a wild, organic look. My favorite combo? A painted stump with trailing ivy and tiny white lights for evening ambiance.
Perfect for small spaces, eco-friendly gardens, or as a centerpiece for patios. The best part? It’s a project that grows more beautiful every season—just like the plants inside.
📚 In This Guide
- What you need
- Instructions
- Tips and common mistakes
- Wrapping up and next steps
What you need
- ● 1 tree stump: Hollowed out naturally (or with a drill/chain saw) to at least 6–8 inches deep and 8–12 inches wide (adjust for plant size).
- ● Drill or chain saw: For carving out the center (if not already hollow). A 1-inch wood bit or chain saw with a fine-tooth blade works best.
- ● Safety gear: Work gloves
- ● Safety goggles
- ● Ear protection (if using power tools)
- ● Drainage layer: Small river rocks or gravel (2–3 inches deep)
- ○ Optional: Perforated landscape fabric to prevent soil clogging
- ● Potting soil: Well-draining mix (e.g., 60% topsoil + 40% perlite/sand). 1–2 bags (5–10 cubic feet) depending on stump size.
- ● Plants: Choose drought-tolerant, shallow-rooted varieties like: Succulents (e.g., Sedum, Echeveria)
- ● Ornamental grasses (e.g., Miscanthus)
- ● Small shrubs (e.g., Dwarf Boxwood)
- ● Stump sealant: Non-toxic wood preservative to prevent rot (apply before planting).
- ● Mulch: Shredded bark or pine straw to retain moisture.
- ● Decorative touches: Paint or stain (weather-resistant)
- ● Moss or lichen for a whimsical look
- ● Solar-powered stake lights for ambiance
Step-by-Step instructions for creating a hollowed-out tree stump planter
Transform a leftover stump into a charming planter that adds rustic charm to your garden in just a few steps.
🪴 Step 1: Clean and Prepare the Stump
Start by removing any loose bark, debris, or moss from the inside of the stump using a wire brush or putty knife. I like to work in sections, scraping away the soft inner wood until the cavity is clean and dry. This prevents rot and gives your plants a healthy foundation.
If the stump has lingering moisture or sap, let it sit in the sun for a day or two to dry completely. You’ll know it’s ready when the interior feels dry to the touch and smells fresh. Avoid using stumps with deep cracks or large holes—they can’t hold soil well and may leak.
✂️ Step 2: Line the Stump for Drainage and Protection
Cut a piece of landscape fabric or burlap to fit snugly inside the stump, leaving extra to fold over the edges. This keeps soil from washing out while allowing water to drain. I tuck the fabric into the corners and secure it with small nails or staples—just enough to hold it in place without puncturing the fabric.
Next, add a layer of small rocks or gravel on top of the fabric. This creates a drainage layer that prevents root rot. Aim for about 2-3 inches of rocks, filling the bottom third of the stump. Press them down gently to create a stable base before adding soil.
🌱 Step 3: Fill With Soil and Plant Your Choices
Choose a well-draining potting mix designed for containers or a blend of garden soil and compost. Fill the stump about ¾ full, leaving room for your plants to grow. I like to press the soil down lightly with my hands to eliminate air pockets, ensuring roots will have good contact with the soil.
Select plants that thrive in containers and match the stump’s size. Succulents, ferns, or small shrubs work beautifully. Dig a hole slightly larger than the root ball, place the plant inside, and backfill with soil. Water gently but thoroughly to settle everything in place.
💧 Step 4: Water and Maintain for Long-Term Success
Water the stump planter deeply right after planting to help the soil settle and roots establish. Over the next few days, check the soil daily—it should stay moist but not soggy. I water mine every 2-3 days in warm weather, adjusting for rain. A drip irrigation system or self-watering planter tray can help maintain consistent moisture.
Add a layer of mulch on top of the soil to retain moisture and suppress weeds. Use 1-2 inches of shredded bark or pine needles, keeping it away from the base of the plants. This also gives your stump planter a polished, finished look that blends seamlessly with your garden’s rustic aesthetic.
Tips & tricks for perfect hollowed-out tree stump planters
Here's what nobody tells you—these little details make all the difference between a planter that lasts and one that falls apart.
Stump Selection Wisdom: Look for stumps with thick, solid walls—at least 4-6 inches thick—to hold soil and plants properly. Thin walls can't support the weight of soil and may crack under pressure. I test by tapping the sides with a hammer; if it sounds hollow, skip it. Also, avoid stumps with deep cracks or holes that won't hold soil or allow proper drainage.
The Drainage Layer Game-Changer: Don't skimp on the 2-3 inches of rocks in Step 2—this is what prevents root rot and keeps your plants healthy. I like using pea gravel because it's lightweight and drains exceptionally well. For extra insurance, add a few small holes in the bottom of the stump if it's sitting on a hard surface, using a drill bit slightly larger than a pencil.
Soil Prep Tip: Before pressing down that ¾ full soil mixture in Step 3, mix in a handful of perlite or vermiculite (about 10% of your soil volume) to improve drainage and aeration. This is especially important if you're using garden soil, which can compact and suffocate roots. The extra air pockets help roots establish faster and prevent waterlogging.
Plant Pairing Strategy: For best results, choose plants with similar water needs. Pair moisture-loving ferns with other shade-tolerant plants, or group drought-resistant succulents together. I like to plant taller plants in the center and shorter ones around the edges to create visual interest. This arrangement also makes watering easier—you can target the center plants first.
Pro Tips for Hollowed Out Tree Stump Planter
- Here's what nobody tells you—these little details make all the difference between a planter that lasts and one that falls apart.
- Stump Selection Wisdom: Look for stumps with thick, solid walls—at least 4-6 inches thick—to hold soil and plants properly.
- The Drainage Layer Game-Changer: Don't skimp on the 2-3 inches of rocks in Step 2—this is what prevents root rot and keeps your plants healthy.
Frequently asked questions
How do I know if a tree stump is safe to hollow out?
A stump is safe if it’s completely dry and decay-free—tap it with a hammer or screwdriver. If it sounds hollow or crumbles easily, it’s ready. Avoid stumps with mold, insects, or a foul smell. Pro tip: Let fresh stumps sit for 6–12 months to ensure full decomposition before repurposing.
Can I use a hollowed-out stump planter right away, or do I need to wait?
You can plant immediately, but prep is key! Line the stump with landscape fabric to block soil loss, then fill with potting mix. For moisture retention, add a 1-inch layer of gravel at the bottom. Wait 1–2 weeks after planting to water deeply, letting roots establish before regular care.
What are the best plants for a hollowed-out tree stump planter?
Opt for drought-tolerant, shallow-rooted plants like:
- Succulents (e.g., sedum, echeveria)
- Herbs (e.g., rosemary, thyme)
- Ferns or mosses (for a lush, green look)
- Small shrubs (e.g., dwarf boxwood)
What if my stump planter starts rotting or leaking soil?
Leaks? Reinforce the base with a plastic nursery pot (cut to fit) or seal gaps with hydraulic cement. Rotting? The stump may be too wet—drill drainage holes in the sides and add a gravel layer at the bottom. For extra durability, paint the interior with a non-toxic sealant before planting.
Is a DIY stump planter cheaper than buying one?
Absolutely!
A hollowed-out stump costs nothing (if you have the stump), while store-bought versions range from $30–$100+. Factor in $10–$20 for tools/materials (saw, drill, soil), but you’ll save big on labor. Bonus: It’s a unique, eco-friendly centerpiece!
Wrapping up and next steps
Transforming a hollowed-out tree stump into a stunning planter is easier—and more rewarding—than you think! With just a few tools and a little creativity, you’ve got a rustic, eco-friendly garden centerpiece that adds charm and character to any outdoor space.
Whether you’re a seasoned gardener or a DIY beginner, this project is your chance to repurpose, refresh, and elevate your garden with minimal effort.
Ready to take the next step? Grab that stump, follow your green thumb’s guidance, and watch your garden bloom with newfound personality! 🌿✨ Start your project today—your future plants (and neighbors) will thank you!