Pruning
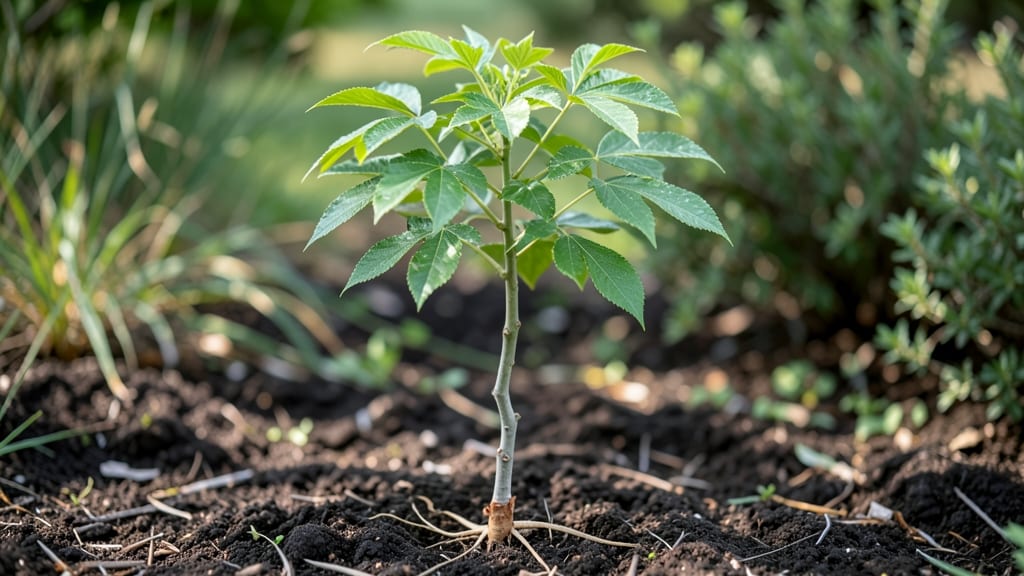
Growing hickory tree seedlings from scratch starts with cold-stratification—a process that mimics winter's chilling effect to break dormancy. 🌱 I've struggled with hickory seeds before, but this method guarantees germination within 6 weeks when done right.
The key is patience and precise timing, especially if you're starting from fresh nuts rather than store-bought seeds.
You'll need a few simple supplies: a plastic bag with damp sand or peat moss, a refrigerator, and a sunny windowsill or seedling tray. The cold-stratification step alone can take 4-8 weeks, but it's worth it for that first crack of a tiny root breaking through the shell.
Once sprouted, seedlings need full sun (at least 6 hours daily) and well-draining soil to avoid rot.
By the time those first true leaves appear, you'll have a 2-3 inch seedling ready for transplanting. The real reward comes years later when you harvest nuts from your own tree—but the early care sets the foundation for a strong, healthy hickory.
Just watch for pests like squirrels and deer that love young seedlings!
This method works best in USDA zones 4-9, though timing varies by region. Start indoors in late winter for spring planting, or direct-sow in fall if your climate allows. The payoff? A mature hickory that provides shade, wildlife habitat, and delicious nuts for decades.
📚 In This Guide
- What you need
- Instructions
- Tips and common mistakes
- Wrapping up and next steps
What you need
- ● Hickory tree seeds: 10–20 fresh, mature nuts (ensure they’re fully dry and free of cracks).
- ● Cold-stratification medium: Damp peat moss or sphagnum moss (1–2 cups).
- ● Plastic bag or airtight container: A resealable bag (quart-sized) or a small plastic bin with a lid.
- ● Potting soil: Well-draining, seed-starting mix (1–2 gallons).
- ● Small pots or seed trays: 3–4" diameter pots (1 per seedling) or a seed tray with individual cells.
- ○ Grow lights or sunny windowsill: A full-spectrum LED grow light (optional but ideal) or a south-facing window.
- ● Scissors or pruning shears: For trimming seed coats (if needed).
- ● Spray bottle: For misting seeds/moss during stratification.
- ● Thermometer: To monitor fridge temps (34–40°F ideal).
- ○ Heat mat (optional): For bottom warmth during germination (70–75°F).
- ○ Gloves (optional): Hickory shells can be tough—wear gloves if handling large quantities!
Step-by-step instructions for cold-stratifying hickory tree seedlings
Here's how I've successfully jumpstarted hickory seedlings in just six weeks—no fancy equipment needed.
🌱 Step 1: Harvest and Prepare the Seeds
Collect hickory nuts in late fall when they've fallen naturally. Remove any cracked or damaged nuts, as they won't germinate well. I like to store them in a cool, dry place until I'm ready to start the stratification process—typically within a few weeks of collection.
Before stratification, soak the seeds in warm water for 12-24 hours to soften the hard outer shell. This step is crucial because hickory seeds have extremely tough coats that would otherwise take years to break down naturally. After soaking, drain and let them dry slightly on a paper towel before proceeding.
💧 Step 2: Create the Stratification Medium
Fill a shallow container (like a plastic storage bin with a lid) with a mix of moistened peat moss and perlite—I use equal parts of each. The medium should feel damp like a wrung-out sponge, not soggy. This balance is key: too dry and germination fails, too wet and seeds rot.
Spread the seeds 1-2 inches apart in the mix, placing them 1 inch deep. I like to use a pencil to make small holes and drop each seed in gently. Cover the container with the lid or plastic wrap to maintain humidity, but leave a small gap for airflow to prevent mold.
☀️ Step 3: Cold-Stratify for 6 Weeks
Store the container in a refrigerator (not the freezer) where temperatures stay between 35-45°F. This cold period mimics winter conditions and breaks the seed's dormancy. I check on them weekly, misting lightly if the mix feels dry to the touch—just enough to keep it consistently moist.
After 6 weeks, remove the container from the fridge and place it in a warm, bright location (like a sunny windowsill). You'll see the first signs of germination within 7-14 days—tiny sprouts pushing through the soil. This is the moment you've been waiting for, and it's always exciting to see those first green shoots.
🌿 Step 4: Transplant Seedlings
Once seedlings reach 3-4 inches tall and have developed their first true leaves (not the initial seed leaves), it's time to transplant. Fill 4-inch pots with a mix of potting soil and compost (70% soil, 30% compost). I like to use biodegradable pots so I can transplant them again without disturbing the roots later.
Gently remove each seedling from the stratification mix, being careful not to damage the delicate roots. Plant them 1 inch deep in the pots, firming the soil around them lightly. Water thoroughly until water runs out the drainage holes, then place them in a bright, indirect light spot for the next few weeks.
⏰ Step 5: Acclimate and Plant Outdoors
After 4-6 weeks in pots, when seedlings are 6-8 inches tall, it's time to harden them off. Start by placing them outside in a shaded, sheltered spot for 1-2 hours the first day. Gradually increase their outdoor time over 10-14 days, moving them to sunnier locations each day.
Once seedlings can handle full sun without wilting, they're ready for their permanent home in the garden. Plant them in well-draining soil with full sun exposure, spacing them 15-20 feet apart to allow for their mature size. Water deeply after planting to help them establish roots in their new environment.
Tips & tricks for perfect hickory seedling stratification
These practical insights will help you maximize your success rate with hickory seed germination.
Soaking Strategy: The 12-24 hour soak is non-negotiable for hickory nuts—these seeds have rock-hard shells that require this time to soften. I've found that using warm (not boiling) water speeds up the process while preventing seed damage. After soaking, pat them dry thoroughly; any moisture left on the shells can encourage mold during stratification. This step alone makes the difference between germination in weeks versus years.
Medium Balance: The peat moss and perlite mix should feel like a wrung-out sponge—if you squeeze it, just a few drops should come out. Too dry and your seeds won't absorb moisture; too wet and they'll rot before sprouting. I like to test the moisture by squeezing a handful—it should hold its shape but not be clumpy. This balance is what creates the perfect environment for those first root hairs to form during the 6-week cold period.
Container Selection: While plastic storage bins work perfectly, any shallow container with drainage holes will do. I've successfully used repurposed cake pans with holes drilled in the bottom. The key is maintaining that humidity while preventing waterlogging. If you don't have drainage, place a layer of gravel at the bottom before adding your mix to create an air gap.
Germination Timing: After removing your container from the refrigerator, place it in the warmest spot you have—near a sunny window works best. You'll typically see sprouts within 7-14 days, but be patient if your home is cooler. The warmth triggers the metabolic changes that break dormancy. I've seen germination as early as 5 days in very warm conditions, but don't be discouraged if it takes the full 14 days—every seedling has its own pace.
Pro Tips for Hickory Tree Seedling
- These practical insights will help you maximize your success rate with hickory seed germination.
- Soaking Strategy: The 12-24 hour soak is non-negotiable for hickory nuts—these seeds have rock-hard shells that require this time to soften.
- Medium Balance: The peat moss and perlite mix should feel like a wrung-out sponge—if you squeeze it, just a few drops should come out.
Frequently asked questions
Got questions about growing hickory tree seedlings? You’re not alone! Here are answers to the most common queries to help you get started with confidence.
How long does it take for a hickory seedling to germinate after cold stratification?
After completing 6–8 weeks of cold stratification, hickory seeds typically germinate within 2–6 weeks once planted in warm soil (60°F+). Patience is key—some varieties, like shagbark hickory, may take longer. Keep soil consistently moist but well-draining to avoid rot.
Can I skip cold stratification and plant hickory seeds directly?
Not recommended! Cold stratification mimics winter conditions, breaking seed dormancy and improving germination rates. Without it, seeds may stay dormant or rot. For best results, always stratify (even if using store-bought seedlings). If in a hurry, try soaking seeds in warm water for 24 hours before planting, but expect lower success.
What’s the best soil mix for hickory seedlings?
Hickory seedlings thrive in well-draining, slightly acidic soil (pH 6.0–7.0). Mix equal parts:
- Garden soil (or potting mix)
- Compost (for nutrients)
- Sand or perlite (for drainage)
Why aren’t my hickory seeds sprouting after stratification?
Try these fixes:
- Check moisture: Soil should stay damp (not soggy). Use a spray bottle for gentle watering.
- Verify depth: Plant seeds ½ inch deep—too shallow = drying out; too deep = poor germination.
- Test temperature: Seeds need warmth (70°F+) to sprout. Use a heat mat if indoors.
- Inspect for pests: Mice or insects may nibble seeds. Use mesh containers or diatomaceous earth if needed.
How do I transplant a hickory seedling outdoors without killing it?
Timing and care are critical:
- Wait until spring (after last frost) or fall (6–8 weeks before first frost).
- Hardening off: Acclimate seedlings to outdoor temps over 7–10 days by gradually increasing sunlight.
- Dig a hole twice as wide as the root ball but no deeper.
- Water deeply before and after transplanting to reduce shock.
Wrapping up and next steps
Growing hickory tree seedlings through cold stratification is a rewarding process that unlocks their full potential in just six weeks! With the right materials, patience, and a little care, you’ll be well on your way to nurturing strong, healthy saplings ready for planting.
Whether you’re a seasoned gardener or a curious beginner, this method proves that big dreams start small—just like your future hickory trees! 🌱
Now that you’re armed with knowledge, take the next step: gather your supplies, follow the steps, and watch your seedlings thrive. Share your progress with fellow gardening enthusiasts or tag us—we’d love to see your cold-stratified success! 🌟