Propagation
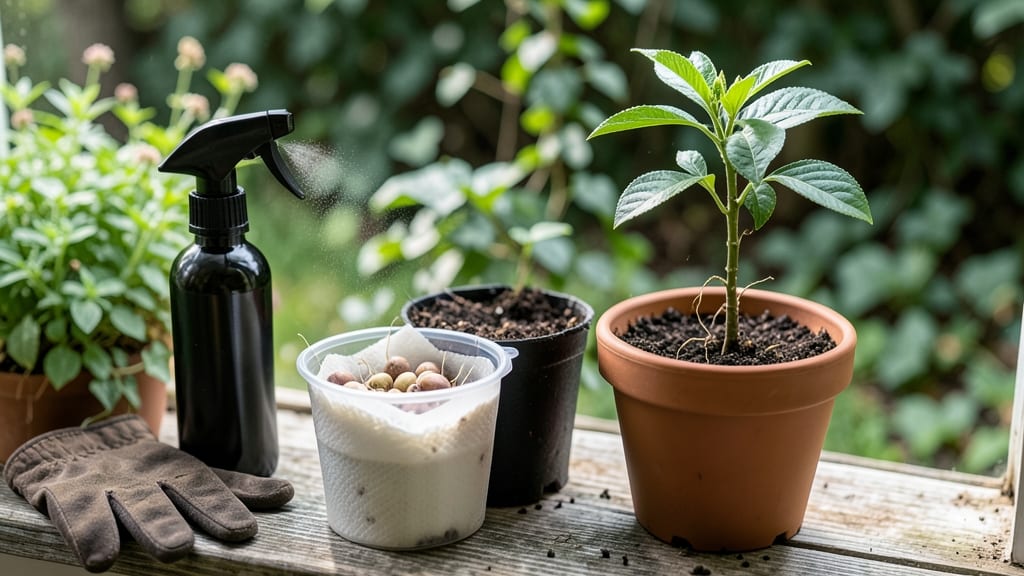
Growing a guava tree from seed means sweet, tropical fruit in just six months—if you know the right tricks. 🌱 The key starts with picking the perfect seed from a ripe guava, because not all seeds will sprout reliably.
I’ve learned that patience and the right conditions turn those tiny seeds into sturdy saplings ready for transplanting by summer. You’ll need a warm spot (think 70-80°F), moist paper towels for germination, and a well-draining potting mix.
Most seeds sprout within 2-4 weeks if kept consistently damp, though some stubborn ones take longer. The first leaves are delicate, so avoid overwatering—root rot is the biggest early killer. By month 3, you’ll see real growth: thicker stems and broader leaves.
That’s when you’ll know you’re on track for fruit in 2-3 years, though some varieties surprise you with early blooms. The smell of fresh guava blossoms in spring is worth every step. This method works for both indoor starters and outdoor plantings, though tropical climates give the best results.
Let’s get those seeds growing!
📚 In This Guide
- What you need
- Instructions
- Tips and common mistakes
- Wrapping up and next steps
What you need
- ● Guava seeds: 3–5 fresh, plump seeds (harvested from ripe guava fruit). Pro tip: 💡 Store seeds in a paper towel in the fridge for 1–2 weeks to break dormancy if they don’t sprout quickly.
- ○ Seed-starting trays or small pots: 4–6 (3–4 inches deep) with drainage holes. Optional: Biodegradable peat pots for easy transplanting.
- ● Well-draining potting mix: 2–3 bags of a cactus/succulent blend (or mix equal parts perlite, coconut coir, and compost). Avoid heavy garden soil!
- ● Spray bottle: For gentle watering (guava seeds hate soggy soil!).
- ● Plastic wrap or humidity dome: To create a mini greenhouse effect.
- ● Grow lights or sunny windowsill: A south-facing window or LED grow lights (12–14 hours/day) for seedlings.
- ● Small hand trowel: For transplanting seedlings.
- ○ Fertilizer (optional): Balanced liquid fertilizer (5-5-5 or 10-10-10) diluted to half-strength. Wait until seedlings have 2–3 true leaves!
- ● Pruning shears: For future shaping (once your tree is established).
- ● Mulch (later stage): Wood chips or straw to retain moisture around mature plants.
Step-by-step instructions for growing a guava tree from seed
Here's how to turn a single seed into a thriving tropical fruit tree in just six months.
🌱 Step 1: Extract and Prepare the Seed
Start by selecting a fresh guava fruit—ripe but not overripe. Cut it open and remove the large, flat seeds. Rinse them gently under running water to remove any fruit pulp clinging to the surface. Let them air-dry completely for 24 hours on a paper towel; this prevents mold from forming during germination.
Guava seeds have a hard outer shell that slows water absorption. To speed up germination, place the dried seeds between two damp paper towels, fold them, and seal in a plastic bag. Store in a warm spot (75-85°F) for 3-5 days. Check daily—they're ready when the outer shell softens enough to pierce with your fingernail.
💧 Step 2: Plant the Germinated Seed
Fill a small 4-inch pot with well-draining potting mix (avoid garden soil—it compacts too easily). Make a ½-inch deep hole in the center and place one seed inside, pressing lightly so it stays in place. Cover with an extra ¼ inch of soil to protect the tender sprout.
Water gently until moisture reaches the bottom of the pot, then place the pot in a bright, indirect light spot. Keep the soil consistently moist but never soggy—guava seedlings hate waterlogged roots. You'll see the first true leaves (not the initial seed leaves) in 3-4 weeks.
☀️ Step 3: Transplant and Provide Sunlight
Once the seedling reaches 6 inches tall and has 4-5 true leaves, it's time to transplant. Choose a 6-inch pot with drainage holes and fill it with a mix of potting soil and perlite (half and half). Gently remove the seedling, keeping the root ball intact, and replant at the same depth.
Move the pot to a location with full sun (6+ hours daily). Guava trees love warmth—if your climate dips below 50°F, keep the plant indoors near a sunny window. Watch for new growth; within 2 months, you'll see faster leaf production and the first signs of woody stem development.
🪴 Step 4: Fertilize and Encourage Growth
After 8 weeks, switch to a balanced liquid fertilizer (10-10-10) diluted to half strength. Apply every 4 weeks during the growing season (spring and summer). Guava seedlings need nutrients to support their rapid growth—you'll notice thicker stems and darker green leaves within 2 weeks of fertilizing.
Rotate the pot a quarter turn weekly so the tree grows straight instead of leaning toward the light. If you notice yellowing leaves, reduce watering slightly—guava trees prefer slightly dry soil over soggy conditions. By month 4, your seedling should be 1-2 feet tall with a sturdy trunk.
⏰ Step 5: Prepare for Outdoor Planting
When nighttime temperatures stay above 60°F and there's no risk of frost, it's time to move outdoors. Choose a sunny, sheltered spot with well-draining soil. Dig a hole twice as wide as the pot but the same depth. Gently remove the seedling, loosen the roots, and place it in the hole, covering with soil.
Water deeply after planting and mulch around the base with 2 inches of organic mulch to retain moisture. Guava trees thrive in USDA zones 9-11, but with proper care, you can grow them in containers in cooler climates. By month 6, your young tree will be ready to produce flowers—and eventually, fruit—if given patience and the right conditions.
Tips & tricks for growing a guava tree from seed
Real talk: Growing a guava tree from seed isn't complicated, but these small details make all the difference between a thriving plant and a sad, stunted one.
Seed Preparation Matters: That 24-hour drying period isn't just about preventing mold—it's about breaking down the seed's natural dormancy. I learned this the hard way after watching seeds rot in damp conditions. After drying, test the seed's readiness by gently pressing it with your fingernail. If it gives slightly, it's ready for germination. The warm 75-85°F range is crucial too—this mimics tropical conditions and speeds up the process.
Lighting Secrets: The instructions mention bright, indirect light, but here's what nobody tells you—guava seedlings need more light than most houseplants. If your leaves look pale or leggy after 3-4 weeks, supplement with a grow light for 12-14 hours daily. I use a simple LED bulb on my kitchen counter, and it makes all the difference in preventing weak stems.
Transplanting Timing: Waiting until your seedling reaches 6 inches with 4-5 true leaves gives it enough strength for the transplant shock. Here's my pro move: I water the seedling thoroughly the day before transplanting. This keeps the root ball moist and makes the transition easier. Also, use the same depth in your new pot—burying too deep can cause rot.
Fertilizer Strategy: That 10-10-10 fertilizer at half strength is perfect, but timing matters. I start fertilizing at 8 weeks and apply it every 4 weeks during growing season, but here's the kicker: I always water the plant first, then fertilize. This prevents root burn and gives your guava tree a chance to absorb nutrients properly. Yellowing leaves? You're probably overwatering—let the top inch of soil dry out between waterings.
Pro Tips for Guava Tree From Seed
- Real talk: Growing a guava tree from seed isn't complicated, but these small details make all the difference between a thriving plant and a sad, stunted one.
- Seed Preparation Matters: That 24-hour drying period isn't just about preventing mold—it's about breaking down the seed's natural dormancy.
- Lighting Secrets: The instructions mention bright, indirect light, but here's what nobody tells you—guava seedlings need more light than most houseplants.
Frequently asked questions
Growing a guava tree from seed is exciting but comes with questions! Here are answers to the most common ones to help you succeed:
How long does it take for a guava seed to sprout?
A guava seed typically sprouts within 14 to 30 days, depending on temperature and moisture. Keep the soil warm (around 70–80°F) and consistently damp (not soggy) to speed up germination. Patience is key—some seeds may take up to 60 days!
Can I grow a guava tree indoors from seed?
Yes, but it’s tricky! Guava trees thrive in warm, sunny climates and need 6+ hours of direct light daily. If indoors, place near a south-facing window or use a grow light. Expect slower growth and smaller fruit compared to outdoor trees.
How fast will my guava tree grow from seed?
Seedlings grow slowly at first—about 6–12 inches per year in ideal conditions. With proper care (sun, water, fertilizer), a guava tree can reach 5–10 feet tall in 3–5 years. Fruit production may take 3–5 years after planting!
Will my homegrown guava tree produce fruit like store-bought ones?
Not always! Seed-grown guava trees may produce smaller, less uniform fruit than grafted varieties. For consistent quality, consider grafting a known variety onto your seedling later. Alternatively, save seeds from ripe, healthy store-bought guavas for better odds.
What should I do if my guava seedling has yellow leaves?
Yellow leaves often signal overwatering, underwatering, or nutrient deficiency. Check soil moisture—it should be damp but not waterlogged. If leaves are pale, fertilize with a balanced citrus/guava fertilizer. Pests (like aphids) can also cause issues; treat with neem oil if needed.
Can I grow a guava tree in a cold climate?
Guava trees are tropical/subtropical and struggle in frost (below 32°F). If you live in a cold zone, grow the tree in a large pot and bring it indoors during winter. Alternatively, plant in a microclimate (e.g., near a sunny wall) for extra warmth.
Wrapping up and next steps
Growing a guava tree from seed is a rewarding journey that blends patience with tropical fruit dreams! 🌱 With the right care—sunlight, well-draining soil, and occasional love—your seedling could blossom into a fruitful tree in just 6 months.
Remember, consistency is key, and every tiny leaf is a step closer to juicy, fragrant guavas.
Ready to take the next step? Start with one seed today—your future harvest awaits! 🌿 Whether you’re a beginner or a green thumb, this project is a fun, hands-on way to connect with nature. Happy growing!