
Lawn
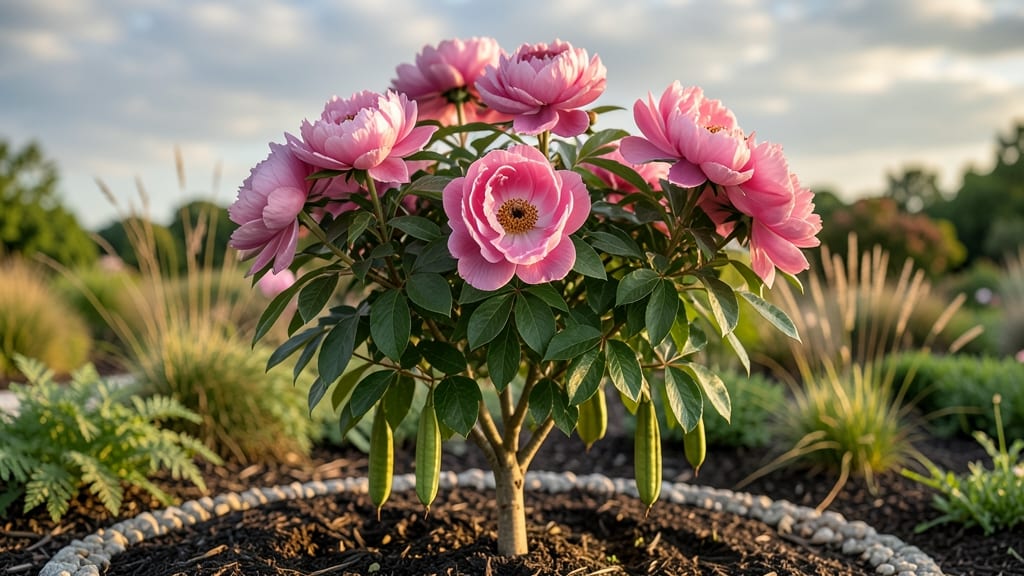
Tree peony seed pods hold the promise of future blooms, but cracking their germination code takes patience and precision. 🌱 I’ve struggled with low germination rates for years—until I discovered the exact timing and conditions that finally worked for me.
The secret isn’t just in collecting the pods; it’s in knowing when they’re ripe and how to break their dormancy.
First, you’ll need a pair of sharp pruners and a container for stratification. Harvest the pods when they turn brown and papery in late fall, then extract the seeds before they dry out completely.
The real magic happens when you mimic winter’s cold spell—stratifying the seeds for 6-8 weeks in moist sand or a damp paper towel in the fridge. This tricks the seeds into thinking they’ve survived winter, priming them to sprout.
By spring, you’ll see tiny shoots pushing through the soil, but don’t rush them. Seedlings need gentle care—partial shade and consistent moisture—to avoid stress. The first blooms might take 3-5 years, but the wait is worth it for those lush, fragrant flowers.
I’ve watched my own seedlings grow into thriving plants, and the process gets easier with each batch.
Common mistakes? Overwatering or skipping stratification. The pods are finicky, but once you nail the timing, you’ll have a steady supply of new peonies. Start small—just 5-10 pods—and let the results guide you. Every gardener’s journey with tree peonies begins with a single pod.
📚 In This Guide
- What you need
- Instructions
- Tips and common mistakes
- Wrapping up and next steps
What you need
- ● Mature tree peony seed pods: 3–5 fully ripe, brown pods (harvested in late fall or early winter). Pro tip: 💡 Choose pods that are slightly soft to the touch but not mushy!
- ○ Sterilized potting mix: 2–3 gallons of well-draining, seed-starting mix (e.g., 50% perlite + 50% peat moss or coconut coir). Optional: Add a handful of sand for extra aeration.
- ● Containers: Small pots (3–4 inches deep) for individual seeds, or
- ● A shallow tray (10x20 inches) for sowing multiple seeds at once.
- ● Plant labels & marker: To track seed varieties (e.g., ‘Max Paeony,’ ‘Shishi Gashira’).
- ● Spray bottle: For gentle watering (avoid oversaturating seeds!).
- ● Plastic wrap or humidity dome: To create a mini greenhouse effect.
- ● Grow lights or sunny windowsill: A south-facing window or LED grow lights (12–14 hours/day) for seedlings.
- ● Seed stratification setup: A refrigerator (for cold treatment) or a seed stratification mat (if pre-chilling isn’t an option).
- ● Fungicide: A light dose of mycorrhizal inoculant or cinnamon powder to prevent damping-off disease.
- ● Heat mat: For faster germination (set to 65–75°F).
- ● Transplanting tools: Small trowel, gloves, and a rooting hormone (for when seedlings are ready to move outdoors).
Step-by-Step guide to germinating tree peony seed pods
Here's how I've learned to coax these stubborn seeds into life—with patience and the right tricks.
🌱 Step 1: Harvest and Prepare the Seed Pods
Collect mature seed pods in late fall after they've turned brown and dried on the plant. You'll know they're ready when they split open naturally or can be gently pried open with your fingers. Remove the seeds carefully—they're tiny and fragile, about the size of a pinhead. I like to place them in a paper envelope to dry for an extra week in a cool, dark place before starting germination.
Don't rush this drying step. Fresh seeds won't germinate well, and the outer coating needs time to harden slightly. If you're impatient, you can speed this up by placing them in the refrigerator for 3-4 weeks to simulate winter stratification, which mimics their natural dormancy period.
💧 Step 2: Stratify for Successful Germination
Tree peony seeds require 60-90 days of cold stratification to break dormancy. Mix the dried seeds with a moistened (not soggy) sand and peat moss blend in a sealed container. I use a ratio of 1 part seeds to 3 parts mix. Place the container in your refrigerator's crisper drawer, where temperatures stay consistently around 35-40°F. Check monthly to ensure the mix remains moist—never let it dry out completely.
This cold treatment tricks the seeds into thinking winter has passed, signaling them to sprout in spring. If you miss this step, germination rates will drop dramatically, and you might wait years for blooms. I've tried skipping stratification, and while a few seeds eventually sprouted, most remained dormant for over a year.
☀️ Step 3: Sow Stratified Seeds in Spring
Once stratification is complete, plant the seeds in well-draining soil in a shallow tray or small pots. Press them ¼ inch deep—they're so tiny that deeper planting can delay or prevent germination. Space them 2 inches apart to avoid crowding as they grow. Keep the soil lightly moist but never soggy; peony seedlings hate wet feet.
Place the tray in a bright, indirect light spot (like a north-facing window) until germination occurs. A grow light works better for consistent results, positioned 4-6 inches above the tray. Germination can take 4-8 weeks, so don't give up if nothing appears right away. I've had years where seeds took nearly 3 months to sprout—patience is key.
🌿 Step 4: Care for Seedlings Until Transplanting
Once seedlings emerge, provide full sun (6+ hours daily) and keep the soil evenly moist but not waterlogged. Thin seedlings to the strongest 3-4 per pot when they reach 2 inches tall, using scissors to avoid disturbing roots. Peony seedlings grow slowly at first, so don't rush this step—weak plants will struggle to bloom.
After the last frost, transplant seedlings outdoors to a sunny, sheltered spot with well-draining soil. Space them 3-4 feet apart to allow room for their mature size. Mulch around the base with 2-3 inches of organic mulch to retain moisture and protect roots. The first year, focus on root growth—you won't see blooms until 2-3 years after planting.
⏰ Step 5: Overwinter and Encourage First Blooms
Peony seedlings need at least one full winter to establish strong roots before they'll bloom reliably. In their first winter, protect young plants with a thick layer of mulch (4-6 inches) to insulate roots from freezing temperatures. Avoid fertilizing heavily in the first year—too much nitrogen encourages leaf growth at the expense of blooms.
By their third spring, your seedlings should produce their first flowers. Watch for buds forming in late winter—this is your signal that the plant is ready to reward your patience. If buds fail to open, it might mean the plant needs more sun or better drainage. I've found that peonies grown from seed often take longer to bloom than nursery-grown plants, but the wait is worth it for the unique, heirloom-quality flowers you'll get.
Tips & tricks for perfect tree peony germination
Here's what nobody tells you about working with these finicky seeds—tricks that'll make all the difference between success and years of waiting.
Timing is Everything: When harvesting seed pods in Step 1, look for pods that have turned completely brown and are starting to split open naturally. If they're still green or tightly closed, they're not ready—wait another week. I've learned the hard way that premature pods contain immature seeds that won't germinate. The drying period in a cool, dark place (or refrigerator for 3-4 weeks) is non-negotiable for breaking that tough outer coating. Think of it as seed conditioning—just like you'd let a tough steak rest before cooking.
Stratification Secrets: For Step 2, don't just toss seeds in the fridge—create that perfect 1:3 seed-to-mix ratio with moistened (not wet) sand and peat moss. I like to use a small plastic container with a tight lid and poke a few air holes to prevent mold. The key is maintaining that consistent 35-40°F temperature—your refrigerator's crisper drawer is ideal. Check monthly by lifting the lid: if the mix feels dry, add a tiny bit of water (just enough to moisten). Too much moisture causes rot, too little means the seeds won't wake up.
Lighting Strategy: In Step 3, that bright indirect light is crucial for preventing leggy seedlings. While north-facing windows work, I've found grow lights positioned 4-6 inches above the tray create more consistent results. If using a grow light, opt for a full-spectrum bulb that mimics natural sunlight. The 4-8 week germination window can feel like an eternity, but remember—these seeds are ancient survivors. They're used to waiting for the perfect moment, so be patient. Mark your calendar when you start stratification so you can track the 60-90 day timeline accurately.
Transplanting Transition: When moving seedlings outdoors in Step 4, harden them off gradually over 7-10 days. Start with just an hour in a sheltered spot, then increase daily. This mimics natural conditions and prevents shock. Also, pay attention to your soil's drainage—peony roots despise soggy conditions. If your soil is heavy clay, amend it with compost before transplanting. The 3-4 foot spacing might seem excessive, but it gives roots room to establish before you'll see those coveted blooms in 2-3 years.
Pro Tips for Tree Peony Seed Pods
- Here's what nobody tells you about working with these finicky seeds—tricks that'll make all the difference between success and years of waiting.
- Timing is Everything: When harvesting seed pods in Step 1, look for pods that have turned completely brown and are starting to split open naturally.
- Stratification Secrets: For Step 2, don't just toss seeds in the fridge—create that perfect 1:3 seed-to-mix ratio with moistened (not wet) sand and peat moss.
Frequently asked questions
Got questions about tree peony seed pods? You’re not alone! Here are answers to the most common queries to help you navigate germination like a pro.
When do tree peony seed pods ripen and when should I harvest them?
Tree peony seed pods typically ripen late summer to early fall (August–October, depending on your climate). Harvest them when the pods turn brown and papery—they’ll split open on their own if left too long. Collect them promptly to avoid seed loss or sprouting in the pod. Pro tip: Wear gloves; the pods can be prickly!
How do I know if my tree peony seeds are viable?
Viable tree peony seeds are plump, firm, and dark brown inside the pod. Shriveled or hollow seeds won’t germinate. For extra assurance, stratify seeds (mimic winter) by mixing them with moist sand and refrigerating for 3–4 months before planting. Fun fact: Some seeds may take 2+ years to sprout—patience is key!
Why aren’t my tree peony seeds germinating? Troubleshooting tips?
Common culprits include:
- Improper stratification: Tree peonies need cold to break dormancy. Skip this step, and germination rates plummet.
- Poor soil moisture: Keep soil consistently moist (not soggy) during germination—dry spells can stall sprouts.
- Shallow planting: Seeds should be ½ inch deep; deeper planting suffocates them.
- Heat stress: Germination thrives at 60–70°F. Use a seedling heat mat if your climate is too hot.
Can I grow tree peonies from store-bought seeds, or do I need to collect my own?
Store-bought seeds can work, but tree peonies are hybrids, so results may vary wildly—expect unpredictable colors, sizes, or bloom times. For reliable blooms, collect seeds from healthy, mature tree peonies in your area. Bonus: Grafted peonies (common in nurseries) won’t produce true seeds—stick to pod-collected seeds for consistency!
How long does it take for tree peony seedlings to bloom?
Tree peony seedlings grown from seed can take 3–5 years (or longer!) to produce their first blooms. Patience is critical—focus on nurturing strong roots and foliage. For faster blooms, consider layering or grafting established peony varieties. Pro move: Label seedlings immediately to track progress!
Wrapping up and next steps
Growing tree peony seed pods into vibrant blooms is a rewarding journey that blends patience with nature’s magic! 🌱 By mastering the right soil, timing, and care, you’ll unlock the potential for stunning, long-lived flowers that brighten any garden.
Whether you’re a seasoned gardener or just starting, every small step—like proper stratification or gentle transplantation—brings you closer to success.
Ready to turn those seed pods into a flourishing garden? Start small: pick one pod to experiment with this season, and share your progress with fellow plant enthusiasts. Who knows? Your first bloom could inspire a whole new green thumb adventure! 🌸