
Landscaping
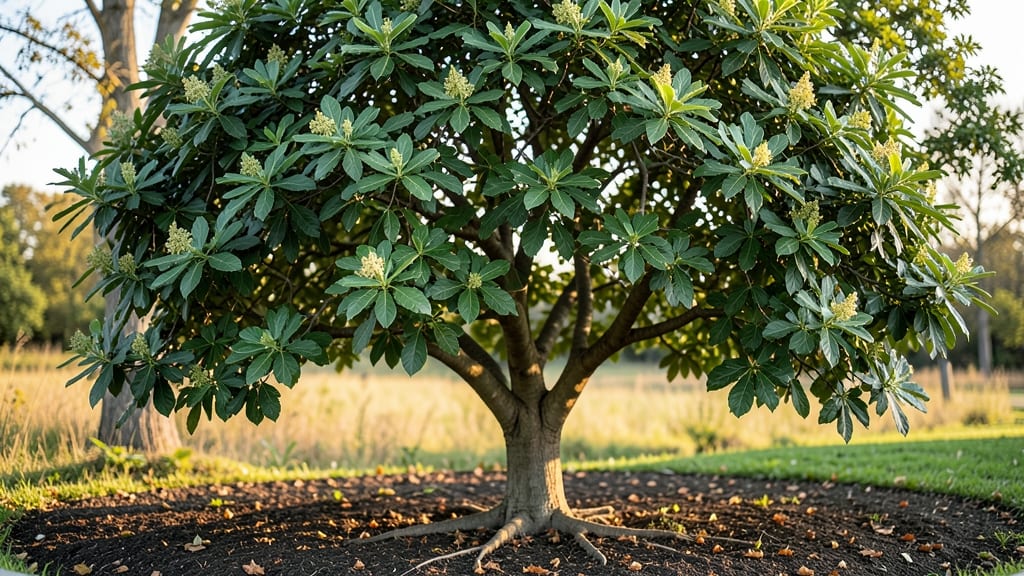
A Tree of Life landscape isn’t just a garden—it’s a living tapestry that tells a story. 🌿 Imagine a privacy screen that thrives year-round, blending towering canopies with symbolic plants like baobabs, succulents, and fragrant shrubs.
My design combines layers of greenery to create depth, texture, and meaning, inspired by ancient traditions where trees represent life, wisdom, and connection. The magic lies in the layers: tall evergreens for structure, medium-height shrubs for color, and ground covers to tie it all together.
You’ll need a mix of drought-tolerant plants (like olive trees or agave) and fast-growing climbers (such as jasmine or clematis) to fill gaps quickly. The result? A lush, ever-changing backdrop that feels like a sanctuary.
What you’ll end up with is a privacy screen that’s alive—not just a wall of leaves, but a dynamic ecosystem. Birds will nest in the branches, flowers will attract pollinators, and the scent of blooms will drift through your yard all season long.
It’s the kind of garden that grows more beautiful with each passing year. Perfect for small yards, urban backdrops, or even as a focal point in a larger landscape. Whether you’re drawn to the symbolism or just love a good green curtain, this design delivers both beauty and function.
Let’s bring the Tree of Life to your space!
📚 In This Guide
- What you need
- Instructions
- Tips and common mistakes
- Wrapping up and next steps
What you need
- ● Tall, fast-growing evergreens (3-5 plants): 3x Thuja occidentalis (Arborvitae) – 6-8 ft tall, 3-4 ft wide
- ● 2x Chamaecyparis lawsoniana (Lawson Cypress) – 8-10 ft tall, 4-5 ft wide
- ● Medium-height shrubs (5-7 plants): 4x Ilex crenata (Boxwood) – 4-6 ft tall, 3-4 ft wide
- ● 3x Viburnum dentatum (Arrowwood Viburnum) – 5-7 ft tall, 4-6 ft wide
- ● Low-growing ground cover (10-15 plants): 10x Helleborus niger (Christmas Rose) – 1-2 ft tall, spreads 1-2 ft
- ● 5x Ajuga reptans (Bugleweed) – 6-12 in tall, spreads aggressively
- ● Mulch (3-5 bags): 3-4 cubic feet of pine bark or cedar mulch (dark brown, 2-3 inches thick)
- ○ Soil amendments (optional but recommended): 1 bag compost (for nutrient boost)
- ● 1 bag peat moss (for moisture retention)
- ● Digging & planting: Shovel (flat & round head)
- ● Garden trowel
- ● Wheelbarrow (for mulch/soil)
- ● Measuring & layout: Measuring tape (25 ft)
- ● Stakes & string (for marking plant spacing)
- ● Level (to ensure even planting depth)
- ● Safety & extras: Work gloves (heavy-duty)
- ● Knee pads (for comfort)
- ● Hose with nozzle (for watering)
- ● Pruners (bypass type, for shaping)
- ● Drip irrigation kit (for low-maintenance watering)
- ● Edging tool (to define plant beds neatly)
- ● Slow-release fertilizer (for faster establishment)
- ● Decorative stones (for pathways or borders)
How to design a thriving Tree of Life privacy screen
This layered approach creates a lush, evergreen privacy barrier that stays beautiful through all seasons.
🌱 Step 1: Plan Your Multi-Layered Layout
Start by sketching a 10-foot deep planting area behind your property line. The front layer should feature 3-4 foot tall shrubs like boxwood or dwarf holly for immediate privacy. I always space these 3 feet apart in a staggered pattern—this creates natural gaps for air flow while maintaining density. Behind these, plant 6-8 foot tall evergreens like arborvitae or emerald green cedar, spaced 5 feet apart to allow mature growth without crowding.
For the canopy layer, select 15-20 foot tall trees like Leyland cypress or cherry laurel, placing them 8-10 feet apart at the back of your design. These will provide long-term structure while the lower layers fill in. I like to use a 3:1 ratio of evergreens to deciduous trees—this ensures year-round coverage while adding seasonal interest when leaves change color.
🪴 Step 2: Prepare the Planting Zones
Dig individual planting holes twice as wide as each plant's root ball but only as deep as the root ball itself. This prevents burying the trunk too deeply, which can cause rot. I always loosen the native soil at the bottom of each hole with a garden fork—this helps roots spread into the surrounding earth instead of circling the root ball.
For the front layer, amend the planting hole with 2-3 inches of compost mixed into the native soil. For the taller layers, add 1 inch of slow-release fertilizer to give them a strong start. Water each hole thoroughly before planting to settle the soil and remove air pockets. You'll know it's ready when water drains evenly without pooling.
☀️ Step 3: Plant and Stake for Stability
Place each plant in its hole so the top of the root ball sits 1 inch above ground level—this prevents settling over time. Backfill with native soil mixed with compost, firming gently in 2-inch layers as you go. For the front layer shrubs, I use 2-3 stakes per plant tied loosely with soft fabric strips to prevent trunk damage as they grow.
Water each newly planted shrub or tree with 1 gallon of water to help settle the soil around roots. Avoid compacting the soil too firmly—you want roots to push through easily. For the taller trees, I add 3-4 inches of mulch in a 3-foot diameter ring around the base, keeping it 6 inches away from the trunk to prevent rot.
💧 Step 4: Establish a Watering Schedule
Water deeply twice weekly for the first 3 months, providing 3-5 gallons per plant depending on size. You'll know it's enough when water drains 6-8 inches deep into the soil. After establishment, reduce to once weekly during dry spells, focusing on the front layer shrubs which dry out fastest.
I always water in the early morning to reduce evaporation and fungal risks. For the first month, check soil moisture by pushing your finger 2 inches deep—if it feels dry, water again. This helps prevent transplant shock while encouraging deep root growth. Avoid overhead watering once plants are established to prevent disease spread.
✂️ Step 5: Maintain Layers Through Seasons
Prune the front layer shrubs twice yearly—once after flowering in spring and again in early summer. I use clean, sharp shears to make cuts just above a leaf node at a 45-degree angle for best regrowth. For the taller trees, remove only dead or crossing branches in late winter before new growth begins.
Fertilize the entire screen once in early spring with a balanced 10-10-10 formula, followed by a slow-release organic fertilizer in mid-summer. This keeps growth steady without overwhelming the plants. Watch for browning needles on evergreens—this usually means either overwatering or nutrient deficiency, both easy to correct with proper care.
Tips & tricks for perfect Tree of Life privacy screen
Creating a stunning, functional privacy screen takes more than just planting—it's about the details that make all the difference. Here's what I've learned from years of designing these lush landscapes.
Layer Depth Matters: The 10-foot depth I recommend isn't arbitrary—it accounts for mature plant sizes while preventing overcrowding. If your space is narrower, consider using columnar varieties like 'Emerald Green' arborvitae which grow narrower (3-4 feet wide) but still provide excellent coverage. This lets you maintain the same privacy effect in tighter spaces without sacrificing beauty.
Soil Prep Secret: When loosening the native soil in Step 2, I go one step further by adding a handful of mycorrhizal fungi to each planting hole. These beneficial fungi form symbiotic relationships with plant roots, dramatically improving nutrient and water uptake during the critical first year. It's especially helpful for evergreens which have more demanding root systems. You can find these at garden centers in powder or granular form.
Staking Strategy: The 1-inch height above ground level for root balls in Step 3 is crucial, but what about the stakes? I always use bamboo stakes because they're sturdy yet flexible enough to move with the plant as it grows. The key is to tie them loosely—tight bindings can actually damage young stems as they thicken. I use soft fabric strips that won't cut into the bark and check the ties every 2-3 months to loosen them as the plant grows.
Watering Wisdom: That 6-8 inch deep watering check in Step 4 might seem technical, but here's a simple way to remember it: it should reach about the length of your forearm from wrist to elbow. For the first month, I actually use a soil moisture meter to verify—it's worth the small investment to ensure you're not overwatering (which causes more problems than underwatering). The early morning timing is non-negotiable for preventing fungal diseases like powdery mildew that thrive in damp evening conditions.
Pro Tips for Tree Of Life Landscape
- Creating a stunning, functional privacy screen takes more than just planting—it's about the details that make all the difference.
- Layer Depth Matters: The 10-foot depth I recommend isn't arbitrary—it accounts for mature plant sizes while preventing overcrowding.
- Soil Prep Secret: When loosening the native soil in Step 2, I go one step further by adding a handful of mycorrhizal fungi to each planting hole.
Frequently asked questions
Got questions about creating your own Tree of Life landscape? You’re not alone! Here are some of the most common queries—plus straightforward answers to help you design with confidence.
What’s the fastest way to establish privacy with a Tree of Life design?
A Tree of Life landscape combines fast-growing shrubs (like Bamboo or Hornbeam) with slower-maturing trees (e.g., Oak or Maple) for layered privacy. For quick results, plant Bamboo or Hydrangea as the lower layer—they fill in within 1–3 years. Trees take 5–10 years but offer long-term, lush coverage.
How long does it take for a Tree of Life landscape to mature fully?
Full maturity depends on your plant mix, but most Tree of Life designs reach their peak in 7–15 years. Fast growers (e.g., Willow or Poplar) can provide partial privacy in 3–5 years, while slower trees (like Redwood) take 10+ years. Plan for staggered planting to balance early and long-term coverage.
Is a Tree of Life landscape more expensive than a fence or hedge?
Upfront costs vary, but Tree of Life landscapes often save money long-term. While fences or hedges may cost $15–$50 per linear foot to install, trees require $50–$200 per specimen but need no replacement and boost property value. Factor in mulch, soil prep, and irrigation—but skip costly maintenance like trimming or staining!
Can I mix native and non-native plants in a Tree of Life design?
Mixing native plants (e.g., Dogwood or Serviceberry) with low-maintenance non-natives (like Japanese Maple) works well. Just ensure compatible growing conditions (sun/shade, soil type). Pro tip: Natives support local wildlife and reduce water needs—win-win!
How do I prevent pests or diseases in a Tree of Life landscape?
Start with healthy soil and resistant species (e.g., Oak over Elm, prone to Dutch elm disease). Monitor for pests like aphids or borers, and act fast with neem oil or insecticidal soap. Pro tip: Diverse plantings deter pests—avoid monocultures! Prune in late winter to reduce stress and disease risk.
Wrapping up and next steps
A Tree of Life landscape isn’t just a stunning visual—it’s a functional masterpiece that brings privacy, beauty, and sustainability year-round. 🌿 By layering native plants, evergreens, and flowering shrubs, you create a thriving ecosystem that evolves with the seasons while requiring minimal upkeep.
The best part? You’re not just designing a screen—you’re crafting a legacy for your outdoor space.
Ready to transform your yard? Start small—sketch a simple layout, gather a few key plants, and dive in! Whether you’re a seasoned gardener or a curious beginner, every step brings you closer to a serene, lush retreat. Plan your first layer today!