
Tools
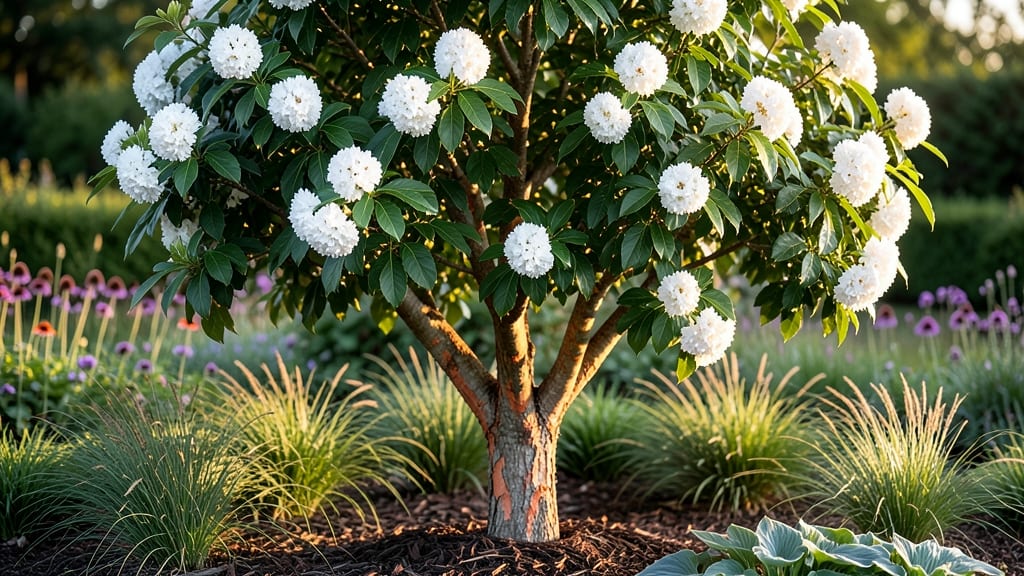
A tree garden bed isn’t just about planting—it’s about creating a living vertical tapestry where roots, trunks, and canopies weave together. 🌳 I designed mine to fit a 4x8-foot space, stacking dwarf fruit trees with perennials at their base, and now we harvest apples, berries, and herbs from the same square footage that once grew just grass.
The secret? Layering plants by height and function, so every inch works for you and the ecosystem.
Start with soil that’s rich but drains well—think 50% topsoil, 30% compost, and 20% perlite—to prevent waterlogging while feeding deep roots.
Choose trees that thrive in your zone (dwarf varieties like ‘Columnar Apple’ or ‘Patio Pear’ are game-changers for small spaces), then tuck understory plants like lavender or thyme around their bases. These companions suppress weeds, retain moisture, and even improve fruit flavor by attracting pollinators.
By summer’s end, you’ll have a self-sustaining vertical garden that yields food, shade, and year-round interest. The dwarf trees produce full-sized fruit on a fraction of the space, while the perennials fill gaps with color and texture.
Plus, the dappled shade creates microclimates perfect for heat-sensitive veggies like lettuce or spinach planted at the bed’s edges.
This design scales from a balcony planter to a backyard orchard—just adjust spacing and tree size. For larger beds, add a mulch ring around each tree to lock in moisture and keep roots cool.
The key is patience: trees take 2–3 years to mature, but the payoff is a garden that grows with you, not against your space.
📚 In This Guide
- What you need
- Instructions
- Tips and common mistakes
- Wrapping up and next steps
What you need
- ● Growing Medium: High-quality potting soil (10-20 bags, depending on bed size; opt for a mix with perlite or vermiculite for drainage).
- ● Compost or organic fertilizer (5-10 lbs to enrich soil).
- ● Structural Components: Wooden frame or pre-made planter box (untreated cedar or redwood recommended; dimensions: 4’x2’x1’ minimum for a small bed).
- ● Landscape fabric (to line the bottom and prevent soil loss).
- ● Drainage layer: Gravel (1-2” thick) or crushed stone.
- ● Tools: Shovel or garden trowel (for soil prep).
- ● Drill with screws or brackets (if assembling a wooden frame).
- ● Measuring tape and level (for precision).
- ● Watering can or hose with spray nozzle.
- ● Plant Supports: Bamboo stakes or trellises (for climbing plants like beans or peas).
- ● Coco coir or peat moss (to improve moisture retention).
- ● Design Touches: Decorative mulch (e.g., cedar chips for aesthetics).
- ● Drip irrigation kit (for automated watering).
- ● Safety Gear: Gloves and knee pads (for comfort during assembly).
Step-by-Step instructions for creating a tree garden bed
Turn limited space into a thriving vertical garden with these simple layers—perfect for small yards or urban patios.
🌱 Step 1: Plan Your Vertical Layers
Start by sketching your design on paper. The key is to arrange plants by height, with taller trees at the back or center and shorter shrubs/perennials in front. I like to use a 3-tier approach: top layer for mature trees (like dwarf fruit trees or ornamental varieties), middle layer for shrubs (like hydrangeas or dwarf lilacs), and bottom layer for ground covers or low-growing perennials.
Measure your space—most small tree garden beds fit 4-6 feet wide and 6-8 feet deep. If you're working with a raised bed, ensure it's at least 12 inches deep to accommodate root growth. This ensures your trees won’t outgrow their home too quickly. For example, a 4-foot-wide bed can comfortably fit two dwarf apple trees in the back, three hydrangea shrubs in the middle, and a creeping thyme ground cover in the front.
🪴 Step 2: Prepare the Soil and Install Drainage
Remove any grass or weeds from the area, then loosen the soil to a depth of 12-18 inches using a shovel or garden fork. If your soil is heavy clay or sandy, mix in 2-3 inches of compost and 1 inch of perlite to improve drainage and aeration. This step is critical—poor drainage leads to root rot, especially in containers or raised beds.
For raised beds, line the bottom with landscape fabric to prevent weeds from creeping up. Add a 2-inch layer of gravel at the base for drainage, then fill the rest with a mix of topsoil, compost, and peat moss (equal parts). This ensures your plants get the nutrients they need while keeping roots healthy. Water the soil thoroughly before planting to help it settle.
☀️ Step 3: Plant Your Trees and Shrubs in Layers
Begin with the tallest plants at the back or center of the bed. Dig holes twice as wide as the root ball but no deeper—this encourages roots to spread outward. Place each tree or shrub in the hole, then backfill with soil, pressing gently to remove air pockets. Water deeply to help the soil settle around the roots.
Space your plants according to their mature size. For example, dwarf fruit trees should be 6-8 feet apart, while shrubs like hydrangeas can be 3-4 feet apart. Add mulch around the base of each plant, keeping it 2-3 inches away from the trunk to prevent rot. This layer of mulch (like shredded bark or straw) helps retain moisture and suppress weeds—just what you need for a low-maintenance garden.
💧 Step 4: Water and Maintain for Long-Term Growth
Water your new tree garden bed deeply once a week for the first month, then taper off to every 10-14 days once established, depending on rainfall. The goal is to keep the soil moist but not soggy—stick your finger 1 inch into the soil to check. Overwatering is a common mistake, especially in containers or raised beds where drainage is critical.
Fertilize lightly in the first growing season with a balanced, slow-release fertilizer (like 10-10-10) applied in early spring. Prune any dead or crossing branches as needed, but avoid heavy pruning in the first year—this can stress young plants. Watch for signs of pests or disease, like yellowing leaves or holes in foliage, and address them early to keep your garden thriving.
⏰ Step 5: Monitor and Adjust Over Time
Check your garden bed monthly to ensure plants are getting enough sunlight. Most trees and shrubs need at least 6 hours of direct sun daily, so adjust placement if you notice leggy growth or pale leaves. If your space is shady, choose shade-tolerant varieties like dwarf ferns, boxwood, or Japanese maples instead.
As your plants grow, you may need to thin out overcrowded shrubs or prune trees to maintain the layered look. This keeps air circulating and prevents disease. In late fall, add a 2-inch layer of mulch to protect roots from freezing temperatures. With proper care, your tree garden bed will flourish for years, providing beauty and bounty in even the smallest space.
Tips & tricks for perfect tree garden beds
A few simple strategies will help your layered garden thrive without the guesswork—especially in tight spaces.
Layering Logic: When planning your 3-tier layout, think vertically first! The top layer should get the most sunlight, so position your tallest trees (like dwarf fruit trees) where they won’t shade the middle layer too early in the day. I like to stagger plants so the middle shrubs (hydrangeas, lilacs) peek through the gaps of the taller trees. This creates natural airflow and prevents disease while maximizing every inch of space.
Soil Prep Pro Tip: For that critical 12-18 inch soil depth in Step 2, rent a soil aerator if you're working with compacted ground—it saves hours of backbreaking work. If you're mixing compost and perlite, do it in layers: spread 1 inch of perlite first, then compost, then topsoil. This prevents clumping and ensures even drainage throughout the entire bed. The perlite at the bottom is especially important for raised beds where water can pool.
Planting Precision: The "twice as wide" rule for planting holes in Step 3 is golden, but here's the secret: loosen the sides of the hole with your fingers before placing the root ball. This encourages roots to spread outward immediately rather than circling (a common problem called "pot-bound roots"). For dwarf trees, gently tease apart any tightly packed roots—it takes 30 seconds but makes a huge difference in establishment.
Watering Wisdom: That "deeply once a week" guideline in Step 4 works, but here's how to do it right: use a long-handled trowel to create small trenches around each plant's drip line (where the branches extend). Pour water into these trenches—it goes straight to the roots where they need it most, rather than running off the surface. This is especially crucial in the first month when roots are still shallow and vulnerable to drying out.
Pro Tips for Tree Garden Bed
- A few simple strategies will help your layered garden thrive without the guesswork—especially in tight spaces.
- Layering Logic: When planning your 3-tier layout, think vertically first! The top layer should get the most sunlight,...
- Soil Prep Pro Tip: For that critical 12-18 inch soil depth in Step 2, rent a soil aerator if you're working with comp...
Frequently asked questions
Got questions about creating a tree garden bed? You’re not alone! Here are some of the most common queries—and their straightforward answers—to help you get growing with confidence.
What’s the best time of year to plant a tree garden bed?
For most climates, early spring or fall are ideal—when temperatures are mild, and trees aren’t under stress from extreme heat or cold. Avoid planting in peak summer (risk of drought stress) or winter (frozen soil can damage roots). If you’re in a warm zone, late fall to early winter works too!
Can I use a tree garden bed for vegetables, or is it just for herbs?
Both! While herbs like basil, thyme, and parsley thrive in tree garden beds, you can also grow shallow-rooted veggies like lettuce, radishes, and green onions. Just avoid heavy feeders (e.g., tomatoes or corn) that need deep soil. Pro tip: Use the top layer for fast growers and the middle for herbs!
How do I troubleshoot yellowing leaves in my tree garden bed?
Yellow leaves usually mean overwatering, poor drainage, or nutrient deficiency. Check the soil—it should be moist but not soggy. If the pot has no drainage holes, add them! For nutrients, fertilize lightly with a balanced organic fertilizer (like fish emulsion) every 4–6 weeks. Bonus: Wilted leaves? It might be underwatering!
Are there alternatives to traditional tree garden beds?
Try these space-saving hacks:
- Hanging pockets: Fabric grow bags or mesh pockets for herbs and greens.
- Pallet gardens: Repurpose wooden pallets into vertical planters.
- Wall-mounted planters: Use modular systems for a sleek, urban look.
- DIY tiered shelves: Stack crates or lumber for layered growing.
How long does it take to see results in a tree garden bed?
Fast growers like basil or radishes may sprout in 2–4 weeks, while herbs like rosemary or thyme take 6–8 weeks to establish. Trees (e.g., citrus or fig) can take months to years for full maturity. Patience pays off! Regular pruning and care speed up growth. Pro tip: Harvest herbs early to encourage bushier growth.
Where can I buy a tree garden bed if I don’t want to DIY?
Check these spots for pre-made options:
- Garden centers: Local nurseries often carry vertical planters.
- Online retailers: Amazon, Etsy, or specialty sites like Planters.com.
- Home improvement stores: Lowe’s or Home Depot sell modular systems.
- Farmers’ markets: Some vendors sell handmade tree garden beds.
Wrapping up and next steps
Creating a tree garden bed is a game-changer for small spaces—packing layers of greens, herbs, and even fruits into a single vertical setup! 🌱 Whether you’re a green thumb or just starting, this method maximizes yield while keeping your garden organized and thriving.
The key? Start small, plan smart, and let nature do the rest.
Ready to transform your space? Grab your tools, pick your plants, and dive in—your future harvest (and Instagram-worthy garden!) awaits. Which layer will you try first? 🌿