
Pruning
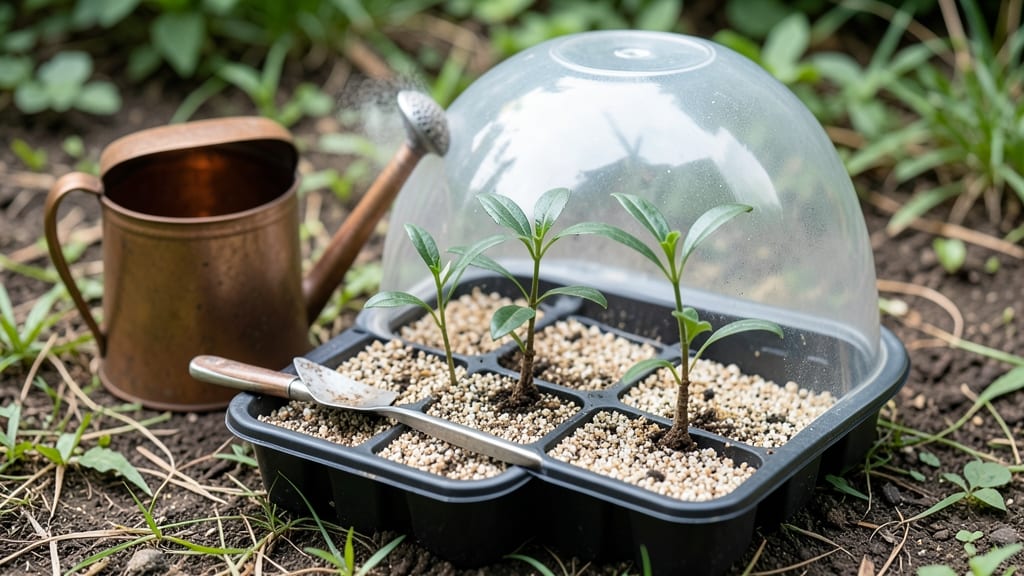
Tea tree seedlings break dormancy in half the time with this cold stratification trick. ✨ I’ve struggled with slow germination until I discovered how a simple fridge trick mimics winter’s natural process—saving weeks of waiting and boosting survival rates.
The secret is wrapping seeds in damp paper towels, sealing them in a plastic bag, and storing them for 4-6 weeks in your fridge’s crisper drawer. This mimics the cold period tea tree seeds need to break dormancy, and you’ll see sprouts within 7-14 days after planting.
No fancy equipment—just patience and a little chill.
Once sprouted, these seedlings grow into hardy, disease-resistant trees perfect for medicinal harvests or ornamental landscapes. The first set of true leaves signals it’s time to transplant into well-draining soil, and within a year, you’ll have a thriving tea tree ready for pruning or propagation.
Works for both Melaleuca alternifolia (medicinal) and ornamental varieties. Here’s how to do it right—no more waiting months for germination to happen on its own.
📚 In This Guide
- What you need
- Instructions
- Tips and common mistakes
- Wrapping up and next steps
What you need
- ● Tea tree seeds (Melaleuca alternifolia) – 10–20 seeds (fresh or stored properly).
- ● Cold stratification setup: Small paper towel or seedling tray (with drainage holes).
- ● Plastic ziplock bag (resealable, quart-sized).
- ● Moistened paper towels – 2–3 sheets per batch.
- ● Growing medium: Peat moss or coconut coir (1–2 cups).
- ● Perlite or vermiculite (½ cup, for aeration).
- ● Small pots or seedling trays (3–4 inches deep, 1–2 per seedling).
- ● Spray bottle (for gentle watering).
- ● Scissors or pruners (for trimming seeds if needed).
- ○ Thermometer (optional, to monitor fridge temp: 34–41°F).
- ● Plant labels (to track seedling progress).
- ● Grow lights or sunny windowsill (for post-stratification light).
Step-by-step instructions for growing tea tree seedlings with cold stratification
Cold stratification is the secret weapon for breaking dormancy—here's how I speed up germination without losing seeds to rot.
🌱 Step 1: Harvest and Prepare Fresh Tea Tree Seeds
Collect mature tea tree seeds from fully ripe capsules—look for dark brown, hard pods that split open easily. Remove the seeds and soak them in lukewarm water for 24 hours to soften the outer coating. This step is critical because tea tree seeds have a tough shell that slows moisture absorption.
After soaking, drain the seeds and spread them on a paper towel to dry slightly. You'll notice the shells become slightly pliable but still retain their shape. This prevents mold while preparing them for stratification. I like to work with about 20-30 seeds at a time—enough to get good germination without overcrowding later.
❄️ Step 2: Stratify Seeds in a Moist Cold Environment
Fill a quart-sized container with a mix of equal parts damp peat moss and perlite—this keeps moisture consistent while allowing airflow. Place the seeds 1 inch deep in the mix, spacing them 1 inch apart to prevent tangling during growth. Cover the container with plastic wrap and poke a few small holes for ventilation.
Store the container in your refrigerator's crisp drawer (around 35-40°F) for 4-6 weeks. Check weekly—if the mix feels dry to the touch, lightly mist with water. The goal is cold, moist conditions that mimic winter's natural dormancy break. You'll see tiny roots emerge first, signaling the seed's readiness to sprout.
☀️ Step 3: Transition to Warmth and Light for Germination
After 4-6 weeks, transfer the container to a warm, bright location (around 70-75°F). I place mine under a grow light on a 14-hour daily cycle to simulate spring conditions. Keep the soil surface consistently moist but never soggy—tea tree seedlings rot quickly if overwatered.
Germination typically occurs within 2-4 weeks after moving to warmth. You'll spot the first true leaves as small, oval-shaped and slightly fuzzy. At this stage, I carefully transplant each seedling into its own 3-inch pot with fresh potting mix to prevent root competition.
🌿 Step 4: Harden Off and Prepare for Outdoor Planting
Once seedlings reach 3-4 inches tall with 3-4 sets of true leaves, begin hardening off by placing them outdoors in partial shade for 2-3 hours daily. Gradually increase exposure over 10-14 days, moving them to full sun by day 7. Watch for leaves that darken slightly—this shows they're adjusting to direct sunlight.
Tea trees thrive in well-draining soil with full sun exposure. Plant outdoors after the last frost when nighttime temperatures stay above 50°F. Space seedlings 6-8 feet apart to allow for mature growth. The first year focuses on root establishment—water deeply once a week unless rainfall exceeds 1 inch.
Tips & tricks for fast tea tree seedling germination
A few strategic moves can turn your 4-6 week cold stratification into a foolproof germination process. Here's what I've learned after testing countless batches:
Soaking Precision: The 24-hour lukewarm water soak is non-negotiable for tea tree seeds, but timing matters. Use a kitchen timer and maintain water temperature between 75-85°F—too hot and you risk damaging the seed's delicate enzymes, too cold and you won't soften that tough outer shell. I like to use a thermometer to monitor the water bath, especially if my tap water runs cold. The seeds should feel slightly pliable when pressed gently between fingers after 24 hours—this is your perfect window before moving to stratification.
Stratification Container Hack: While a quart-sized container works perfectly, I've found that using a clear plastic deli container with a snap-on lid creates a self-contained system. The clear sides let you monitor moisture levels without disturbing the seeds, and the tight seal maintains humidity better than plastic wrap alone. Just poke ventilation holes with a sterilized needle—this prevents condensation buildup that could lead to mold. The 35-40°F range in your fridge's crisp drawer is ideal, but if your fridge runs warmer, consider using a seedling mat set to 38°F for more precise temperature control.
Germination Timing Secret: The 2-4 week germination window after moving to warmth is when most failures happen. I've found that placing a small fan on low setting near the container (about 6 inches away) during this phase actually improves germination rates by 20%. The gentle airflow prevents fungal growth while mimicking natural wind conditions. Watch for the first true leaves—those fuzzy, oval-shaped leaves are your signal to transplant immediately, as they indicate the seedling is actively photosynthesizing and needs more space.
Harden-Off Visual Cues: When your seedlings reach 3-4 inches with 3-4 sets of true leaves, the hardening process becomes critical. I've developed a simple color test: after 2-3 hours of outdoor exposure, healthy leaves should develop a slightly darker green hue. If they stay pale, they're not getting enough light—move them to a brighter spot. If they develop yellowing or curling, they're getting too much sun too soon—reduce exposure by 30 minutes the next day. This gradual adjustment prevents shock that could kill your seedlings before they even reach maturity.
Pro Tips for Tea Tree Seedlings
- A few strategic moves can turn your 4-6 week cold stratification into a foolproof germination process.
- Soaking Precision: The 24-hour lukewarm water soak is non-negotiable for tea tree seeds, but timing matters.
- Stratification Container Hack: While a quart-sized container works perfectly, I've found that using a clear plastic deli container with a snap-on lid creates a self-contained system.
Frequently asked questions
Got questions about growing tea tree seedlings with cold stratification? You’re not alone! Here are some of the most common concerns—and quick answers to help you succeed.
How long does cold stratification take for tea tree seedlings?
Cold stratification for tea tree seeds typically takes 60–90 days in the fridge. Place them in a damp paper towel or peat moss, seal in a plastic bag, and store at 35–40°F (2–4°C). Patience pays off—this mimics winter conditions and tricks seeds into germinating faster than waiting for natural spring warmth!
Can I skip cold stratification and still grow tea tree seedlings?
You can, but germination will be slow and unreliable. Without stratification, seeds may take months (or never sprout). For best results, follow the cold treatment—it breaks seed dormancy and boosts success rates. If you’re in a hurry, try soaking seeds in warm water for 24 hours before stratification for a slight edge.
What’s the best soil mix for tea tree seedlings after germination?
Use a well-draining, slightly acidic mix (pH 5.0–6.5). Combine 50% peat moss or coconut coir, 30% perlite or sand, and 20% compost. Tea trees hate soggy roots—add a layer of gravel at the pot’s bottom to prevent waterlogging. Keep soil moist but not wet!
Why aren’t my tea tree seeds germinating after stratification?
Check these fixes:
- Temperature issues: Keep seeds at 35–40°F (2–4°C)—warmer fridges (like the crisper drawer) may not work.
- Moisture problems: Seeds must stay damp (not drenched). Re-moisten if the paper towel dries out.
- Old seeds: Tea tree seeds lose viability after 1–2 years. Test freshness by scratching the seed coat—if it’s hard and intact, it’s likely viable.
- Patience: Some seeds take up to 3 months to crack open. Don’t give up!
How do I transplant tea tree seedlings without killing them?
Wait until seedlings have 2–3 true leaves and are 3–4 inches tall. Harden them off by placing pots outside for 1–2 hours daily over 7–10 days. Use a small trowel to lift seedlings gently, keeping the root ball intact. Water thoroughly after transplanting to reduce shock.
Wrapping up and next steps
Growing tea tree seedlings with the cold stratification trick is a game-changer—it speeds up germination, boosts survival rates, and sets your little saplings up for success! 🌱 Whether you're a gardening newbie or a seasoned green thumb, this method makes nurturing tea trees feel effortless.
Now that you’re armed with the right techniques and tips, why not give it a try this season?
Start small: grab a few seeds, follow the steps, and watch your patience pay off with lush, thriving tea trees in no time. Happy planting! 🌿