
Pruning
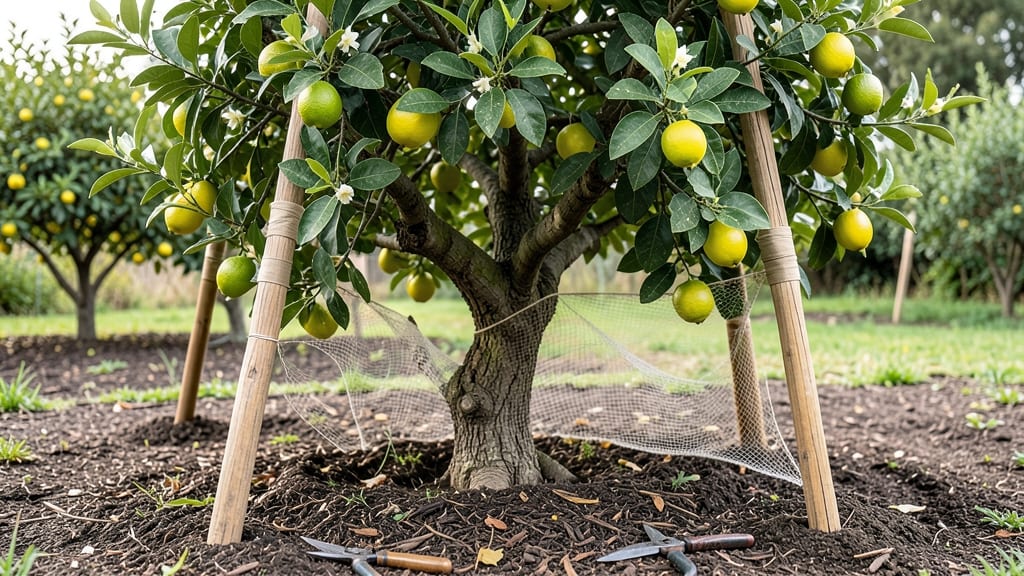
Watching a tree branch bend dangerously under its own weight is a gut-wrenching sight—especially when you know it could snap in the next storm. 🌳 Strategic trimming to support branches isn’t just about aesthetics; it’s about giving your tree a fighting chance to grow strong without permanent damage.
I’ve seen branches that looked hopelessly weak become sturdy, productive parts of the tree after the right cuts and support.
The key is timing and technique: prune in late winter or early spring when the tree’s energy is dormant, and always make cuts just outside the branch collar where it meets the trunk. You’ll need sharp pruners, a sturdy ladder, and—if needed—tree ties or small stakes to guide new growth.
The goal is to redirect energy into stronger, upward-facing branches while keeping the tree’s natural shape intact.
By the end of the process, you’ll have a tree that stands tall without leaning, with branches that distribute weight evenly and resist wind damage. The best part?
You’ll do it without leaving ugly scars or stunting the tree’s growth—just healthier, more resilient wood. Think of it as giving your tree a structural tune-up.
Works for young trees, mature branches, and even those recovering from storms. Here’s how to do it right the first time—no guesswork, just proven methods that keep your tree thriving for decades. Let’s get started with the tools and steps that make all the difference.
📚 In This Guide
- What you need
- Instructions
- Tips and common mistakes
- Wrapping up and next steps
What you need
- ● Pruning shears or loppers: Bypass pruners (for clean cuts) or anvil pruners (for thicker branches, up to ¾ inch in diameter). Choose sharp, high-quality tools to avoid crushing or tearing.
- ● Pole saw or pruning saw: For branches too high to reach safely (up to 3–4 inches in diameter). Opt for a foldable, lightweight design for ease of use.
- ● Tree branch supports: Tree cradles or slings (for large, heavy branches—e.g., 50+ lbs). Look for durable nylon or canvas with adjustable straps.
- ● Propping sticks or stakes (for smaller branches—1–3 inches thick). Use hardwood or treated lumber to prevent rot.
- ● Rope or ratchet straps: 3/8-inch to ½-inch polyester webbing (rated for 500+ lbs) to secure branches during trimming.
- ● Ladder or lift: Extension ladder (rated for your height + 3 feet of overhang) or an aluminum lift for tall trees. Ensure it’s stable and rated for outdoor use.
- ● Safety gear: Work gloves (cut-resistant for handling branches).
- ● Safety glasses or goggles (to protect from debris).
- ● Hard hat (if working near power lines or in windy conditions).
- ● Tree wound dressing: Pruning sealant (controversial but useful for large wounds—1–2 inches in diameter). Choose a water-based, breathable formula.
- ● Tarps or drop cloths: To protect landscaping or vehicles from falling debris.
- ● Tree growth regulator: Pruning paste (to prevent fungal entry into cuts).
- ● First-aid kit: For minor cuts or scrapes (always better to be prepared!).
Step-by-step guide to supporting tree branches safely
Here's how to reinforce branches without causing long-term harm to your tree.
🌿 Step 1: Assess the Branch and Choose the Right Support
Start by examining the branch you want to support. Look for signs of stress like cracks in the bark, splits in the wood, or leaning angles greater than 45 degrees. These are clear indicators that support is needed. For branches under 3 inches in diameter, flexible tree ties or soft straps work best. For thicker branches, consider using wooden stakes or metal supports.
I always avoid using wire or anything that can cut into the bark. The goal is to provide temporary support while the tree heals naturally. Measure the branch length and select a support that will reach at least 2/3 of its length—this ensures even distribution of weight and prevents further stress.
✂️ Step 2: Prepare the Branch and Support Materials
Before attaching anything, clean the branch surface with a damp cloth to remove dirt or debris. This helps the support material adhere better and reduces the risk of infection. If the branch has peeling bark or open wounds, apply a thin layer of tree wound dressing to protect it from pests or disease.
Cut your support materials to size. For tree ties, use 2-3 inch wide strips that won’t constrict as the branch grows. If using stakes, position them 6-12 inches away from the branch base—close enough to provide support but far enough to avoid damaging the trunk. I like to pre-drill small holes in wooden stakes to make installation easier later.
🪴 Step 3: Install Supports Without Damaging the Tree
Begin by securing the support at the branch’s thinnest point, usually near the trunk. Use soft padding like rubber sleeves or foam between the branch and any metal hardware to prevent rubbing injuries. For tree ties, wrap them in a figure-eight pattern, starting from the thickest part of the branch and working outward. Leave a 1/4 inch gap between the tie and the bark to allow for seasonal swelling.
If using stakes, attach them to the branch with non-metallic straps or zip ties (cut the plastic portion to prevent tightening over time). Angle the stakes outward from the branch to create a V-shape, which helps distribute weight more evenly. Double-check that the support isn’t too tight or too loose—you should be able to fit a finger between the branch and the support.
☀️ Step 4: Monitor and Adjust Supports Over Time
After installation, check the supports every 2-4 weeks during the growing season. Look for signs of constriction marks on the branch or loosened straps. Trees grow, so supports that felt snug at first may need adjusting. If a tree tie starts to dig into the bark, loosen it immediately—even slight pressure can restrict growth and invite disease.
Remove supports once the branch stabilizes, usually after 1-2 growing seasons. You’ll know it’s time when the branch holds its shape without assistance and new growth appears healthy. I always mark the removal date on my calendar so I don’t forget—leaving supports on too long can actually weaken the branch over time.
⏰ Step 5: Prune Strategically to Reduce Future Stress
While supporting the branch, take the opportunity to prune any dead, diseased, or crossing branches that might add unnecessary weight. Use clean, sharp pruning shears to make cuts at a 45-degree angle, just outside the branch collar. This encourages faster healing and reduces the risk of future stress points.
Focus on removing up to 25% of the tree’s canopy at a time to avoid shocking it. Thin out crowded branches first—this improves air circulation and reduces the weight load on individual limbs. After pruning, apply a light layer of mulch around the base to retain moisture and protect roots during recovery.
Tips & tricks for supporting tree branches safely
These practical insights will help you reinforce branches like a pro while keeping your tree healthy.
Support Selection: For branches under 3 inches in diameter, flexible tree ties are your best friend. They distribute weight evenly and won't damage the bark as the branch grows. I've found that 2-3 inch wide straps work perfectly—they're wide enough to prevent cutting but narrow enough to stay secure. If you're working with thicker branches, wooden stakes are ideal because they're sturdy yet gentle on the bark. Just remember to angle them outward in a V-shape to create proper support.
Installation Technique: When securing supports, always start at the branch's thinnest point near the trunk. This is where the branch is most vulnerable to splitting. I can't stress enough how important it is to use soft padding between the branch and any metal hardware—even a small amount of friction can create wounds that attract pests. The figure-eight wrapping pattern for tree ties isn't just decorative; it ensures even pressure distribution. And that 1/4 inch gap you should leave between the tie and bark? It's crucial for allowing seasonal swelling without constriction.
Monitoring Strategy: The 2-4 week check-ins during growing season are non-negotiable. I've seen perfectly installed supports fail because homeowners forgot to check them. Look for those telltale constriction marks or straps that have loosened over time. Trees grow, and what felt snug yesterday might be too tight today. A simple finger test between the branch and support will tell you everything you need to know about whether adjustments are needed.
Pruning Wisdom: While you're supporting the branch, don't miss the chance to prune away dead or crossing branches that add unnecessary weight. The 25% canopy rule is your guide—never remove more than that in one session. I've learned this the hard way: aggressive pruning can shock the tree more than the original branch issue. Always make your cuts just outside the branch collar at a 45-degree angle. This technique promotes faster healing and maintains the tree's natural shape.
Pro Tips for Support Tree Branches
- These practical insights will help you reinforce branches like a pro while keeping your tree healthy.
- Support Selection: For branches under 3 inches in diameter, flexible tree ties are your best friend.
- Installation Technique: When securing supports, always start at the branch's thinnest point near the trunk.
Frequently asked questions
Got questions about supporting tree branches to prevent damage? Here are some common concerns—and clear answers—to help you navigate the process with confidence.
When is the best time to support tree branches?
The ideal time to support branches is immediately after pruning or when you notice sagging, cracking, or signs of stress (like bark splitting). For young trees or storm-damaged limbs, act within 24–48 hours to prevent further harm. Avoid supporting branches during active growth seasons (spring/summer) unless absolutely necessary, as this can stress the tree.
What materials work best for supporting branches?
Use tree-specific supports like:
- Cable-and-pulley systems for large limbs (e.g., static or dynamic cables).
- Wooden or metal spreaders for smaller branches (e.g., V-shaped props).
- Tree straps or nylon slings to avoid girdling (use only for short-term support).
How do I tell if a branch needs support?
Watch for these red flags:
- Branches sagging more than 30–45 degrees from horizontal.
- Cracks or splits in the bark or wood (signs of structural failure).
- Branches rubbing against each other (causing bark damage).
- Visible leaning or uneven growth after pruning.
Can I remove support after a few months?
Yes, but timing is key! Remove supports gradually over 1–3 years, depending on the branch’s size and health. Start by loosening cables or props in spring and monitor for:
- New growth at the branch collar (sign of healing).
- No sagging or cracking when supports are removed.
What if my DIY support fails or damages the tree?
Don’t panic! If you notice:
- Girdling (strips of bark removed by straps/wire).
- Rotting at support points (from moisture buildup).
- Branch dieback after support.
Wrapping up and next steps
Supporting your tree branches through strategic pruning isn’t just about aesthetics—it’s about health, safety, and long-term growth. 🌳 By removing weak or overcrowded branches carefully, you prevent disease, encourage stronger structure, and protect your tree (and property!) from damage.
Think of it as a proactive investment in your tree’s future.
Ready to take action? Start small—inspect just one branch this weekend using the tools and techniques you’ve learned. Confidence grows with practice, and soon, you’ll be a pruning pro! For larger projects, don’t hesitate to consult an arborist. Your tree will thank you with years of vibrant, resilient growth.