
Flowers
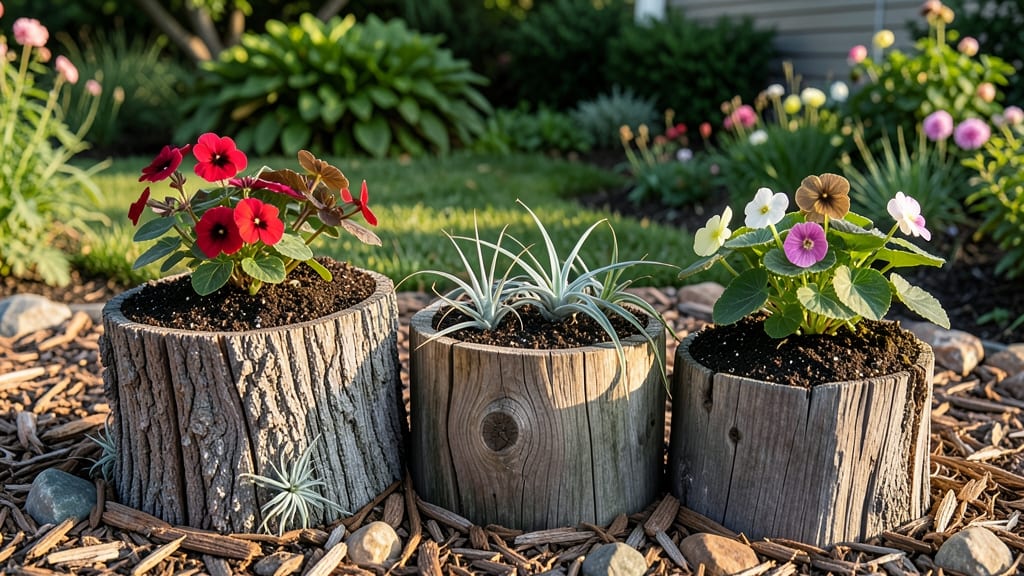
Transforming dead tree stumps into vibrant vertical gardens by planting flowers in the stumps can turn an eyesore into a stunning focal point. 🌸 I’ve turned three stumps in my backyard into cascading flower displays that draw bees and butterflies all summer—no one would guess they were once just wood.
The secret lies in the right flowers: trailing petunias, ferns, and impatiens thrive in the shallow soil, while perennials like heuchera add year-round color. A simple mix of potting soil and compost ensures moisture stays where it needs to be, and a slow-release fertilizer keeps blooms coming.
By midsummer, your stump garden will be a lush, fragrant masterpiece that adds height and texture to any space. The best part? It’s a project that takes just a weekend but pays off for years. Works in urban yards, patios, or even as a whimsical centerpiece for a wedding venue.
Let’s get those stumps blooming!
📚 In This Guide
- What you need
- Instructions
- Tips and common mistakes
- Wrapping up and next steps
What you need
- ● Tree stump: A clean, hollowed-out stump (at least 6–12 inches deep, wider than 4 inches). Pro tip: If the stump is still attached to the tree, remove it safely with a chainsaw or hire a professional.
- ● Potting soil: 1–2 bags (2–3 cubic feet total) of well-draining, peat-free potting mix (avoid garden soil—it compacts and holds too much moisture).
- ○ Moss or landscape fabric: A small roll (optional but helpful) to line the stump and prevent soil erosion.
- ● Small flowers or succulents: Choose compact, shallow-rooted varieties like: Miniature impatiens 🌸
- ● African violets 💜
- ● Sedum or hens & chicks (succulents) 🌵
- ● Ferns or mosses (for a lush, green look) 🍃
- ○ Mulch (optional): Cocoa fiber or shredded bark to retain moisture and suppress weeds.
- ● Chainsaw or stump grinder: For hollowing out the stump (or borrow one from a local hardware store).
- ● Trowel or small shovel: For scooping soil and planting.
- ● Spray bottle: To mist plants and keep them hydrated.
- ● Gloves & safety goggles: Always prioritize safety when working with power tools!
- ○ Drill & small holes (optional): For drainage if your stump isn’t naturally porous.
- ● A sunny or partially shaded spot (check your flower’s light needs!).
- ● Access to water (a hose or watering can nearby).
- ● Patience! Stumps dry out faster than garden beds—plan to water daily for the first week.
Step-by-Step guide to creating a stunning tree stump flower garden
Transforming a tree stump into a vertical garden is easier than you think—here's how to turn an old stump into a thriving flower display.
🪴 Step 1: Prepare the Tree Stump for Planting
Start by cleaning the stump thoroughly with a wire brush to remove any loose bark, debris, or old moss. This ensures your plants have direct contact with the wood and can establish roots properly. I like to use a stiff-bristled brush to scrub the entire surface, including the sides and top edges, until the wood looks clean and smooth.
Next, drill ¼-inch drainage holes every 4-6 inches around the stump's circumference. These holes allow excess water to escape and prevent root rot. Use a power drill with a wood bit—don't rush this step, as proper drainage is critical for long-term success. If the stump is very large, you can space the holes a bit farther apart, but smaller stumps need more frequent drainage points.
🌱 Step 2: Line the Stump with Moisture-Retaining Fabric
Cut a piece of landscape fabric large enough to wrap around the stump and cover the drilled holes completely. Secure it in place with staple guns or heavy-duty staples, ensuring no gaps remain where water could seep through. This fabric prevents soil from washing out while still allowing roots to penetrate and water to drain.
Here's the thing—don't skip this step. Without the fabric, soil will erode quickly, especially when you water the plants. I've seen stumps turn into muddy messes in just a few weeks without it. Once the fabric is secure, give it a quick spray with water to help it settle against the wood.
💧 Step 3: Fill the Stump with Lightweight Potting Mix
Fill the stump with a well-draining potting mix designed for containers. Avoid garden soil—it compacts easily and doesn't provide the aeration roots need. I like to use a mix that includes peat moss, perlite, and compost for the best results. Fill the stump to about 1 inch below the top edge, leaving room for your plants.
Press the soil down gently but firmly to eliminate air pockets. You want it compact enough to hold plants in place but still loose enough for roots to grow easily. Tap the stump lightly on the ground a few times to help settle the soil evenly. If the mix feels too dry after filling, give it a light misting to moisten it without oversaturating.
✂️ Step 4: Plant Your Flowers Strategically
Choose small, shallow-rooted flowers like impatiens, ferns, or creeping thyme for your stump garden. These plants thrive in vertical spaces and don't require deep soil. Start by making small holes in the soil with your fingers or a trowel—just deep enough to accommodate the roots of your plants.
Place each plant gently into its hole, then cover the roots with soil and press lightly to secure them. Space plants about 3-4 inches apart to allow room for growth. If you're using trailing plants like ivy or creeping jenny, position them toward the edges of the stump so they can spill over beautifully. Water each plant lightly after planting to help them settle into their new home.
☀️ Step 5: Water and Maintain Your Stump Garden
Water your stump garden deeply once a week, or more often if the weather is particularly hot or dry. Check the soil by sticking your finger about 1 inch deep—if it feels dry, it's time to water. Avoid overhead watering, which can cause soil to erode from the stump. Instead, use a watering can with a long spout or a gentle hose attachment to water at the base.
Feed your plants with a balanced, water-soluble fertilizer every 4-6 weeks during the growing season to keep them blooming beautifully. I like to use a 10-10-10 fertilizer diluted to half strength, applied directly to the soil. Mulch the top of the stump with orchid bark or shredded bark to help retain moisture and suppress weeds. This also gives your garden a finished, polished look.
Tips & tricks for perfect vertical stump gardens
Here's what I've learned from turning stumps into stunning vertical gardens—these tricks make all the difference.
Drainage is Non-Negotiable: In Step 1, when you're drilling those ¼-inch holes every 4-6 inches, I can't stress enough how critical this is. If you skip this or space them too far apart, your stump will become a soggy mess. For extra insurance, I add a few extra holes near the base where water naturally collects. This prevents root rot and keeps your plants thriving.
Fabric Placement Matters: Don't just wrap that landscape fabric around the stump—make sure it's tucked neatly into every hole and overlaps by at least 2 inches where the edges meet. I've seen fabric pull away after watering, leaving gaps that let soil escape. Secure it tightly with staples, then give it a final spray with water to help it stick to the wood before adding soil.
Soil Settling Secret: After filling your stump with that lightweight potting mix in Step 3, resist the urge to rush to planting. Let the soil settle for at least 15 minutes before pressing it down. This helps eliminate air pockets that could prevent roots from establishing properly. I tap the stump gently on the ground a few times to help compact it evenly—this small step makes a huge difference in plant stability.
Plant Placement Strategy: When arranging your flowers in Step 4, think about height and trailing habits. Place taller plants like impatiens toward the back of the stump (closest to the trunk) and trailing varieties like creeping jenny toward the edges. This creates a beautiful cascading effect that draws the eye. I like to make a quick sketch first to visualize the arrangement before planting.
Pro Tips for Planting Flowers In Tree Stumps
- Here's what I've learned from turning stumps into stunning vertical gardens—these tricks make all the difference.
- Drainage is Non-Negotiable: In Step 1, when you're drilling those ¼-inch holes every 4-6 inches, I can't stress enough how critical this is.
- Fabric Placement Matters: Don't just wrap that landscape fabric around the stump—make sure it's tucked neatly into every hole and overlaps by at least 2 inches where the edges meet.
Frequently asked questions
Got questions about turning tree stumps into blooming vertical gardens? Here are some of the most common ones—and their answers! Whether you're a beginner or just troubleshooting, we’ve got you covered.
Can I plant flowers in any tree stump?
Not all stumps work! Choose rotted or hollow stumps with soft wood—freshly cut stumps won’t hold moisture well. Avoid stumps with mold, pests, or chemical treatments (like herbicides). If your stump is solid, drill holes for drainage and soil retention.
When is the best time to plant flowers in a stump?
Spring or early fall are ideal! Plant in mild weather (50–75°F) to help roots establish before extreme heat or cold. Avoid winter planting—frost can damage young plants. If you’re in a warm climate, late winter works too.
What flowers work best in tree stumps?
Opt for compact, shallow-rooted varieties like sedum, ferns, moss, or small succulents. Avoid heavy bloomers (e.g., roses) or deep-rooted plants—they’ll struggle in limited space. Air plants (tillandsias) are also great for stumps with minimal soil.
Why aren’t my flowers growing in the stump?
Check these fixes:
- Poor drainage: Ensure holes are drilled or the stump isn’t waterlogged.
- Not enough soil: Pack moisture-retentive potting mix firmly around roots.
- Too much sun/shade: Match plants to your stump’s light conditions (e.g., ferns thrive in shade).
- Pests: Inspect for bugs—spray with neem oil if needed.
What if I don’t want to use a tree stump? What are alternatives?
No stump? No problem! Try these vertical garden hacks:
- Pallet gardens: Stack wooden pallets and fill with soil.
- Hanging planters: Use fabric pockets or macramé hangers.
- DIY planter boxes: Repurpose old ladders, boots, or even bicycle wheels!
- Living walls: Mount a frame with pockets for small plants.
Wrapping up and next steps
Transforming old tree stumps into vibrant flower beds is a creative, eco-friendly way to breathe life into small spaces—and you’ve got all the tools to make it happen! 🌸 Whether you’re a gardening pro or a curious beginner, this project adds beauty, sustainability, and a touch of whimsy to your yard.
Now that you’re armed with tips and answers, grab that stump and get planting! Next, snap a photo of your blooming masterpiece and share it with fellow gardeners—inspiration spreads like wildflowers!