
Pruning
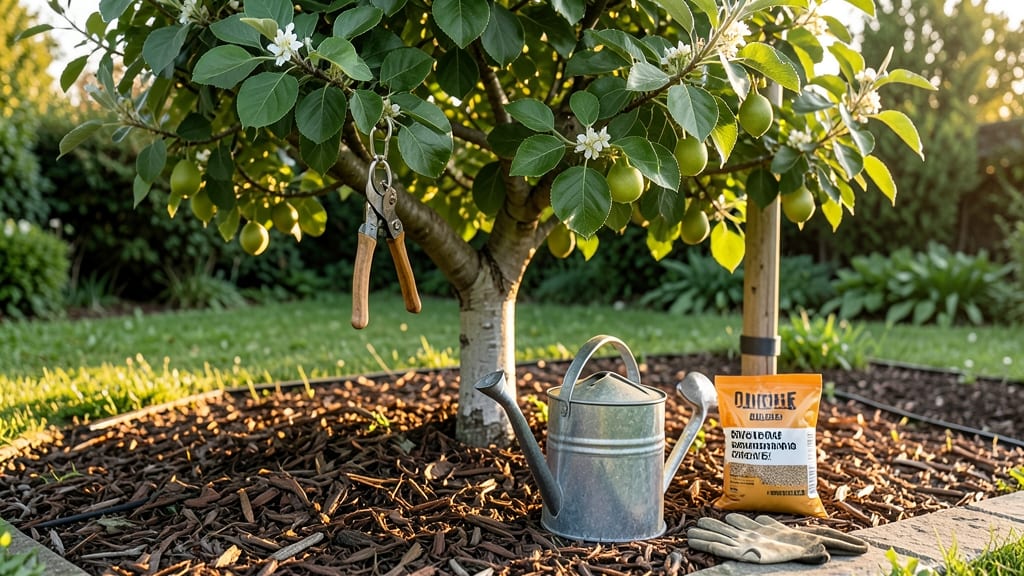
Pear tree care and maintenance this winter will determine whether your first harvest is a bust or a bounty. ✂️ I’ve watched my own tree go from a tangled mess to a productive powerhouse by following a simple seasonal calendar—one that balances fruit production with long-term health. The key isn’t just cutting branches; it’s timing cuts to match the tree’s natural growth cycles, and I’ll show you exactly when and how.
Most gardeners prune once in late winter, but pears need three strategic cuts: a cleanup in late winter to shape the tree, a light thinning in early summer to improve airflow, and a final adjustment in fall to prepare for dormancy.
You’ll also learn how to spot water sprouts (those fast-growing vertical shoots) and remove them before they drain energy from fruit production. The goal is a tree that’s open enough for sunlight to reach every cluster but sturdy enough to support heavy fruit.
By the end of your first season, you’ll have a tree that bears larger, sweeter pears with fewer diseases and fewer broken branches. The pruning calendar accounts for different pear varieties—some bloom early, others late—and adjusts for your climate zone.
Even if you’ve never pruned before, this method works for both organic and conventional growers, with tools you likely already own.
We’ll also cover when to fertilize, how to handle pests like codling moths, and what to do if your tree suddenly drops leaves. The best part?
Once you master the calendar, you’ll spend less time pruning and more time enjoying the harvest. Let’s get your tree in shape for next year’s crop.
📚 In This Guide
- What you need
- Instructions
- Tips and common mistakes
- Wrapping up and next steps
What you need
- ● Pruning shears: Bypass pruners (4–6 inches) for small branches (Pro tip: Sharpen annually for clean cuts! ✨
- ● Loppers: 8–10 inches for medium branches (1–2 inches). Look for ratcheting or bypass types.
- ● Pruning saw: Curved-tooth saw for thick branches (2+ inches). Disinfect with rubbing alcohol between cuts to prevent disease. 🧼
- ● Gloves: Heavy-duty, cut-resistant gloves (e.g., mechanics’ gloves or gardening gloves with Kevlar).
- ● Ladder: Sturdy, extendable ladder (16+ feet) for tall trees. Safety first! Use stabilizers or a helper.
- ○ Pruning sealant: Optional but helpful for large cuts (>2 inches). Choose a latex- or asphalt-based product.
- ● Disposable pruning bags: 3–5 gallon bags for collecting debris (or a tarp + rope).
- ● Winter (Dormant Season): Marking paint: White or silver paint for tagging cuts (helps track healing progress).
- ● Tarp or drop cloth: 10x12 feet to protect ground from sawdust/debris.
- ● Spring/Summer (Post-Harvest): Fertilizer: Balanced 10-10-10 or organic compost (5–10 lbs per tree).
- ● Mulch: 2–4 inches of wood chips or straw (keep 6 inches away from trunk).
- ● 🔧 Toolkit: Keep a small caddy with extra blades, oil, and a multi-tool for quick adjustments.
- ● 🌡️ Weather check: Prune on dry, cool days (avoid frost or rain within 24 hours).
- ● 🎯 Safety gear: Add eye protection and earplugs if using a chainsaw (for aggressive pruning).
Step-by-Step instructions for pruning and maintaining a pear tree
Here's the straightforward seasonal approach I use to keep my pear trees healthy and productive.
✂️ Step 1: Prune for Structure in Late Winter (Before Bud Break)
Start your pruning in late winter when the tree is still dormant but just before buds begin to swell. This is the ideal time because you can see the tree's structure clearly, and it minimizes stress on the tree. Remove any dead, diseased, or crossing branches first—these are your top priorities.
Next, focus on opening up the center of the tree by cutting back branches that grow inward. Aim to create an open vase shape that allows sunlight and air to reach the center. I like to make cuts just outside a bud that faces outward—this encourages new growth in the right direction. Use clean, sharp pruners to avoid tearing the bark.
☀️ Step 2: Thin Out Fruit Spurs in Early Spring (After Bloom)
Once the tree has finished blooming but before the fruit sets, it's time to thin out fruit spurs. Pears grow best when they're not overcrowded, so remove about one-third of the fruit clusters to ensure the remaining pears grow larger and healthier. Look for clusters that are small, weak, or poorly positioned—these are the first to go.
I like to leave one or two pears per spur to give them room to grow. This step is crucial because overcrowded fruit leads to smaller, lower-quality pears. If you're unsure which to remove, err on the side of fewer pears—they'll thank you with better size and flavor later.
🌿 Step 3: Monitor Growth and Remove Water Sprouts in Summer
Throughout the summer months, keep an eye out for water sprouts—these are fast-growing, vertical shoots that steal energy from the tree. Remove them as soon as you spot them, cutting them back to a bud or lateral branch. These sprouts rarely produce fruit and can weaken the tree's structure.
Also, check for any diseased or pest-infested branches and prune them immediately. Summer is a great time to do light maintenance pruning to keep the tree looking tidy and encourage healthy growth. Just avoid heavy pruning in summer—it can stress the tree and make it more susceptible to disease.
⏰ Step 4: Final Cleanup in Early Fall (Before Dormancy)
In early fall, do a final check for any dead, broken, or diseased branches that may have appeared during the growing season. Remove them to keep the tree healthy as it prepares for winter. This is also a good time to thin out any remaining fruit that didn't develop properly during the season.
After pruning, give the tree a deep watering to help it recover from any stress. Apply a layer of mulch around the base (but not touching the trunk) to protect the roots from temperature fluctuations. This final step sets your pear tree up for a strong, productive next season.
Tips & tricks for perfect pear tree maintenance
I learned these pruning secrets after years of trial and error—your tree will thank you for these simple adjustments.
Tool Prep is Everything: Before you start, sharpen your pruners and sterilize them with rubbing alcohol. Dull tools tear bark, inviting disease, and dirty blades spread infection between cuts. I keep a small bottle of alcohol in my toolbox for quick sanitizing between trees—it's a game-changer for preventing fungal issues.
Bud Direction Matters: When making cuts in Step 1, visualize the tree's growth pattern. Always cut just outside a bud that faces outward—this ensures new branches grow away from the center, maintaining that open vase shape. I mark potential cuts with a piece of tape before making them to avoid guesswork.
Summer Pruning Strategy: During summer maintenance in Step 3, focus on removing water sprouts immediately rather than waiting. These vertical shoots grow aggressively and can completely alter your tree's shape if left unchecked. I check my trees every two weeks during peak growing months to stay ahead of this problem.
Mulch Depth Wisdom: In Step 4, apply mulch to a depth of 2-3 inches—any deeper can suffocate roots. Keep it 6 inches away from the trunk to prevent rot. I use shredded bark mulch because it breaks down slowly and improves soil structure over time.
Pro Tips for Pear Tree Care And Maintenance
- I learned these pruning secrets after years of trial and error—your tree will thank you for these simple adjustments.
- Tool Prep is Everything: Before you start, sharpen your pruners and sterilize them with rubbing alcohol.
- Bud Direction Matters: When making cuts in Step 1, visualize the tree's growth pattern.
Frequently asked questions
Got questions about keeping your pear tree thriving? Here are some of the most common concerns—and their straightforward answers—to help you care for your tree like a pro!
When is the best time to prune a pear tree for fruit production?
The ideal time to prune pear trees is late winter or early spring (just before buds swell but before leaves emerge). This timing promotes healthy growth and maximizes fruit yield. Avoid heavy pruning in fall, as it can stimulate new growth vulnerable to frost damage. Pro tip: Light maintenance pruning (removing dead or crossing branches) can be done in summer if needed!
How much should I trim a young pear tree each year?
For young pear trees (under 3 years old), aim to remove no more than 20-25% of the foliage per year. Focus on:
- Opening the center for airflow ()
- Removing water sprouts or suckers
- Shaping the tree to encourage a strong structure
Why aren’t my pear trees producing fruit, even after pruning?
Several factors could be at play:
- Age: Pear trees often take 3-5 years to bear fruit after planting.
- Pollination: Many pears require cross-pollination from another variety (check your tree’s needs!).
- Nutrients: Poor soil or lack of fertilizer (like nitrogen or potassium) can stunt fruit production.
- Disease/Pests: Check for signs of fire blight or borers, which can weaken the tree.
Can I prune a pear tree in summer, and if so, how?
Yes! Summer pruning (June-July) is great for:
- Removing sucker growth (vigorous shoots from the base)
- Thinning out dense foliage to improve airflow
- Correcting shape after winter pruning
What’s the difference between “heading back” and “thinning out” pruning?
| Heading Back () | Thinning Out () |
|---|---|
| Cutting back a branch to a bud or lateral shoot to encourage bushier growth or more fruiting spurs. | Removing an entire branch back to its point of origin to open the canopy and reduce crowding. |
| Best for: Shaping young trees or stimulating new growth. | Best for: Improving airflow, reducing disease risk, and promoting larger fruit. |
Wrapping up and next steps
Caring for your pear tree is a rewarding journey that blends patience with purpose—each season’s pruning, feeding, and attention unlocks sweeter fruit, stronger growth, and a stunning landscape centerpiece. 🌳✨ Whether you’re a first-time grower or a seasoned gardener, following this seasonal trimming calendar keeps your tree thriving while minimizing stress. Now’s the perfect time to grab your pruners and get started!
Ready to transform your pear tree into a bountiful, beautiful asset? Bookmark this guide, mark your calendar, and take the first step this season—your future harvest will thank you!