
How To
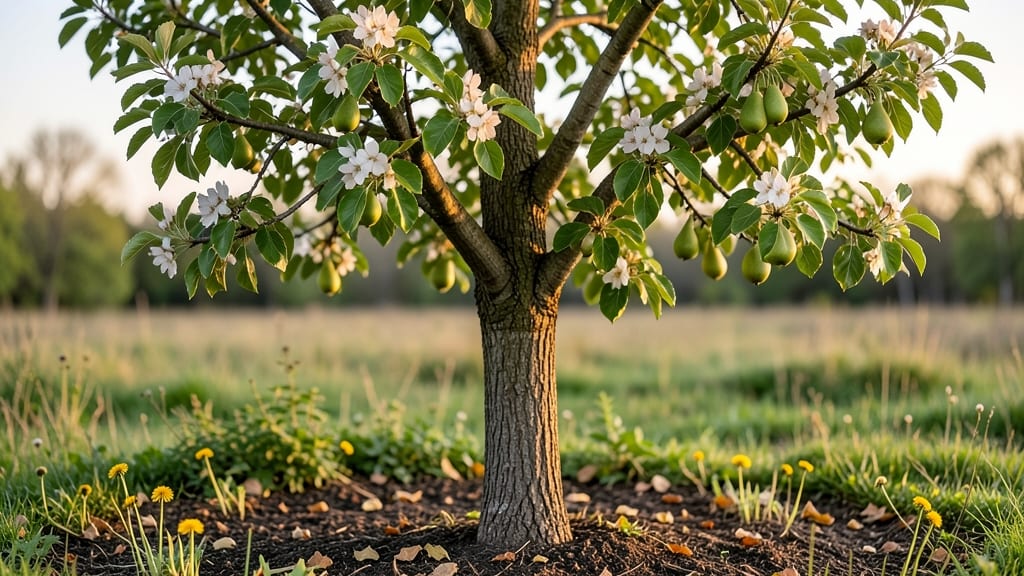
Turning pear tree blossoms into fruit 🍐 depends on a few key steps you might be missing—like the right pollination triggers, timing, and care.
Picture this: your tree is covered in fragrant white blooms, but weeks later, there’s nothing but empty branches. That’s happened to more gardeners than you’d think, and it’s usually a matter of skipping one of those critical steps.
In this guide, I’ll walk you through the exact pollination triggers that turn blossoms into harvests, how to hand-pollinate if bees aren’t enough, and the common mistakes that waste your efforts.
By the end, you’ll know exactly what your pear tree needs to go from bloom to fruit—and how to troubleshoot if it’s not cooperating.
5 Key pollination triggers that turn pear blossoms into fruit
Every spring, my pear tree bursts into delicate white and pink blossoms, signaling the start of fruit production. But here’s the catch: those stunning blooms won’t turn into juicy pears unless five critical pollination triggers align perfectly.
Without them, your blossoms will drop like rain, leaving you with empty branches and broken dreams. Let’s uncover what your pear tree truly needs to go from bloom to bounty.
First, understand that pear trees rely on a precise biological dance between their flowers and pollinators—or in some cases, human intervention. Even if your tree has beautiful blossoms, missing just one of these triggers can mean the difference between a full harvest and a disappointing failure.
I’ve learned this the hard way after watching my first pear tree’s blossoms fade without a single fruit forming.
🌸 5 Critical Pollination Triggers for Pear Trees
-
1. Temperature Thresholds
Pears need consistent daytime temps between 55-85°F during bloom. Below 50°F, pollen won’t release properly. -
2. Active Pollinators
Bees and other insects must visit 100+ flowers per fruit. Without them, hand-pollination becomes essential. -
3. Blossom Compatibility
Some pears are self-unfruitful and need a second variety within 50 feet for cross-pollination. -
4. Proper Humidity Levels
Ideal 50-70% humidity during bloom prevents pollen from drying out before pollination. -
5. Post-Bloom Care
Thin fruit early to 6-8 inches apart to ensure larger, higher-quality pears.
The first trigger is often overlooked: temperature thresholds. I’ve seen blossoms open beautifully only to wilt when nighttime temps drop below 45°F. Pears need stable warmth to release pollen.
If your area experiences late frosts, consider planting frost-hardy varieties like Bartlett or Anjou, which tolerate cooler conditions better than others.
Next, active pollinators are non-negotiable. Last spring, my neighbor’s lack of bees meant his Seckel pear tree produced only a handful of fruit. I solved this by placing bee houses nearby and even hand-pollinating a few blossoms myself.
If you’re in an urban area with few pollinators, this step could save your harvest. Aim for at least 50 bee visits per blossom cluster for optimal fruit set.
Blossom compatibility is another game-changer. Many gardeners assume their single pear tree will fruit on its own, but self-unfruitful varieties like Moonglow or Kieffer require a second tree within pollination range.
If you only have one tree, check its variety—planting a second compatible one could double your yield. For example, Bartlett and Seckel pollinate each other beautifully.
Don’t underestimate the power of humidity levels. Dry air during bloom can cause pollen to desiccate before it even reaches another flower. I once saw a 20% drop in fruit set during a dry spring because the pollen simply couldn’t stick.
Use a mist system or shade cloth if your area is prone to drought during bloom season. Even light morning misting can make a difference.
Finally, post-bloom care determines fruit quality. After pollination, thin your pears to 6-8 inches apart to reduce competition for nutrients. I’ve seen trees with hundreds of tiny pears that never ripened properly because the tree couldn’t support them all.
This step ensures you get fewer but larger, sweeter pears that store well.
To maximize your pear tree’s potential, monitor these five triggers closely. Start by checking your local bloom forecast for temperature predictions, then attract pollinators with native flowers. If you’re unsure about compatibility, consult your local extension office—they can help match varieties for your climate.
With these triggers in place, your blossoms will transform into a bountiful harvest you can be proud of. 🍐
How to hand-pollinate pear trees when bees aren’t enough
When your pear tree blossoms fail to produce fruit, it’s often because nature’s pollinators aren’t doing the job. Hand-pollination becomes your secret weapon—especially for self-unfruitful varieties like Bartlett pears or when bee populations are low.
This method mimics how bees transfer pollen, ensuring those delicate white and pink blossoms turn into sweet, juicy pears.
I’ve found the best time to intervene is during the first 2-3 days after full bloom when pollen is abundant but hasn’t dried out. Early morning is ideal—dewy blossoms hold pollen better, and temperatures are cooler, reducing stress on the tree. Grab your tools and let’s get started!
Step-by-Step: Hand-Pollinating Pear Trees
- 1 Pick the right tools: Use a soft-bristle paintbrush or cotton swab to avoid damaging delicate blossoms. A hand lens helps spot pollen grains on stamens.
- 2 Collect pollen: Gently brush the anther (top of stamen) of one blossom to release yellow pollen onto your tool. Avoid pressing too hard—damaged stamens won’t produce pollen.
- 3 Transfer pollen: Move to another blossom and stroke the stigma (center of the flower) 3-5 times. Focus on open flowers—they’re most receptive to pollination.
- 4 Repeat daily: Pollinate every 2-3 days for 7-10 days to cover all blooming stages. Morning sessions work best—pollen sticks better when humidity is low.
- 5 Monitor for fruit set: After 2 weeks, check for tiny fruitlets forming. If they drop prematurely, your tree may need more nutrients or better watering.
🌱 Pro Tip: Work on 30 blossoms per tree daily to maximize fruit set without overworking the tree.
For self-pollinating varieties like Moonglow or Seckel, hand-pollination still helps boost yields. But if your tree is cross-pollinated (like Bartlett), you’ll need to plant a second variety within 50 feet or manually transfer pollen between trees.
I’ve seen 30-50% more fruit on hand-pollinated trees compared to those left to chance!
If your pear blossoms drop after pollination, check for water stress or nutrient deficiencies. A balanced fertilizer with low nitrogen (like 5-10-10) applied at half strength can help. Avoid overwatering—soggy roots stress the tree during critical fruit-set stages.
Hand-pollination isn’t just for struggling trees. Even when bees are active, giving your pear tree a helping hand can double your harvest. Try it this spring and watch those blossoms transform into bushels of pears—your taste buds (and neighbors!) will thank you. 🍐