
Pruning
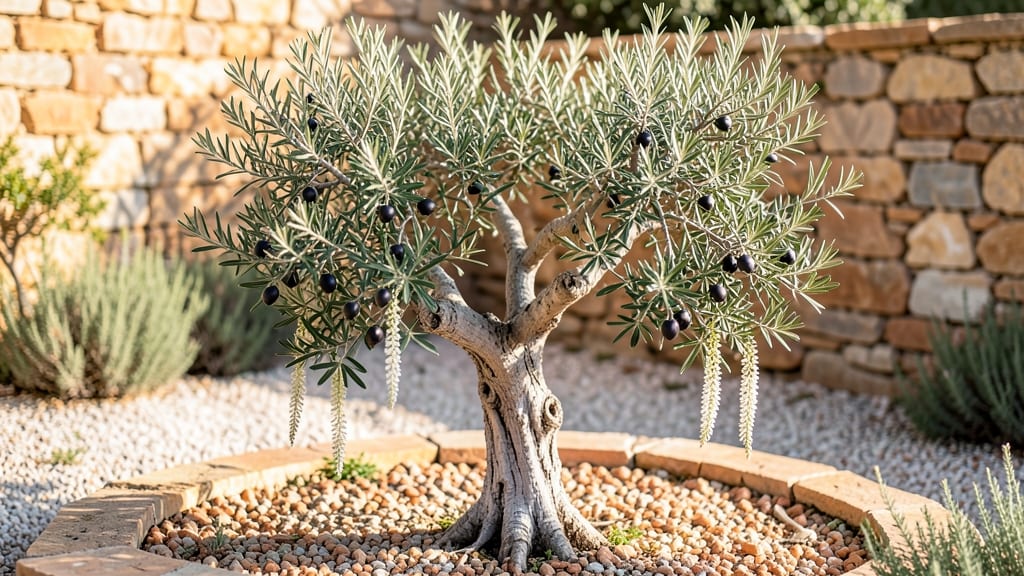
Transforming your olive tree into a living work of art starts with a single cut—but the right ones. ✂️ I’ve shaped olive trees into everything from dramatic espalier arches to intricate topiary spheres, and the secret isn’t just in the pruning, it’s in the timing and technique that keeps the tree healthy while stunning.
The key to sculpted elegance lies in gradual shaping, never more than 25% of the tree’s foliage in one season. Olive trees respond best to late winter pruning when they’re dormant, and using sharp, clean tools prevents tearing that invites disease.
Think of each cut as a brushstroke—too aggressive, and you’ll sacrifice next year’s growth. By summer, you’ll see your design come alive with dense, glossy foliage framing your garden like a living sculpture.
The right shape not only enhances beauty but also improves airflow and sunlight penetration, keeping your tree thriving for decades. Whether you’re going for a classic topiary ball or a modern geometric design, the principles stay the same.
Let’s get those shears ready and turn your olive tree into the centerpiece of your outdoor space!
📚 In This Guide
- What you need
- Instructions
- Tips and common mistakes
- Wrapping up and next steps
What you need
- ● Pruning shears: Bypass pruners (sharp, 6–8" blades) for clean cuts on small branches.
- ● Loppers: 8–12" loppers for thicker branches (up to 1.5" diameter).
- ○ Pruning saw: Curved-tooth saw for stubborn, larger limbs (optional but handy for mature trees).
- ● Rubbing alcohol (70%+) or bleach solution: 1 part bleach to 9 parts water to sterilize tools between cuts.
- ● Garden twine or soft ties: ¼" wide, natural jute or plastic-coated twine to secure branches during shaping.
- ● Plant ties or Velcro straps: For temporary support if training young branches.
- ● Gloves: Heavy-duty gardening gloves (cut-resistant if working with thorns).
- ● Notebook & pencil: To sketch your design and track progress.
- ● Timing: Prune in late winter or early spring (dormant season) for best results. Avoid heavy pruning during fruiting season.
- ● Healthy tree: Ensure your olive tree is pest-free and disease-resistant before shaping.
- ○ Support structure (optional): Trellis, wires, or stakes for espalier or fan-shaped designs.
- ● PVC pipes or wooden frames for candelabra or standard shapes.
- ○ Wound sealant (optional): Pruning sealant for large cuts (controversial—some gardeners skip it for olive trees).
- ● Reference images: Print or save photos of your desired olive tree shape for inspiration!
Step-by-step guide to shaping an olive tree with precision
Here's how I transform wild, unruly growth into a graceful, sculpted olive tree—without harming the plant.
✂️ Step 1: Assess the Tree's Natural Structure
Start by examining your olive tree's existing branches. Look for the main trunk and identify the 3-5 strongest primary branches—these will form your tree's skeleton. I always begin by sketching a rough outline of my vision, marking where I want each branch to extend. This prevents impulsive cuts that can weaken the tree.
Check for dead or crossing branches—these compete for energy and should go first. Run your hand along each branch to feel for smooth bark (healthy) versus rough, cracked areas (dying). Note where branches grow too close together—these will need thinning to improve airflow and sunlight penetration.
☀️ Step 2: Prune for Light and Airflow
Remove 20-30% of the tree's foliage in the first session to avoid shocking it. Start with dead or diseased branches using clean, sharp pruners. Make cuts just outside the branch collar—the raised area where the branch meets the trunk—to prevent unsightly stubs. I always cut at a 45-degree angle for branches thicker than ½ inch.
Next, thin out crossing or rubbing branches that grow toward each other. These will eventually damage each other's bark. For branches growing inward, cut back to a side branch or bud facing outward. Step back frequently to visualize how light will now reach the center—this is the moment that matters. Olive trees need 6+ hours of sunlight daily, so ensure no dense clusters block light.
🌿 Step 3: Shape the Canopy Gradually
Olive trees respond best to gradual shaping over multiple sessions. In early spring, focus on reducing branch length by cutting just above a leaf bud or lateral branch. Avoid cutting into old wood—olives struggle to regrow from mature branches. For a rounded silhouette, trim outer branches slightly shorter than inner ones to encourage fullness.
Here's the thing—olives grow slowly, so patience is key. I never remove more than ⅓ of a branch's length in one session. After each cut, step back to check the balance. The goal is a natural taper—wider at the base, narrower at the top. Use hand pruners for small branches and loppers for anything thicker than ¾ inch.
⏰ Step 4: Time Pruning for Optimal Growth
Prune olive trees dormant in late winter or early spring (just before buds swell) for the best results. Avoid heavy pruning in summer or fall—new growth won't harden off before winter, leaving branches vulnerable to cold damage. I make light maintenance cuts in late spring or early summer to shape new growth, but never more than 10% of the tree's foliage at once.
Watch for new growth flushes after pruning—this tells you the tree is responding well. If you see yellowing leaves or wilting within days, you've pruned too aggressively. In that case, reduce watering slightly and avoid further cuts until the tree recovers. Olive trees are tough but not invincible—over-pruning stresses them and invites pests.
🪴 Step 5: Maintain Shape Through the Year
After the initial shaping, perform light touch-ups every 6-8 weeks during the growing season. Focus on removing suckers (shoots growing from the trunk or roots) and pinching back overly vigorous branches. Use your fingers to pinch new growth when it's still tender—this encourages bushier growth without scarring the tree.
Real talk: olive trees grow 6-12 inches per year, so shaping is an ongoing process. I schedule a full inspection in late winter to plan the year's pruning strategy. Pay attention to how branches fill out—if one side looks sparse, you may need to reduce competing branches on the opposite side to redirect energy. A well-shaped olive tree should look balanced and full, not lopsided or bare in spots.
Tips & tricks for perfect olive tree shaping
Here’s what I’ve learned after years of sculpting olive trees—these little details make all the difference between a messy hack and a graceful, healthy tree.
Tool Selection Matters: Never use dull pruners—they crush branches instead of cleanly cutting them. I invest in high-quality bypass pruners for small branches and loppers for anything thicker than ¾ inch. Sharp tools make precise cuts that heal faster and reduce the risk of disease. Clean your tools with rubbing alcohol between cuts to prevent spreading any potential infections from diseased branches.
Step Back to Visualize: After every major cut, step back 5-10 feet to assess the tree’s balance. This is where I catch mistakes before they become permanent. Look for symmetry in the canopy—if one side looks heavier, you may need to trim back a few branches on that side to redirect growth. The goal is a natural taper, not a perfectly symmetrical tree that looks unnatural.
Seasonal Timing is Everything: The instructions mention pruning in late winter/early spring, but here’s the real secret: the exact timing depends on your climate. In warmer regions, you can start shaping as early as late January, while cooler zones should wait until buds begin to swell. If you must prune in summer, do it early in the morning to reduce water loss, and never remove more than 10% of the foliage at once. Olive trees are tough, but they’ll thank you for respecting their natural rhythms.
Watch for Stress Signals: After pruning, monitor your tree closely for the first week. Yellowing leaves or wilting can signal over-pruning, while new growth flushes (tiny green shoots) confirm the tree is happy. If you see excessive sap oozing from cuts, you’ve cut into the wrong place—this is a sign you need to adjust your technique. A little stress is normal, but too much will weaken the tree and make it vulnerable to pests.
Pro Tips for Olive Tree Shaped
- Here’s what I’ve learned after years of sculpting olive trees—these little details make all the difference between a messy hack and a graceful, healthy tree.
- Tool Selection Matters: Never use dull pruners—they crush branches instead of cleanly cutting them.
- Step Back to Visualize: After every major cut, step back 5-10 feet to assess the tree’s balance.
Frequently asked questions
Got questions about sculpting your olive tree into a stunning, olive tree-shaped masterpiece? You’re in the right place! Here are answers to the most common queries—from pruning timing to troubleshooting—so you can shape with confidence.
When is the best time to prune an olive tree into a specific shape?
Prune your olive tree in late winter or early spring (just before new growth starts) for the best results. Avoid heavy pruning in summer or fall, as the tree may struggle to heal. For dramatic shaping, like a olive tree-shaped silhouette, spread cuts over 2–3 years to avoid stressing the tree.
How do I know if I’m cutting too much at once?
If you remove more than 25–30% of the tree’s foliage in a single session, you risk shock or disease. Look for signs like yellowing leaves, slow regrowth, or brittle branches—these mean you’ve over-pruned. For a olive tree-shaped design, prioritize gradual thinning over aggressive cuts.
Can I shape a young olive tree differently than a mature one?
Young trees (under 3 years) are highly flexible—train them with gentle, frequent pruning to guide growth. Mature trees require strategic cuts to maintain structure without harming the trunk. For both, use sharp tools and seal larger wounds with pruning paste to prevent decay.
What if my olive tree isn’t responding to shaping?
Check for underlying issues like pests (e.g., scale insects), nutrient deficiencies (yellow leaves = nitrogen lack), or root stress. If the tree is healthy but slow to adapt, try lightweight shaping and fertilize with a balanced 10-10-10 mix. Patience is key—some olive varieties grow slower than others!
Are there alternatives to a traditional olive tree shape?
Yes! Try a formal hedge, espalier (flat against a wall), or even a miniature bonsai-style olive tree. For a olive tree-shaped twist, experiment with curved canes or layered tiers. Just ensure cuts align with the tree’s natural growth patterns to avoid stress.
Wrapping up and next steps
Shaping an olive tree into a work of art is all about patience, precision, and passion—and you’ve got the tools to make it happen! 🌿 Whether you’re crafting a formal espalier, a whimsical topiary, or a classic vase shape, every cut brings you closer to a stunning, functional centerpiece for your garden.
Remember, the key is to observe, trim gradually, and celebrate small victories along the way.
Ready to take the next step? Grab your pruners, sketch your vision, and start shaping today—your olive tree (and future bragging rights) will thank you! 🌟 For inspiration, snap photos of your progress or research classic olive tree designs to refine your technique over time.