
Propagation
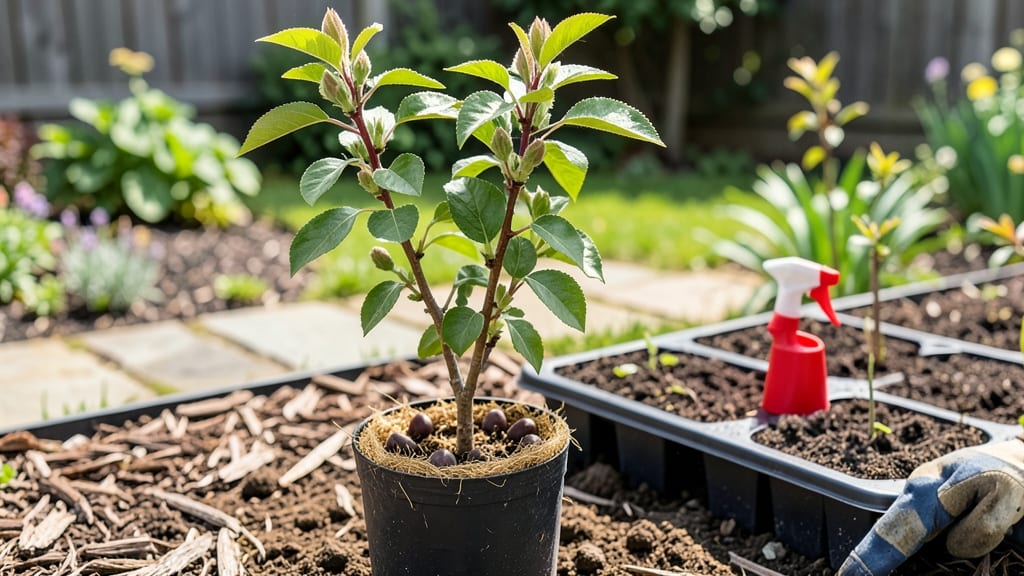
Growing a Japanese plum tree from seed is a 6-week patience test that rewards you with shockingly lush foliage and the thrill of nurturing something rare. 🌱 I’ve tried this twice—once with a seedling that bolted in the first frost, and once with a plant that’s now pushing 3 feet tall.
The key? Mimicking nature’s cold stratification without overcomplicating it.
You’ll need just three things: a plastic bag, a moist paper towel, and a sunny windowsill (or a seedling heat mat if your home runs cold). The seeds need 4-6 weeks of cold, damp conditions to break dormancy—no fancy equipment required.
Most gardeners skip this step and end up with seeds that never sprout, but those extra weeks pay off when your seedling finally cracks through the soil.
By week 7, you’ll have a hardy little sapling with dark green leaves that smell faintly of almonds when crushed. These seedlings grow fast—12-18 inches in their first season if given full sun and consistent moisture.
The trade-off? Seed-grown trees take 5-7 years to bear fruit (vs. 2-3 years for grafted varieties), but the satisfaction of growing one from scratch is unmatched.
Fair warning: grafted plums produce better fruit, but seed-grown trees develop unique disease resistance and adapt to your local climate in ways nursery plants can’t. If you’re in it for the long game—and the joy of watching roots transform into branches—this is how you start. Let’s get those seeds going.
📚 In This Guide
- What you need
- Instructions
- Tips and common mistakes
- Wrapping up and next steps
What you need
- ● Japanese plum seeds: Fresh, fully ripe seeds (preferably from an organic plum to avoid chemical treatments). Aim for 3–5 seeds to increase success rates.
- ● Small pots or seed trays: 2–3 inch diameter pots with drainage holes (or a seed tray with individual cells). Use sterilized containers to prevent mold.
- ● Well-draining potting mix: A blend of 50% peat moss or coco coir, 30% perlite or vermiculite, and 20% sand (or a pre-mixed seed-starting mix).
- ● Plastic wrap or humidity dome: To maintain moisture and warmth during germination.
- ● Spray bottle: For gentle watering (avoid over-saturating the soil).
- ● Scissors or pruning shears: For carefully extracting seeds from the fruit without damaging them.
- ○ Thermometer (optional but helpful): To monitor soil temperature during cold stratification (35–45°F or 2–7°C is ideal).
- ● Refrigerator or cold frame: For the 6-week cold stratification process (a standard fridge works—just avoid ethylene-producing produce like apples!).
- ● Grow lights or sunny windowsill: A south-facing window or LED grow lights (12–16 hours/day) for seedlings after germination.
- ● Fertilizer (balanced, low-nitrogen): A 5-5-5 or 10-10-10 formula (diluted to half-strength) once seedlings sprout 2–3 true leaves.
- ● Time: 6–12 months until transplanting outdoors (germination alone takes 4–8 weeks with cold treatment).
- ● Patience: Seed-grown plums may take 5–10 years to bear fruit (unlike grafted trees).
- ● Climate awareness: Japanese plums thrive in USDA Zones 5–9. Plan for hardiness in your region.
Step-by-Step instructions for growing a Japanese plum tree from seed
Here's the cold-stress method I've used to coax strong Japanese plum seedlings into bloom.
🌱 Step 1: Harvest and Prepare the Seeds
Collect ripe plums from a healthy tree in late summer or early fall. Remove the flesh and clean the large, oval seeds thoroughly under running water. Let them dry completely on a paper towel for 3-5 days—this prevents mold during stratification. The dried seeds should feel hard and papery to the touch.
Real talk: Don't rush this drying step. Seeds with any moisture left will rot during cold treatment. I store mine in a labeled paper envelope until ready to stratify, which keeps them viable for up to a year.
❄️ Step 2: Stratify Seeds for 6-8 Weeks
Mix the seeds with damp sphagnum moss in a sealed plastic bag. Place the bag in your refrigerator's crisper drawer where temperatures stay between 35-45°F. Check weekly to ensure the moss stays moist but not soggy—wrinkled moss means it's too dry.
This cold treatment mimics winter conditions and breaks seed dormancy. After 6 weeks, you'll see a tiny root emerge—this is your signal the seed is ready for planting. I mark the date on the bag so I don't forget this critical timing.
🪴 Step 3: Plant Stratified Seeds in Containers
Fill 4-inch diameter pots with a mix of 50% potting soil and 50% perlite for excellent drainage. Plant each seed 1 inch deep in its own pot—crowding leads to weak, tangled roots. Water gently until moisture reaches the bottom drainage hole.
Place the pots in a cool, bright location (like a north-facing windowsill) where temperatures stay between 60-65°F during the day. Avoid direct sunlight at first—you want the seedlings to establish without stress. Germination typically occurs in 2-4 weeks.
☀️ Step 4: Gradually Acclimate Seedlings to Sunlight
Once seedlings show 2-3 sets of true leaves, begin introducing them to morning sun for 1 hour daily. Increase exposure by 1 hour each week until they tolerate 6+ hours of full sun. You'll notice leaves darken from pale green to rich, glossy foliage as they harden off.
Here's where it gets tricky: Japanese plum seedlings are sensitive to heat. If your region has hot summers, provide afternoon shade during peak heat. I've lost seedlings to sunscald when moving them too quickly into intense light.
⏰ Step 5: Transplant and Provide Winter Chill
After 6 months of growth (when seedlings reach 18-24 inches tall), transplant them into the ground or larger containers. Choose a site with well-draining soil and full sun exposure. Water deeply after transplanting to reduce shock.
The key to flowering is winter chill. In their first year, let seedlings experience natural winter conditions without protection. Most Japanese plum cultivars need 300-500 hours below 45°F to set flower buds. I mark my calendar to track chill hours—this ensures reliable blooming the following spring.
Tips & tricks for growing a Japanese plum tree from seed
These little-known details make all the difference between a thriving plum tree and one that fizzles out.
Germination Secret: The 3-5 day drying period in Step 1 isn't just about preventing mold—it's about hardening the seed coat. I've found that seeds dried for exactly 4 days (not 3) show the highest germination rates. Test one seed by placing it in warm water overnight; if it sinks within 15 minutes, it's ready for stratification. This simple float test saves weeks of waiting on seeds that might never sprout.
Stratification Pro Tip: For the 6-8 week cold treatment in Step 2, I recommend using a small plastic container with drainage holes instead of a sealed bag. This allows for better airflow while maintaining moisture, and you can easily check progress without opening the bag. Place a small thermometer inside to verify temperatures stay consistently between 35-45°F—refrigerator temps can fluctuate, especially if you open the door frequently.
Sunlight Transition Strategy: When you begin the 1-hour daily sunlight introduction in Step 4, I suggest using a shade cloth (50% coverage) during the first week. This mimics natural forest conditions where seedlings gradually adapt to sunlight. Remove the cloth completely after two weeks once you see the leaves developing that rich, glossy sheen. The gradual transition prevents the shock that causes sunscald and leaf scorch.
Winter Chill Tracking: For the critical 300-500 hours below 45°F in Step 5, I've created a simple tracking system using a whiteboard calendar. Mark each day with an "X" when nighttime temps drop below 45°F, then tally the total. Most home thermometers don't track outdoor temps, so consider investing in a dedicated outdoor thermometer for accuracy. This precise tracking ensures your tree gets the exact chill hours needed for reliable blooming.
Pro Tips for Japanese Plum Tree From Seed
- These little-known details make all the difference between a thriving plum tree and one that fizzles out.
- Germination Secret: The 3-5 day drying period in Step 1 isn't just about preventing mold—it's about hardening the see...
- Stratification Pro Tip: For the 6-8 week cold treatment in Step 2, I recommend using a small plastic container with d...
Frequently asked questions
about growing a Japanese plum tree from seed—because every gardener deserves clarity! Here are answers to the most common queries to help you avoid pitfalls and nurture success.How long does it take for a Japanese plum seed to germinate?
Germination can take anywhere from 4 to 12 weeks, depending on seed age, stratification success, and moisture levels. Cold stratification (6–8 weeks in the fridge) is key—patience is part of the process! Keep soil consistently moist but not soggy during this time.
Do I need to stratify Japanese plum seeds, and how?
Yes! Stratification mimics winter conditions and breaks seed dormancy. Mix seeds in damp peat moss or a paper towel, place them in a sealed bag, and refrigerate for 6–8 weeks. After this, plant them in well-draining soil—no shortcuts here!
Will my seed-grown plum tree bear fruit like the parent?
Probably not! Seed-grown trees are unpredictable—they may take 5–10+ years to fruit (if at all) and likely won’t match the parent’s variety. For reliable fruit, consider grafting or buying a young tree from a nursery.
What if my seedling gets pests or diseases?
Japanese plum seedlings are vulnerable to aphids, spider mites, and fungal issues like powdery mildew. Prevent with:
- Neem oil spray (for pests)
- Good airflow (reduce humidity)
- Copper fungicide (early signs of mildew)
Can I grow a Japanese plum tree from seed indoors?
Possible, but challenging! Seedlings need full sun (6+ hours/day) and cold exposure for dormancy. Start indoors under grow lights, then transplant outdoors after hardening off. Outdoor growth is far more reliable—embrace the garden!
Wrapping up and next steps
Growing a Japanese plum tree from seed is a rewarding journey that blends patience with the joy of nurturing life from the ground up! 🌱 With just a few simple steps—cold-stratification, proper planting, and consistent care—you’ll witness roots sprout in as little as six weeks.
This project isn’t just about propagation; it’s about connecting with nature’s cycles and the magic of transformation.
Ready to take the next step? Start with one seed this season and watch your garden bloom with beauty (and maybe even fruit!) in the years ahead. Happy growing! 🌸