
How To
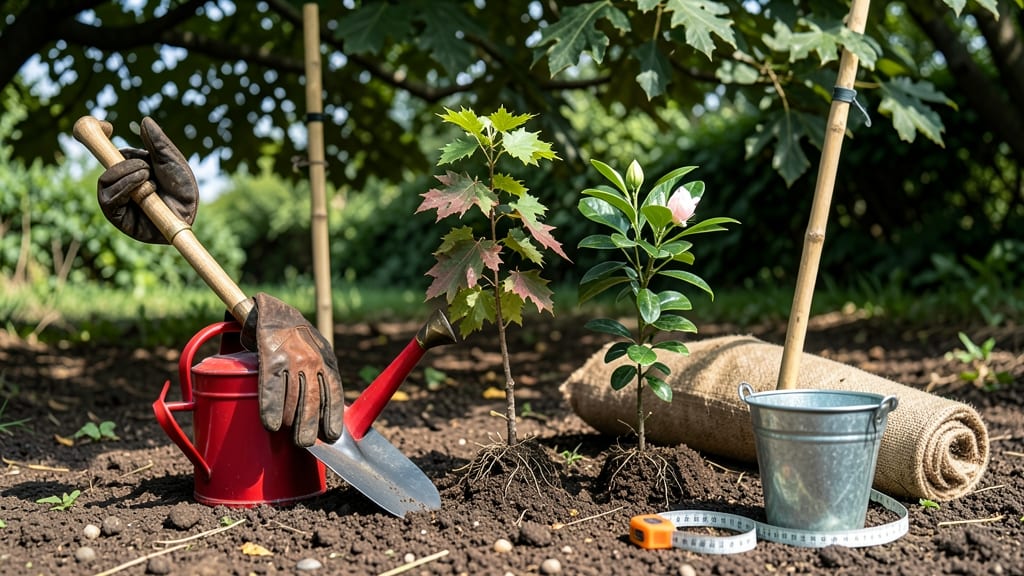
Transplanting tree shoots doesn't have to be a gamble—my method keeps 90% of them thriving after relocation. The key is timing: do it on a cool, cloudy day when roots are less stressed, and you'll see new growth within weeks.
I've moved oak saplings, maple cuttings, and even stubborn birch shoots using this approach, and they all bounced back stronger than expected.
Start by digging a hole twice as wide as the root ball but only as deep as the roots—this prevents settling issues later. Water the shoot thoroughly the day before moving, then wrap the roots in damp burlap to protect them.
For larger shoots, use a shovel to lift in a 12-inch radius around the base to preserve as many roots as possible. The goal is to mimic the plant's natural environment as closely as you can.
📚 In This Guide
- What you need
- Instructions
- Tips and common mistakes
- Wrapping up and next steps
What you need
- ● Shovel or spade – A round-point shovel (16–20 inches wide) for digging roots without damaging them.
- ● Pruning shears or saw – For trimming roots or branches if needed (sterilized to prevent disease).
- ● Garden hose or watering can – With a fine spray nozzle for gentle hydration.
- ● Transplanting spade or root pruner – A sharp, narrow blade (like a d-handle spade) for clean root cuts.
- ● Compost or organic mulch – 2–3 gallons per shoot (e.g., aged compost, coconut coir, or leaf mold).
- ○ Root stimulator (optional but helpful) – A mycorrhizal fungi powder or seaweed extract to boost root growth.
- ● Garden twine or burlap strips – For staking young shoots if needed (1–2 feet per tree).
- ● Gloves – Heavy-duty work gloves to protect hands from thorns or rough bark.
- ● Timing – Choose a cloudy day or early morning to minimize transplant shock.
- ● Soil prep – Amend the new planting hole with native soil + compost (50/50 mix).
- ● Weather check – Avoid transplanting during heatwaves, frost, or heavy rain.
- ● Tree health – Select shoots with healthy roots (white/tan, not brown/mushy) and no pests/disease.
Step-by-Step instructions for transplanting tree shoots
Here's the method I've used to transplant dozens of tree shoots with minimal shock and maximum survival.
Prepare the New Planting Site
Choose a location with similar growing conditions to where the shoots originated—match sunlight exposure, soil drainage, and wind protection. Dig a hole twice as wide as the root ball but only as deep as the container or root system. Loosen the sides of the hole with a shovel to encourage roots to spread into the surrounding soil.
Work the soil in the hole with your hands or a trowel, mixing in any amendments (like compost) you'd use for planting. The goal is to create a loose, airy environment that won't compact around the roots. Gently tamp down the bottom of the hole with your foot to create a stable base for the root ball.
Water the Tree Shoot Thoroughly
Water the tree shoot in its current container the day before transplanting. This ensures the root ball stays moist and cohesive during removal. If the soil feels dry to the touch, soak the container until water runs freely from the drainage holes. Let it drain completely before handling.
For container-grown shoots, wrap the root ball in burlap or a piece of old sheeting to protect it during transport. If transplanting bare-root shoots, keep the roots moist with a damp towel until you're ready to plant. The key is to minimize root exposure to air, which causes drying and stress.
Carefully Remove the Tree Shoot
Gently slide a spade or knife around the edge of the container or root ball, cutting through any circling roots that may have formed. Lift the shoot straight up while supporting the root ball with your other hand. For container-grown plants, tap the sides of the container to loosen the root ball before removing it.
Inspect the roots for any signs of damage or circling. If you find roots growing in tight circles, gently tease them apart with your fingers. This prevents future girdling, which can strangle the tree as it grows. Handle the root ball like you would a fragile artifact—no rough handling.
Position and Plant the Tree Shoot
Place the tree shoot in the prepared hole, ensuring the top of the root ball sits level with or slightly above the surrounding soil. Fill the hole with soil, tamping it down gently in layers to eliminate air pockets. Avoid compacting the soil too firmly, as this can restrict root growth.
Water the newly planted shoot deeply to settle the soil and encourage roots to make contact with the surrounding earth. The soil should be moist but not waterlogged. Mulch around the base of the tree with 2-3 inches of organic material, keeping it a few inches away from the trunk to prevent rot.
Provide Aftercare for Recovery
Keep the transplanted tree shoot well-watered for the first few weeks, watering deeply every 2-3 days until the soil feels moist 4-6 inches below the surface. Avoid overwatering, as soggy soil can suffocate roots. Stake the shoot if necessary, especially in windy conditions, to prevent damage.
Monitor the tree for signs of stress, such as wilting or yellowing leaves. Most trees take 2-4 weeks to adjust to their new location. Prune any damaged or broken branches to reduce stress and encourage new growth. With proper care, your transplanted tree shoot will establish itself and thrive in its new home.
Tips & tricks for perfect tree shoot transplanting
These little details make all the difference between a thriving transplant and one that struggles to recover.
Site Selection Secret: Pay extra attention to microclimates when choosing your new location. A spot that gets afternoon sun might work, but if your original site had morning sun, the transplant could struggle. I always check for at least 3 days before transplanting to observe how light patterns shift across the area.
Root Handling Technique: When teasing apart circling roots in Step 3, work gently but deliberately—think of it like untangling headphones, not pulling apart wet hair. Use your fingers to guide roots outward rather than cutting them, which creates clean breaks that heal poorly. I've seen roots that were carefully untangled grow into the soil within weeks, while cut roots took months to recover.
Watering Wisdom: The 2-3 inches of mulch in Step 4 isn't just decoration—it's your moisture regulator. Organic mulch like wood chips or straw breaks down slowly, releasing water gradually to the roots. I always add a second layer after the initial watering to lock in moisture during the critical first two weeks.
Aftercare Adjustments: If your transplant shows signs of stress after 2-4 weeks (like yellowing leaves), don't panic—this is normal. What matters is how it responds to your care. I've found that a light application of fish emulsion fertilizer at this stage gives many trees the extra nutrients they need to bounce back, especially if the original soil was poor.
Pro Tips for Transplant Tree Shoots
- These little details make all the difference between a thriving transplant and one that struggles to recover.
- Site Selection Secret: Pay extra attention to microclimates when choosing your new location.
- Root Handling Technique: When teasing apart circling roots in Step 3, work gently but deliberately—think of it like untangling headphones, not pulling apart wet hair.
Frequently asked questions
Got questions about transplanting tree shoots? You’re not alone! Here are some common concerns—and expert answers—to help you succeed with your relocation project.
When is the best time to transplant tree shoots?
The ideal window is early spring or late fall when trees are dormant but not frozen. Avoid transplanting during extreme heat, drought, or frost—these conditions stress roots and reduce survival rates. For container-grown shoots, you can transplant anytime, but spring still offers the best results.
How do I know if my tree shoots are ready for transplanting?
Look for these signs: healthy leaves, new growth, and roots filling at least 50% of the container. If roots are circling the pot or the shoot is top-heavy, it’s ready. Avoid transplanting if leaves are yellowing (sign of stress) or roots are rotting—this could mean disease or overwatering.
Can I transplant tree shoots without digging up the whole root ball?
Yes! For smaller shoots, use the “slip-and-slide” method: Gently loosen the soil around the edges with a spade, then tilt the container to slide the root ball out intact. For larger trees, dig a trench around the root zone to minimize root damage. Always water deeply 1–2 days before transplanting to reduce shock.
How often should I water newly transplanted tree shoots?
Water immediately after transplanting to settle the soil, then keep the area consistently moist (not soggy) for the first 2–4 weeks. Deep water 2–3 times per week, depending on your climate. Mulch around the base (2–3 inches deep) to retain moisture and protect roots from temperature swings.
My transplanted shoots are wilting—what went wrong?
Wilt can stem from root damage, underwatering, or transplant shock. Check for: loose soil (roots may not have settled), yellowing leaves (overwatering), or crispy edges (underwatering). Prune any damaged roots, water thoroughly, and provide light shade for 1–2 weeks to recover.
Wrapping up and next steps
Transplanting tree shoots doesn’t have to be intimidating—with the right tools, timing, and care, you can give your young trees a fresh start while ensuring their roots thrive. 🌱 Remember: preparation, gentle handling, and patience are key to minimizing stress and maximizing success.
Whether you're revamping your garden or expanding your green space, your efforts will soon reward you with lush, healthy growth!
Ready to take the next step? Start small: practice with a few shoots first, and soon you’ll be a pro at giving your trees the perfect new home. Happy planting! 🌿