
Size
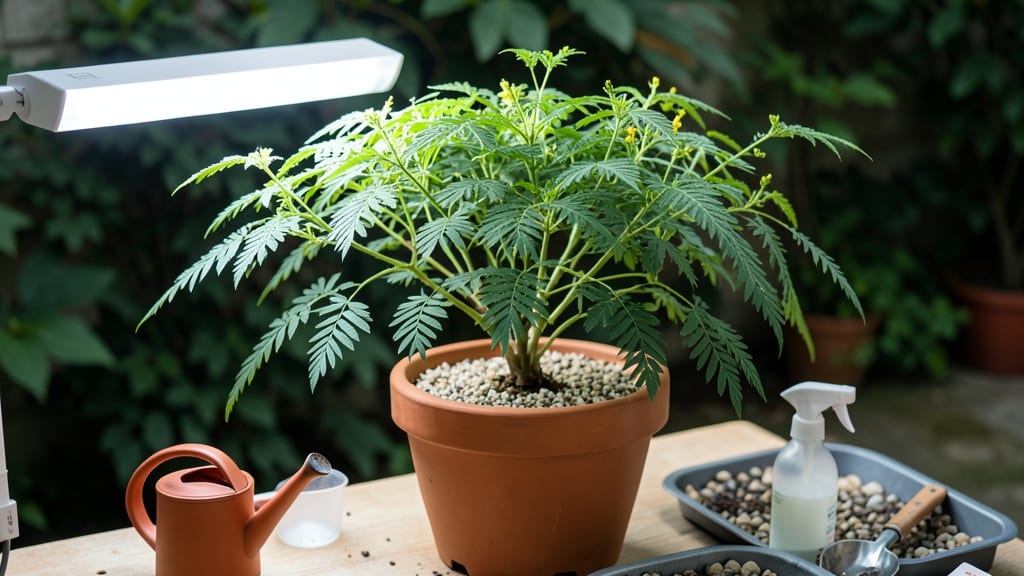
How to grow a moringa tree indoors gives you a fast-growing superfood harvest year-round—no yard needed. 🌱 I’ve turned my kitchen windowsill into a leafy green factory by mastering the right light, soil, and watering rhythm. The secret? Moringa thrives on neglect once established, but those first few weeks demand precision. You’ll need a 6-inch-deep pot (at least 12 inches wide for mature plants), well-draining soil with perlite, and a sunny spot or grow light. Moringa seeds sprout in 3-7 days, and with consistent care, you’ll harvest leaves in just 6-8 weeks. The leaves pack 7x more vitamin C than oranges and 4x more calcium than milk, all while purifying the air. By summer’s end, your plant could reach 6-10 feet tall indoors if pruned regularly. The key is pinching back new growth to encourage bushier, leafier branches—more harvestable surface area. Even in low light, moringa adapts, though leaf production slows without 6+ hours of bright light daily. This method works for apartments, offices, or sunrooms. Start with one plant to test your setup, then expand—your kitchen’s about to become the greenest spot in the house.
📚 In This Guide
- What you need
- Instructions
- Tips and common mistakes
- Wrapping up and next steps
What you need
- ● Moringa seeds: 3–5 high-quality, organic seeds (available online or at garden centers).
- ● Well-draining potting mix: 2–3 gallons of a lightweight, airy blend (e.g., 60% coco coir, 30% perlite, 10% worm castings).
- ● Pot or container: 1–2 gallon pot with drainage holes (or a self-watering planter for beginners).
- ● Watering can or spray bottle: For gentle hydration (avoid soggy soil!).
- ● Grow lights or sunny windowsill: 6+ hours of bright, indirect light daily (south-facing window or LED grow lights).
- ○ Humidity tray or pebble tray: Optional but helpful for tropical climates.
- ● Fertilizer: Balanced liquid fertilizer (e.g., fish emulsion or compost tea) for faster growth.
- ● Pruning shears: Small, sharp scissors to trim leggy stems.
- ● Soil moisture meter: To check moisture levels without overwatering.
- ● Support stake: For taller varieties (if your pot is unstable).
Step-by-step instructions for growing moringa tree indoors
Here's how I grow moringa trees indoors—fast, healthy, and ready for harvest in just a few months.
🌱 Step 1: Start Seeds in Moistened Potting Mix
Fill a 4-inch diameter pot with well-draining potting mix, keeping it slightly moist but not soggy. Moringa seeds germinate quickly, so I like to soak them in warm water for 6-8 hours first—this softens the outer shell and speeds up sprouting. Plant 2-3 seeds per pot about ½ inch deep, spacing them evenly. Cover lightly with a thin layer of mix to protect the seeds.
Place the pot in a warm spot with indirect light, like a kitchen counter near a window. Moringa seeds germinate in 3-7 days—you'll see tiny sprouts pushing through the soil. Keep the soil consistently moist during this time, but avoid overwatering, which can cause rot. Once the seedlings reach 2 inches tall, thin them to the strongest one per pot to give it room to grow.
☀️ Step 2: Provide Bright, Indirect Light for Rapid Growth
Moringa thrives on light, so move your pot to the brightest spot in your home, ideally near a south-facing window where it can get 6-8 hours of indirect sunlight daily. If natural light is limited, supplement with a grow light placed 6-12 inches above the plant for 12-14 hours per day. You'll notice the leaves turn a vibrant green and grow quickly—this is your sign the plant is happy.
Rotate the pot a quarter turn weekly to ensure even growth and prevent the plant from leaning toward the light. Moringa grows fast, so expect new leaves to appear every 2-3 weeks. If you see the leaves yellowing or the plant stretching too much, it’s a sign it needs more light. Adjust the light source or move the pot closer to the window.
💧 Step 3: Water Consistently and Fertilize for Strong Growth
Water your moringa tree when the top inch of soil feels dry. Moringa loves moisture but hates soggy roots, so I water deeply until it drains from the bottom of the pot, then empty the saucer to prevent waterlogging. During the growing season, aim for 1-2 waterings per week, adjusting based on humidity and temperature in your home. Overwatering is the biggest mistake—it leads to root rot and stunted growth.
Start fertilizing when the plant is about 4 inches tall with a balanced liquid fertilizer diluted to half strength. Feed every 4-6 weeks during the growing season to encourage lush, nutrient-rich leaves. You’ll see the difference in leaf size and color within a few weeks. Moringa is a heavy feeder, so don’t skip this step if you want a productive plant.
✂️ Step 4: Prune and Harvest for Continuous Growth
Moringa grows quickly, so regular pruning keeps it compact and encourages bushier growth. Pinch back the tips of the stems when the plant reaches 12 inches tall to promote branching. You can also harvest leaves by snipping individual leaves or small stems with clean scissors. Harvesting stimulates new growth, so don’t be shy—your plant will reward you with more leaves.
For the best flavor and nutrition, harvest young leaves when they’re 3-4 inches long. Avoid taking more than 20-30% of the plant at once to avoid stressing it. If your moringa starts to flower, you can harvest the pods too—they’re packed with nutrients, though they take longer to mature. Prune any dead or yellowing leaves to keep the plant healthy and encourage new growth.
🪴 Step 5: Repot and Maintain for Long-Term Success
Moringa grows fast, so it’ll need a larger pot when its roots fill the current container. Repot into a 6-8 inch pot when you see roots growing out of the drainage holes or the plant becomes top-heavy. Use fresh potting mix and handle the roots gently to avoid damaging them. After repotting, water lightly and place the plant back in bright, indirect light to help it recover.
Keep an eye out for pests like spider mites or aphids, which can attack moringa if the environment is too dry. Wipe leaves with a damp cloth or spray with water to deter pests. With proper care, your moringa tree can grow 6-10 feet tall indoors and produce leaves for months. Enjoy your homegrown superfood—it’s one of the fastest-growing and most nutritious plants you can grow indoors!
Tips & tricks for growing moringa indoors
A few quick strategies that'll help your moringa grow faster and stay healthier indoors.
Germination Hack: After soaking your seeds for the 6-8 hours, place them between two damp paper towels in a sealed plastic bag overnight. This creates a humid environment that can trigger germination in just 24 hours—sometimes even before the 3-7 day window. I've seen sprouts appear within 18 hours using this method. Once they've sprouted, plant them immediately in your moistened potting mix to prevent drying out.
Light Optimization: The 6-8 hours of indirect sunlight is non-negotiable, but here's how to maximize it: Place your moringa on a windowsill with the brightest exposure, then rotate your entire room's furniture to follow the sun's path throughout the day. For grow lights, use full-spectrum LED bulbs—they mimic natural sunlight better than standard white lights. I position mine 8-10 inches above the plant during the 12-14 hour growing period to prevent leaf burn while maintaining intensity.
Watering Wisdom: The top inch dry test works well, but I've found moringa responds better to a consistent schedule during its rapid growth phase. Water every 3-4 days in the morning, allowing the soil to dry slightly between waterings. This mimics natural rainfall patterns and prevents the root rot that comes from soggy conditions. Always water until you see drainage at the bottom—this ensures the roots get properly hydrated without sitting in water.
Pruning Strategy: When your moringa reaches the 12-inch mark for pruning, focus on removing the top 2-3 inches of the main stem. This encourages lateral branching more effectively than just pinching tips. I also recommend harvesting leaves in a staggered pattern—take a few leaves from different branches rather than all from one area. This maintains the plant's energy balance while still stimulating new growth. The 3-4 inch harvest size guideline ensures you get the most nutritious leaves without compromising the plant's health.
Pro Tips for Grow Moringa Tree Indoors
- A few quick strategies that'll help your moringa grow faster and stay healthier indoors.
- Germination Hack: After soaking your seeds for the 6-8 hours, place them between two damp paper towels in a sealed plastic bag overnight.
- For grow lights, use full-spectrum LED bulbs—they mimic natural sunlight better than standard white lights.
Frequently asked questions
about growing moringa indoors—because every gardener deserves a little clarity!How long does it take for moringa seeds to sprout indoors?
Moringa seeds are fast—expect sprouts in 3 to 7 days if kept warm (70–80°F) and moist. Soak seeds overnight for a head start! Pro tip: Use a heat mat if your home runs cooler to speed up germination.
Can I grow moringa in small pots or just large containers?
Start with 5–6 inch pots for seedlings, then upgrade to 12+ inch containers as they grow (moringa trees can reach 6–10 feet tall!). Ensure pots have drainage holes—root rot is a no-go! Alternative: Use fabric grow bags for flexibility.
What if my moringa leaves turn yellow or wilt?
Yellow leaves often mean overwatering or nutrient deficiency. Let soil dry slightly between waterings, and fertilize with a balanced liquid feed every 4–6 weeks. Wilting? Check for underwatering or pests (like spider mites).
How much sunlight does an indoor moringa tree really need?
Moringa is a sun-worshipper—aim for 6–8 hours of direct light daily. A south-facing window or grow lights work best. Without enough light, leaves may turn pale or leggy. Fix: Rotate pots weekly for even growth.
When can I harvest leaves from my indoor moringa tree?
Harvest young, tender leaves (top 6–8 inches) once the plant is 6–8 inches tall—usually 2–3 months in. Pinch back stems to encourage bushier growth! Bonus: Leaves regrow quickly, so harvest every 2–3 weeks.
Wrapping up and next steps
Growing a moringa tree indoors is a rewarding journey that brings fresh, nutrient-packed leaves right to your kitchen! With the right light, soil, and care, you’ll enjoy a thriving plant in just a few weeks—no green thumb required. 🌱
Now that you’re armed with all the tips, start small: plant your seeds today and watch your superfood grow! Once your moringa thrives, share the love by gifting cuttings to friends or experimenting with recipes. The world’s healthiest tree is just a pot away—get growing! 💚