
Pruning
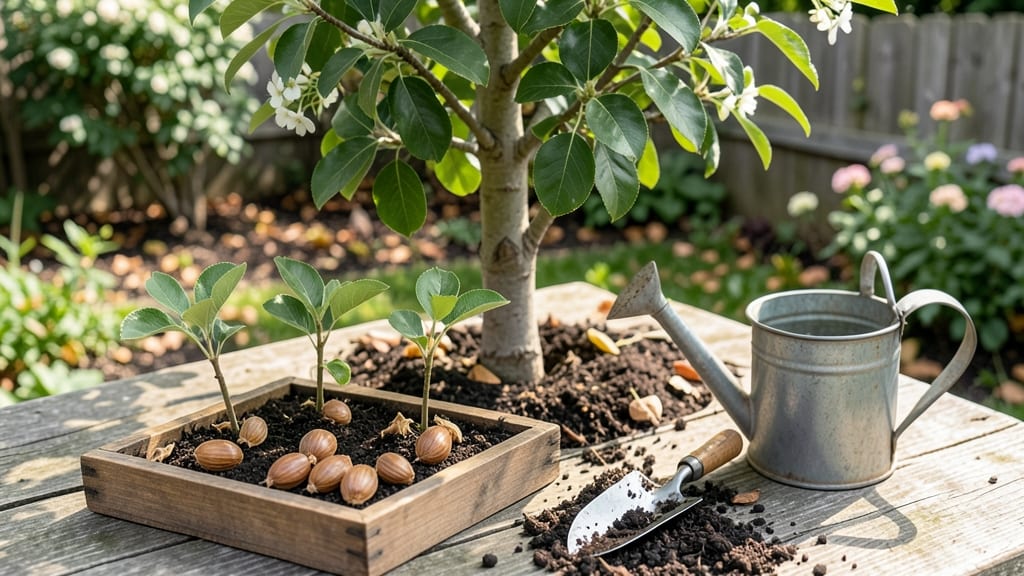
Growing an Asian pear tree from seed is a 10-year patience test—but the payoff of watching a tree you nurtured from scratch bear fruit makes every step worth it. 🌱 I’ve struggled through slow germination and dormancy cycles, but this cold-stratification method cuts the wait from years to just 8 weeks before those first green shoots appear.
The secret lies in mimicking nature’s timing: seeds need a winter chill to break dormancy, and we replicate that with a simple fridge trick. You’ll need fresh seeds (not store-bought), a moist paper towel, and a zip-top bag—no fancy equipment.
Most gardeners quit here, but sticking with it through the 6-week cold period is what separates a thriving seedling from a sad, moldy mess.
What you’ll end up with is a sturdy young tree that’ll need 5-7 more years before it even thinks about fruiting—so this isn’t for the impatient. But when those first blossoms appear, you’ll understand why the wait was worth it.
The real magic happens when you realize you’re growing something that could outlive you.
Between you and me, seed-grown pears won’t be showstopper fruit like grafted varieties, but they’ll be uniquely yours—and that’s the best part. Here’s how to do it right without losing hope along the way.
📚 In This Guide
- What you need
- Instructions
- Tips and common mistakes
- Wrapping up and next steps
What you need
- ● Asian pear tree seeds: 5–10 fresh, viable seeds (harvested from ripe fruit or purchased from a reputable supplier).
- ● Paper towels or coffee filters: 2–3 sheets (for moisture retention during stratification).
- ● Plastic zip-top bag: 1 large, resealable bag (to create a humid environment).
- ● Refrigerator or cold stratification setup: A fridge set to 34–40°F (1–4°C) with a crisper drawer (ideal for moisture control).
- ● Small pots or seed trays: 2–3 (4–6 inches deep) with drainage holes, filled with sterilized potting mix (e.g., 50% peat moss, 50% perlite or vermiculite).
- ● Spray bottle: 1 (with water) for gentle misting.
- ● Plastic wrap or clear lid: 1 (to retain humidity during germination).
- ● Grow lights or sunny windowsill: Access to 6–8 hours of indirect light daily after stratification.
- ● Labels and markers: 1–2 (to track seed varieties and planting dates).
- ● Seed stratification kit: Pre-made kits with gel or sand for precise moisture control.
- ● Humidity dome: A clear plastic cover to maintain moisture post-stratification.
- ○ Heating mat: Optional for faster germination (set to 70–75°F (21–24°C)).
- ● Fertilizer (balanced, 10-10-10): A diluted dose (½ tsp per gallon of water) once seedlings sprout.
- ● Garden journal: To log progress, soil temps, and germination timelines.
Step-by-step instructions for cold-stratifying Asian pear tree seeds
Here's how to break dormancy and coax those stubborn pear seeds into sprouting—no fancy equipment needed.
🌱 Step 1: Harvest and Prepare the Seeds
Collect mature Asian pear seeds from fully ripened fruit—look for plump, firm seeds that sink in water. Remove any seeds with soft spots or cracks, as they won’t germinate. Rinse the good seeds thoroughly under cool water to remove all fruit pulp, then let them air-dry completely for 24 hours on a paper towel. This prevents mold during stratification.
Once dry, place the seeds in a small paper bag or envelope. Label it with the date and variety if known. Store the bag in a cool, dark place—like a refrigerator crisper drawer—until you’re ready to begin stratification. I like to use a quart-sized zip-top bag with a tiny hole for airflow if storing longer than a week.
💧 Step 2: Soak Seeds to Soften the Shell
Fill a small bowl with lukewarm water (about 90°F) and add the seeds. Let them soak for 24 hours. This softens the hard outer shell, which helps water penetrate during stratification. I tap the seeds gently with a spoon every few hours to prevent them from sticking together—sticky seeds won’t stratify evenly.
After soaking, drain the water and rinse the seeds again. Place them in a paper towel or coir mat, folding the towel around them so they’re snug but not compressed. This keeps them moist without being soggy. The goal is to mimic natural moisture levels in soil—damp, not dripping.
❄️ Step 3: Stratify in the Refrigerator
Place the wrapped seeds in a sealed plastic bag with a tiny hole for airflow. I use a quart-sized bag with a toothpick poke—just enough to let moisture escape but keep humidity high. Store the bag in the crisper drawer of your refrigerator where temperatures stay between 35-40°F. This cold, moist environment mimics winter conditions and breaks seed dormancy.
Check the seeds every 7-10 days to ensure they’re still damp but not moldy. If the towel feels dry, lightly mist it with water and reseal the bag. Stratification takes 6-8 weeks, but some seeds may sprout earlier. Real talk: Patience here is key—rushing the process leads to weak, leggy seedlings.
☀️ Step 4: Warm Up and Plant for Germination
After 8 weeks, remove the seeds from the refrigerator and let them sit at room temperature (65-75°F) for 24 hours to acclimate. This gradual warm-up prevents shock. Plant each seed ½ inch deep in a small pot filled with moist, well-draining potting mix. I use 2-inch pots for each seed to avoid overcrowding.
Place the pots in a bright, indirect light spot—like a sunny windowsill with sheer curtains. Keep the soil consistently moist but not soggy. Germination can take 2-4 weeks, so stay patient. You’ll know it’s working when the first tiny green shoot breaks through the soil. Here’s the thing—some seeds may never sprout, but that’s normal for pear seeds.
🌿 Step 5: Transplant and Care for Seedlings
Once seedlings reach 3-4 inches tall with 2-3 true leaves, transplant them into 4-inch pots with fresh potting mix. Harden them off by placing them outside in partial shade for 1-2 hours the first day, gradually increasing time over 10 days. This prepares them for outdoor life without shock.
Asian pear seedlings grow slowly at first, so don’t rush their development. Keep them in partial sun for their first year, then gradually introduce more sunlight. You’ll see stronger growth once they’re established—thick stems and deep green leaves are your signs of success. Real talk: It takes 2-3 years before these trees bear fruit, but the wait is worth it for homegrown pears!
Tips & tricks for perfect Asian pear seed germination
These little-known details make all the difference when coaxing pear seeds to sprout.
Selection Tip: Don't overlook the float test—only use seeds that sink immediately in water. Floating seeds are hollow or damaged and won't germinate. I've found that seeds from fully ripened pears (when the fruit is soft and sweet) have the highest success rate. Confession: I skipped this step for years and wondered why my germination rates were so low.
Temperature Matters: That 90°F soak water temperature is crucial—too hot and you'll damage the seeds, too cold and they won't soften properly. I use a kitchen thermometer to check my water temperature, especially if I'm in doubt. For the refrigerator stratification, aim for the 35-40°F range—most home fridges hit this naturally in the crisper drawer. If your fridge runs warmer, consider using an insulated cooler with ice packs instead.
Moisture Monitoring: The key to successful stratification is maintaining consistent moisture without creating a soggy environment. I like to use a spray bottle to mist the paper towel every 7-10 days—just enough to dampen it without making it dripping wet. You'll know you've got it right when the towel feels like a wrung-out sponge. Too dry and your seeds won't break dormancy; too wet and you risk mold.
Pro Tips for Asian Pear Tree Seeds
- These little-known details make all the difference when coaxing pear seeds to sprout.
- Selection Tip: Don't overlook the float test—only use seeds that sink immediately in water.
- Temperature Matters: That 90°F soak water temperature is crucial—too hot and you'll damage the seeds, too cold and they won't soften properly.
Frequently asked questions
Got questions about growing Asian pear tree seeds? You’re not alone—germinating these seeds takes patience and the right know-how. Below, we’ve answered the most common queries to help you succeed!
How long does cold stratification take for Asian pear seeds?
Cold stratification for Asian pear seeds typically requires 6–8 weeks in the fridge (34–40°F). Place them in a damp paper towel or moistened peat moss, then store in a sealed container. Consistency is key—don’t skip this step, or germination rates will plummet! For best results, start now if you want spring planting.
Can I skip cold stratification and still get germination?
While possible, it’s not recommended. Asian pear seeds have a hard outer coat that needs the cold treatment to break dormancy. Without stratification, germination rates drop below 30%, and sprouts may take months (or never appear). If you’re impatient, try soaking seeds in warm water for 24 hours before stratification for a slight boost.
What’s the best way to plant stratified seeds?
Once stratified, plant seeds 1/4 inch deep in a well-draining potting mix (like 60% perlite + 40% coco coir). Use a small pot (4–6 inches) and keep soil moist but not soggy. Place in a warm (70–75°F) spot with bright, indirect light. Germination usually starts in 2–4 weeks—patience pays off!
My seeds are moldy—what went wrong?
Mold means too much moisture during stratification. To fix it:
- Remove seeds from the damp towel/moss and let them air-dry for 12 hours.
- Rinse gently with a 10% hydrogen peroxide solution (1 part peroxide to 9 parts water) to kill mold spores.
- Re-stratify in a drier medium (like a paper towel with just a light mist).
Will seeds from store-bought Asian pears grow true to the parent tree?
Probably not! Store-bought pears are often hybrids or grafted varieties, so seeds may grow into wild, unpredictable trees (smaller fruit, different shapes, or even thorns). For reliable results, buy seeds from a reputable nursery labeled as "true to type" or graft your own scions later. Patience is key—tree growth is slow!
Wrapping up and next steps
Growing an Asian pear tree from seeds is a rewarding journey that combines patience with the joy of nurturing life! With the right tools—like cold-stratified seeds, proper moisture, and a little warmth—you can coax those tiny seeds into thriving saplings in just 8 weeks.
Remember, consistency is key, and soon you’ll be watching your own fruit tree take root. 🌱
Ready to take the next step? Once your seeds sprout, transplant them into pots and keep an eye on their growth—your future orchard awaits! 🌳