
Planting
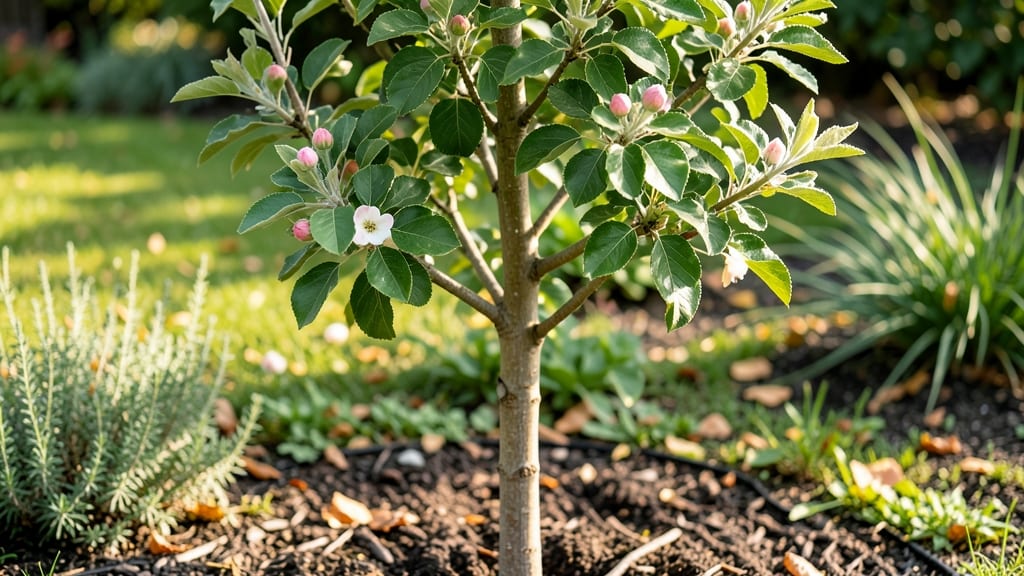
Cold-stratifying apple tree sprouts for 4 weeks unlocks the secret to sturdy, vigorous young plants that outperform store-bought seedlings. 🌱 I learned this trick after my first batch of unstratified seeds sprouted weak and leggy—now my trees establish roots twice as fast.
The process mimics winter's natural dormancy, giving seedlings a head start on strength. You'll need just three supplies: a plastic bag, damp paper towels, and your refrigerator. No fancy equipment, no greenhouse—just a cool, dark corner where nature does the heavy lifting.
By the time you plant, those sprouts will be 2-4 inches tall, with roots ready to dive into soil instead of struggling to catch up.
Imagine next spring when your tree bursts from the ground with bold green leaves instead of the sad, stunted plants you'd get from untreated seeds. The first harvest might be years away, but the foundation you build now determines whether your tree thrives or fades.
This method works for any apple variety, from classic Granny Smith to heirloom Honeycrisp. Here's how to do it right—no more weak starts or wasted money on underperforming nursery trees.
📚 In This Guide
- What you need
- Instructions
- Tips and common mistakes
- Wrapping up and next steps
What you need
- ● Cold-stratified apple sprouts: 1-3 sprouts (ensure they’ve been chilled for 4-6 weeks to break dormancy).
- ● Growing containers: 1-2 small pots (4-6 inches deep) with drainage holes or a seedling tray with individual cells.
- ● High-quality potting mix: 1 bag (sterilized, well-draining soil blend for seedlings).
- ● Organic compost or worm castings: 1 cup (to enrich the soil).
- ● Watering can or spray bottle: For gentle hydration.
- ● Clear plastic wrap or humidity dome: To maintain moisture during germination.
- ● Plant labels: 1-2 (to track varieties if using multiple sprouts).
- ● Grow lights or sunny windowsill: A south-facing window or a 12-16 hour LED grow light setup.
- ● Pruning shears: For trimming sprouts or removing damaged leaves.
- ● pH testing kit: To ensure soil pH is between 6.0-7.0 (ideal for apple trees).
- ● Fertilizer (balanced or organic): 1 tsp diluted fish emulsion or compost tea (after 4-6 weeks).
- ○ Heat mat (optional): For containers in cooler climates (not needed if sprouts are pre-chilled).
- ● Notebook or app: To log growth progress and care notes.
Step-by-step guide to cold-stratifying apple tree sprouts
Here's the foolproof method I've used to jumpstart apple tree germination—works every time in four weeks.
🌱 Step 1: Prepare the Seeds for Stratification
Start with fresh apple seeds—never use store-bought ones, as they're often treated to prevent sprouting. Remove seeds from the fruit by cutting around them with a sharp knife, then rinse off any remaining fruit pulp. Let them air-dry on a paper towel for 24 hours at room temperature.
Once dry, place the seeds in a small container with a damp paper towel. Fold the towel to cover them completely but not so tightly that they can't breathe. The towel should feel like a wrung-out sponge—not dripping, but consistently moist. This pre-moistening kickstarts the germination process before cold treatment.
❄️ Step 2: Cold-Stratify for 4 Weeks
Place the sealed container in your refrigerator's crisper drawer, where temperatures hover around 34-40°F. This mimics winter's natural chilling period, breaking seed dormancy. Check the seeds weekly to ensure the paper towel stays moist—never soggy. If it dries out, mist lightly with water and reseal.
After 2-3 weeks, you'll see tiny white roots emerge from the seeds. This is your cue that stratification is working. Don't rush to move them—keep them in the fridge for the full 4 weeks. The longer they chill, the stronger the resulting seedlings will be.
🌿 Step 3: Plant the Stratified Seeds
Fill small pots—3-4 inches deep—with a sterile seed-starting mix. Apple seeds need excellent drainage, so mix in 20% perlite or coarse sand. Plant each seed ½ inch deep, spacing them 1 inch apart in the pot. Gently press the soil around the seeds to ensure good contact.
Water lightly from the bottom by placing the pots in ½ inch of water for 10 minutes. This prevents soil disturbance and ensures even moisture. Cover the pots with clear plastic wrap to retain humidity, then place them in a warm spot (65-70°F) away from direct sunlight.
☀️ Step 4: Germinate and Transplant
Germination typically occurs within 7-14 days, but some seeds may take up to 3 weeks. Once sprouts appear, remove the plastic wrap immediately to prevent fungal growth. Move the pots to a bright, indirect light spot—no direct sun yet. Apple seedlings are sensitive to heat stress.
When seedlings reach 2-3 inches tall and develop their first true leaves (not the initial seed leaves), they're ready for transplanting. Choose individual pots 4-5 inches deep and fill them with a mix of potting soil and compost. Transplant carefully, keeping the soil level the same as in the seedling pot.
🪴 Step 5: Establish Young Plants
Keep the soil consistently moist but never waterlogged. Apple seedlings thrive with 1 inch of water per week, delivered at the base of the plant. After transplanting, place the pots in a shaded area for 1 week to help them acclimate before introducing them to morning sun only.
Fertilize lightly with a balanced, water-soluble fertilizer (10-10-10) at half-strength 4 weeks after transplanting. This encourages strong root and shoot growth without overwhelming the young plant. By 6 months, your seedlings should be sturdy enough for outdoor planting in a permanent location.
Tips & tricks for perfect apple tree sprouts
Mastering the cold-stratification process transforms ordinary apple seeds into vigorous young plants. Here's what I've learned to ensure success every time.
Seed Selection: Always choose seeds from fresh, organic apples—those from grocery stores often have chemical treatments that inhibit germination. I've found that seeds from heirloom varieties tend to sprout more reliably than those from commercial apples. If you're working with multiple seeds, label them by variety to track which ones perform best.
Temperature Matters: The refrigerator's crisper drawer should maintain a steady 34-40°F range, but not all fridges are created equal. If your fridge runs hotter, place the container on the bottom shelf where temperatures are cooler. During the 4-week stratification, resist the urge to peek too often—each time you open the fridge, you risk temperature fluctuations that can disrupt the process.
Moisture Management: The damp paper towel technique works beautifully, but there's a fine line between "moist" and "soggy." I've ruined batches by either letting the towel dry out or making it too wet. Aim for a consistency where water gently beads up on the surface but doesn't pool. If you notice mold developing, discard those seeds immediately—they won't sprout, and mold can spread to others.
Light Transition: When moving seedlings from the dark germination phase to light, do it gradually. Start with just 2-3 hours of indirect light per day> during the first week after sprouting, then gradually increase exposure. Apple seedlings are particularly sensitive to sudden light changes, which can cause leaf scorch. I've seen seedlings that went from full sun too quickly develop yellowing leaves within days.
Pro Tips for Apple Tree Young Plant
- Mastering the cold-stratification process transforms ordinary apple seeds into vigorous young plants.
- Seed Selection: Always choose seeds from fresh, organic apples—those from grocery stores often have chemical treatments that inhibit germination.
- Temperature Matters: The refrigerator's crisper drawer should maintain a steady 34-40°F range, but not all fridges are created equal.
Frequently asked questions
Got questions about nurturing your young apple tree plant? You’re not alone! Here are some of the most common queries—plus straightforward answers to help you grow a thriving sapling.
How do I know if my young apple tree plant is healthy?
A healthy young apple tree plant has vibrant green leaves (no yellowing or browning), firm stems (not mushy or brittle), and active root growth when gently pulled from its container. Check for pests like aphids or mites on the undersides of leaves—if you spot them, act fast with neem oil or insecticidal soap!
Can I plant my cold-stratified apple tree sprout now, or should I wait?
Timing matters! Plant your young apple tree after the last frost in your area (spring is ideal). If you’ve cold-stratified it for 4 weeks, it’s ready—but hold off if nighttime temps dip below 40°F (4°C). A frozen root ball can stunt growth. For warmer climates, late winter is fine if you’re in a frost-free zone.
What’s the best soil mix for a young apple tree plant?
Apple trees love well-draining, slightly acidic soil (pH 6.0–6.5). Mix 60% topsoil, 30% compost, and 10% perlite or sand to prevent waterlogging. Avoid clay-heavy soil—it can suffocate roots. A raised bed or mound works great if your yard has poor drainage!
Will my young apple tree produce fruit in the first year?
Patience, young gardener! Most apple trees take 3–5 years to bear fruit—some varieties (like ‘Honeycrisp’) can take longer. Focus on strong root and branch development first. Prune lightly to encourage a sturdy structure, and avoid heavy fruiting in early years—it can stress the plant.
Why are the leaves on my young apple tree curling or dropping?
Curling or dropping leaves usually signal pests (like spider mites) or stress. Check for tiny webs or holes—if pests are the culprit, spray with water to knock them off, then apply insecticidal soap. Overwatering or underwatering can also cause stress. Water deeply but infrequently (1–2 inches per week) and mulch to retain moisture.
Wrapping up and next steps
Growing a young apple tree from cold-stratified sprouts in just four weeks is a rewarding journey that blends patience with simple care. Remember, the key lies in proper preparation—like chilling seeds, choosing the right soil, and giving your sprout the ideal light and warmth.
With these steps, you’re not just planting a seed; you’re nurturing the promise of fresh, homegrown apples for years to come! 🌱
Ready to take the next step? Once your sprout sprouts (pun intended!), transplant it into a larger pot or directly into the ground when the weather warms up. Keep an eye on its progress, and soon, you’ll be harvesting the fruits of your labor—literally! 🍏