
Pruning
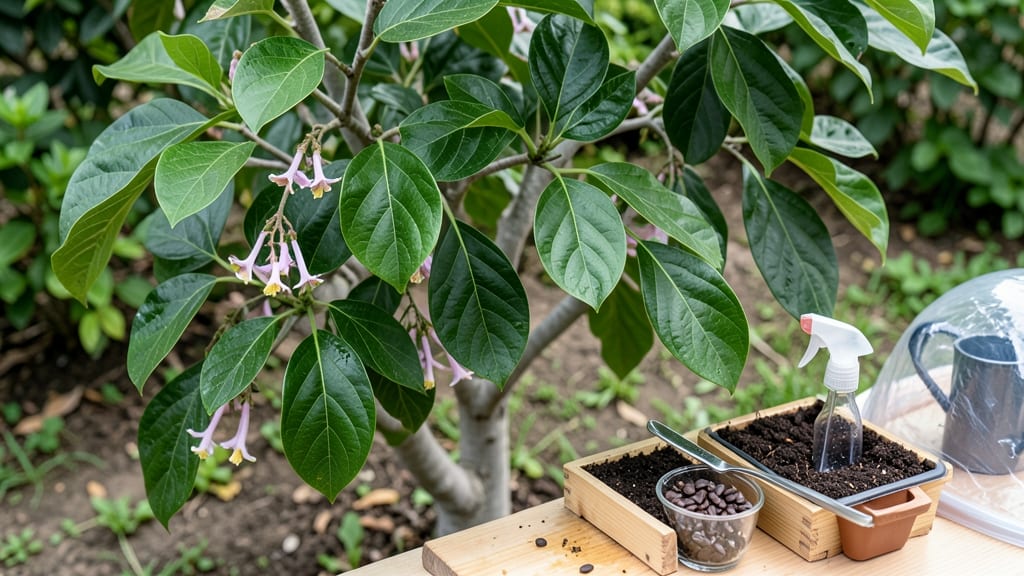
Growing tamarillo trees from seeds unlocks a tropical treat in your garden—if you crack the cold-stratification code. 🌱 I’ve battled with these finicky seeds for years, and the 30-day cold treatment (plus warmth tricks) finally gave me the reliable germination I needed to grow my own fruit trees.
Here’s the secret: tamarillo seeds need a two-phase dance—first, a chilly 4-6 weeks in the fridge to break dormancy, then warmth (70-80°F) to wake them up.
Too much warmth too soon? They rot. Too cold? They nap forever. The soil mix matters too—light, airy, and slightly acidic keeps those sprouts happy.
By month three, you’ll see bright green seedlings reaching for light, ready to transplant into pots. They grow slow at first, but with patience, you’ll have a tree that thrives in zones 9-11—or in containers if you live elsewhere. The first harvest? Worth every wait.
Fair warning: these trees take 3-5 years to fruit, but the sweet-tart payoff makes it all worthwhile. Here’s how to avoid the rookie mistakes that kill seedlings before they start.
📚 In This Guide
- What you need
- Instructions
- Tips and common mistakes
- Wrapping up and next steps
What you need
- ● Tamarillo seeds: 10–20 fresh, plump seeds (harvested from ripe fruit or purchased from a reputable supplier). Pro tip: 💡 Store seeds in a cool, dry place if not using immediately!
- ● Cold-stratification supplies: 1–2 small plastic bags or containers with air holes (or a damp paper towel)
- ● Refrigerator with a temperature range of 35–45°F (2–7°C)
- ○ Optional: Moistened peat moss or coco coir (1 cup)
- ● Germination setup: Seed-starting trays or small pots (3–4 inches deep)
- ● High-quality seed-starting mix (sterile, well-draining, e.g., 50% peat/50% perlite or coco coir blend)
- ● Spray bottle with room-temperature water
- ● Clear plastic wrap or a humidity dome (to retain moisture)
- ● Grow lights or sunny windowsill: A grow light (LED preferred) or a south-facing window with 6+ hours of sunlight daily.
- ○ Heat mat (optional but helpful): A seedling heat mat (70–75°F/21–24°C) to speed up germination.
- ● Patience: Tamarillo seeds can take 4–12 weeks to germinate—stay consistent! ✨
- ● Sterilization: Sanitize trays/pots with a 10% bleach solution (1 part bleach to 9 parts water) to prevent mold.
- ● Warmth: After stratification, maintain soil temps at 70–80°F (21–27°C) for optimal sprouting.
- ● Pest control: Keep an eye out for fungal gnats or mold—use neem oil if needed.
How to cold-stratify tamarillo seeds for reliable germination
Cold-stratification breaks tamarillo seeds' dormancy—here's how to do it right, with timing tricks to avoid common pitfalls.
🌱 Step 1: Extract and Prepare the Seeds
Open the tamarillo fruit carefully using a small knife, avoiding the large central seed cavity. You'll find 4-6 flat, brown seeds embedded in the flesh. Rinse them thoroughly under cool water to remove any pulp—this prevents mold during stratification. I like to soak them in a bowl of water for 15 minutes while scrubbing gently with my fingers to remove stubborn residue.
Once clean, spread the seeds on a paper towel and let them air-dry for 2-3 hours at room temperature. This drying step is critical—wet seeds will rot in the fridge. Place them in a single layer, not touching, to ensure even drying. You'll know they're ready when the edges feel slightly papery to the touch.
❄️ Step 2: Cold-Stratify for 6-8 Weeks
Fill a resealable plastic bag with 2 cups of damp (not soggy) potting mix or a mix of perlite and peat moss. The moisture level should feel like a wrung-out sponge—enough to hold shape but not drip. Add the seeds ½ inch deep into the mix, spacing them 1 inch apart to prevent crowding later.
Seal the bag loosely (leave a small gap for airflow) and place it in a refrigerator set to 35-40°F. Tamarillo seeds need this cold period to break dormancy, and consistency is key—fluctuating temperatures can disrupt germination. Check the bag weekly for moisture; if the mix feels dry, mist it lightly with water. After 6-8 weeks, you'll see the first signs of sprouting.
☀️ Step 3: Transition to Warmth and Light
When you spot tiny white roots breaking through the seed coat (usually around 6-8 weeks), it's time to move the seeds to a warmer environment. Transfer them to small pots filled with well-draining potting mix, planting each seed ½ inch deep. Place the pots in a warm, bright spot with 65-75°F temperatures—a seedling heat mat helps if your home runs cooler.
Keep the soil consistently moist but not waterlogged. You'll notice the first true leaves (not the initial seed leaves) emerge within 2-4 weeks after transferring. This is your cue to gradually introduce them to indirect sunlight, avoiding harsh midday rays that can scorch tender seedlings.
🌿 Step 4: Harden Off Seedlings Before Transplanting
After 8-12 weeks of growth, when seedlings reach 4-6 inches tall with a sturdy stem, begin hardening them off. Start by placing them outside in a shaded, sheltered spot for 1 hour daily. Over 7-10 days, gradually increase their outdoor time, introducing them to morning sun first. This slow acclimation prevents shock and ensures they thrive in their permanent home.
Choose a location with full sun (6+ hours daily) and well-draining soil. Tamarillo trees love warmth, so avoid transplanting until nighttime temperatures stay above 50°F. Water deeply after transplanting to help roots establish, and mulch around the base to retain moisture and regulate soil temperature.
Tips & tricks for perfect tamarillo seed germination
Here's what nobody tells you about tamarillo seeds—these tricks make all the difference between waiting months for sprouts and watching your seedlings pop up like clockwork.
Seed Cleaning Secret: That 15-minute soak in Step 1 isn't just about cleaning—it's a critical pre-treatment. The warm water helps soften the seed coat slightly, making it easier for moisture to penetrate during stratification. I've found that scrubbing with a soft toothbrush (not your fingers) removes more pulp without damaging the seed's delicate structure. This step prevents mold during the cold period, which is where most people's seeds fail.
Moisture Management: The "wrung-out sponge" test in Step 2 is your best friend. Too much moisture creates anaerobic conditions that lead to rot, while too little prevents the seeds from absorbing water through their coats. I recommend using a spray bottle to mist the mix weekly—just enough to keep it damp to the touch. A clear plastic bag with tiny air holes works better than a sealed one for maintaining that perfect moisture balance during the 6-8 week cold period.
Temperature Consistency: That 35-40°F range in your fridge isn't just a suggestion—it's a biological requirement. Tamarillo seeds need consistent cold to break dormancy, and most home fridges fluctuate too much. Place the bag on the middle shelf where temps are most stable, and avoid opening the door frequently. If your fridge runs warmer, consider a dedicated seed stratification fridge or a cool basement area. The key is maintaining that steady 35-40°F for the full 6-8 weeks.
Sprout Recognition: Those tiny white roots breaking through in Step 3 are your first sign of success, but don't mistake them for true germination. Wait until you see the seed coat split open with a visible radicle (the embryonic root) before transferring. I've seen seeds develop roots in the cold period only to fail when moved to warmth—this is why patience matters. Once you see that radicle, you're ready to move to the warmer environment specified in Step 3.
Pro Tips for Tamarillo Tree Seeds
- Here's what nobody tells you about tamarillo seeds—these tricks make all the difference between waiting months for sp...
- Seed Cleaning Secret: That 15-minute soak in Step 1 isn't just about cleaning—it's a critical pre-treatment. The warm...
- Moisture Management: The "wrung-out sponge" test in Step 2 is your best friend. Too much moisture creates anaerobic c...
Frequently asked questions
Got questions about tamarillo tree seeds? You’re not alone!
Here are some of the most common queries—plus straightforward answers to help you grow like a pro.
How long does cold stratification take for tamarillo seeds?
Cold stratification for tamarillo seeds typically takes 6–12 weeks in the fridge. Place them in a damp paper towel inside a sealed bag, then store at 34–41°F (1–5°C) for best results. Patience is key—some seeds may germinate sooner, while others need the full timeline.
Can I skip cold stratification and plant tamarillo seeds directly?
While possible, skipping stratification reduces germination rates. Tamarillo seeds have a hard outer shell that benefits from the cold treatment to break dormancy. If you’re impatient, try soaking seeds in warm water for 24 hours first—though results may vary.
What’s the best temperature for germinating tamarillo seeds after stratification?
Once stratified, maintain a warm, consistent environment of 70–80°F (21–27°C). Use a heat mat or place seeds near a sunny window. Avoid cold drafts—tamarillos thrive in warmth, and this mimics their tropical origins.
Why aren’t my tamarillo seeds sprouting after stratification?
Several factors could be at play: old seeds (use fresh ones!), improper moisture (keep the towel damp but not soggy), or temperature fluctuations. Try a germination test: place a few seeds in warm water—if they float, they’re likely non-viable.
Can I grow tamarillos from store-bought fruit seeds?
Yes! Store-bought tamarillo seeds can germinate, but success rates vary. Rinse seeds thoroughly to remove pulp, then stratify them. For better odds, source seeds from a reputable supplier or a local grower—freshness matters!
Wrapping up and next steps
Growing a tamarillo tree from seeds is a rewarding journey—especially when you unlock the secret of cold-stratification! With patience and the right techniques, you’ll soon watch those tiny seeds sprout into vibrant, fruit-bearing plants.
Whether you’re a seasoned gardener or a curious beginner, every step brings you closer to harvesting your own tangy-sweet tamarillos.
Ready to take the next step? Start your seeds now and keep an eye on those germination timelines—your future harvest is just around the corner! 🌱✨