
Pruning
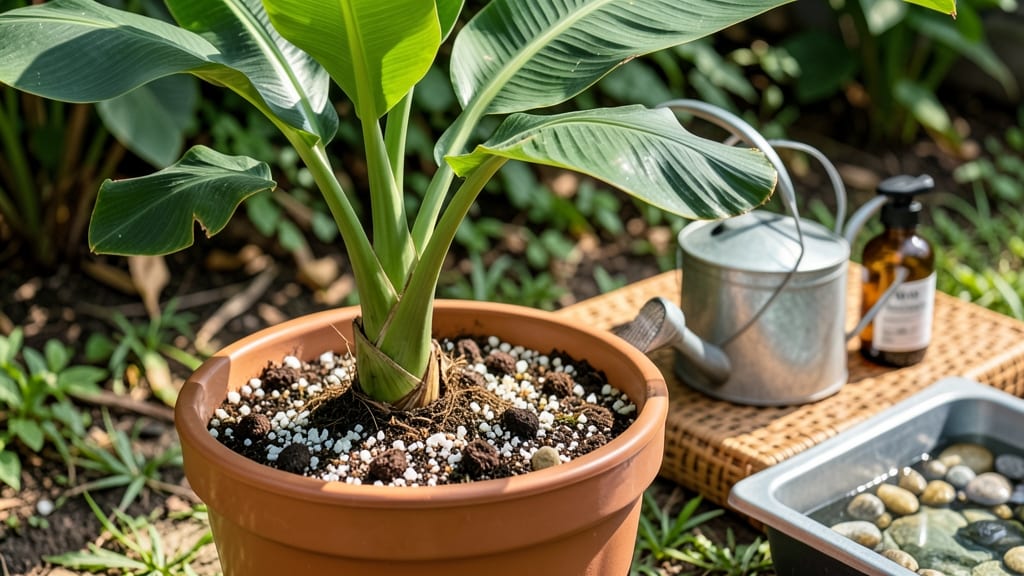
Caring for a dwarf Cavendish banana tree transforms your space into a tropical oasis—without the jungle-sized footprint. 🌿 These compact giants thrive indoors or out, but their growth habits demand a few key secrets, especially when it comes to pruning to keep them manageable year-round.
The trick isn't just cutting back—it's understanding when and how to shape the plant for compact growth while encouraging new shoots. Too much pruning stunts fruit production; too little lets it sprawl uncontrollably.
I’ve learned the sweet spot after three seasons of trial and error, and the results are worth it: lush foliage, reliable harvests, and a tree that fits even small patios or sunrooms. You’ll master the art of selective pruning to maintain that perfect balance—removing old leaves without sacrificing productivity.
The payoff? A banana tree that stays under 10 feet tall, produces fruit twice a year, and looks stunning year-round. Even indoor growers can pull this off with the right light and care.
Whether you're troubleshooting yellow leaves or prepping for your first harvest, this guide covers the essentials—no green thumb required. Let’s get your dwarf Cavendish thriving!
📚 In This Guide
- What you need
- Instructions
- Tips and common mistakes
- Wrapping up and next steps
What you need
- ● Dwarf Cavendish banana plant (potted or bare-root, Musa acuminata ‘Dwarf Cavendish’ variety)
- ● Well-draining potting mix (50% peat or coconut coir, 30% perlite, 20% compost—sterilized to prevent disease)
- ● Pot or container (15–20 gallons minimum, with drainage holes; terracotta or fabric pots preferred)
- ● Pruning shears or sharp bypass pruners (sterilized with rubbing alcohol)
- ● Gloves (heavy-duty gardening gloves—banana sap can irritate skin!)
- ● Balanced fertilizer (10-10-10 or organic option like banana tree fertilizer, applied every 4–6 weeks)
- ● Mulch (straw or wood chips to retain moisture and regulate soil temp)
- ● Watering can or hose with adjustable nozzle (for deep, even hydration)
- ○ Support stake or trellis (optional but helpful for taller varieties or windy areas)
- ● Banana tree pruning paste (to seal cuts and prevent sap loss)
- ● Soil moisture meter (to monitor hydration levels)
- ● Slow-release fertilizer spikes (for convenience)
- ● Fungicide or neem oil (preventative care for pests/diseases)
- ● Grow lights or LED bulbs (if indoors, to supplement 10–12 hours of light/day)
Step-by-Step guide to pruning dwarf Cavendish banana trees
Here's how to keep your banana tree compact, productive, and healthy with precise pruning techniques.
✂️ Step 1: Identify and Remove Sucker Growth
Dwarf Cavendish banana trees produce suckers at the base—these are potential new stems. Select 1-2 of the strongest suckers to keep, removing the rest immediately with clean, sharp pruners. I always leave the one closest to the main stem (the "mother sucker") as it has the best genetic potential. Cut suckers at the base, just above the soil line, to prevent disease entry points.
Watch for vigorous new shoots that emerge within 2-4 weeks of pruning. These are your plant's way of telling you it's recovering. If you see yellowing at the cut site, you've nicked the main stem—stop pruning immediately and apply a fungicide to prevent rot.
✂️ Step 2: Prune Old or Damaged Leaves
Banana trees grow 20+ foot leaves, but old ones drain energy. Remove leaves that are yellow, brown, or torn by cutting them at the base with pruners. I start with the oldest leaves first—these are the ones closest to the ground. Never pull leaves by hand; this tears the plant and leaves ragged edges that invite pests.
Leave the youngest, healthiest leaves to photosynthesize. You'll know you've kept the right ones when the remaining foliage forms a dense, upright canopy. Prune on a dry, sunny morning when the plant is fully hydrated—this reduces stress.
🌱 Step 3: Control Flower Stalk Development
Dwarf Cavendish banana trees produce flower stalks (peduncles) that grow 3-5 feet tall before flowering. To maintain compact growth, remove the flower stalk when it reaches 12-18 inches by cutting it at the base with pruners. This redirects energy to fruit production on the main stem rather than wasted growth.
If you want fruit, leave the stalk until it flowers—just be prepared for a 10-12 foot tall plant. Watch for the stalk to curl upward and develop small buds; that's your cue to decide whether to keep it or prune it out.
🌿 Step 4: Trim Overly Long Pseudostems
Banana trees grow pseudostems (the thick, false stems) that can become top-heavy. If yours exceeds 6-8 feet, trim the top 1-2 feet of the pseudostem to encourage lateral branching. Use pruners to make a clean cut just above a leaf node—this is where new growth will emerge.
After trimming, fertilize with a balanced 10-10-10 formula to support regrowth. You'll see new shoots emerge from the cut site within 3-4 weeks. This technique keeps the tree under 6 feet tall while maintaining productivity.
⏰ Step 5: Seasonal Maintenance Checks
Every 3 months, inspect your banana tree for pests (spider mites, aphids) or diseases (sigatoka leaf spot). Prune out any infected leaves immediately and dispose of them in the trash—not the compost. I schedule my maintenance checks after heavy rains, when fungal diseases are most likely to spread.
In winter (below 50°F), reduce pruning to only remove dead or damaged leaves. Banana trees are tropical and need protection from cold—cover the base with mulch and wrap the pseudostem with burlap if temperatures drop below 45°F.
Tips & tricks for perfect dwarf Cavendish banana tree pruning
These pruning secrets will help you maintain a compact, thriving banana tree that produces fruit year after year without taking over your garden.
Sucker Selection Strategy: When choosing which suckers to keep in Step 1, look for ones that are already showing signs of vigorous growth—thick stems and slightly upright posture. The "mother sucker" closest to the main stem often produces the most robust plant, but don't hesitate to choose the one with the most energy if it's not the closest. I've found that keeping just one strong sucker maintains the tree's compact shape while still allowing for natural replacement cycles. Remember, the goal is to keep only what your space and sunlight can support.
Leaf Pruning Timing: In Step 2, I've learned that timing matters just as much as technique. Prune leaves on a dry morning after a light watering the night before—this ensures the plant is hydrated but not waterlogged. The 20+ foot leaves can be heavy, so work from the bottom up to avoid straining your back. If you notice yellowing at the leaf bases during pruning, this is normal and indicates the leaf is ready to be removed. The dense canopy you're aiming for in Step 2 will develop more quickly if you remove 20-30% of the oldest leaves in each session.
Flower Stalk Decision Point: That 12-18 inch window in Step 3 for removing flower stalks is your best chance to control height. I've seen trees grow an extra 3-4 feet just from leaving that stalk for another week. Watch for the curl and bud development—they're your clear signals. If you're growing in a container or limited space, removing at 12 inches is ideal. For those wanting fruit, leaving it until flowering is fine, but be prepared for a taller plant that may need staking as it grows toward that 10-12 foot potential.
Pro Tips for Dwarf Cavendish Banana Tree Care
- These pruning secrets will help you maintain a compact, thriving banana tree that produces fruit year after year with...
- Sucker Selection Strategy: When choosing which suckers to keep in Step 1, look for ones that are already showing sign...
- Leaf Pruning Timing: In Step 2, I've learned that timing matters just as much as technique. Prune leaves on a dry mor...
Frequently asked questions
Got questions about keeping your Dwarf Cavendish banana tree thriving? You’re not alone! Here are answers to the most common concerns—from pruning puzzles to growth quirks—so you can enjoy lush, compact harvests all year.
How often should I prune my Dwarf Cavendish banana tree?
Prune after fruiting to encourage regrowth—typically every 6–12 months. Remove dead leaves, damaged pseudostems, and old fruit stalks (bunches) to redirect energy. Pro tip: Never cut more than ⅓ of the plant at once to avoid stress.
When is the best time to harvest Dwarf Cavendish bananas?
Harvest when the fruit is firm but slightly soft (not mushy) and the peel turns from green to pale yellow with faint speckles. Avoid waiting too long—they’ll overripe fast! For indoor trees, check daily.
Why aren’t my bananas ripening indoors?
Indoor Dwarf Cavendish trees often need a temperature shift (60–70°F at night) and humidity (50–70%) to trigger ripening. Try moving the plant near a window or use a humidifier. Ethylene gas (from apples or bananas) can also speed things up!
Can I grow Dwarf Cavendish in containers year-round?
Yes! Use a 15–20 gallon pot with drainage and repot every 2–3 years. In cold climates, move it indoors before frost (below 50°F). Dwarf varieties adapt well to containers but need bright, indirect light and regular watering.
What do brown spots on leaves mean?
Brown spots usually signal fungal issues (like anthracnose) or overwatering. Improve airflow, reduce moisture on leaves, and apply copper fungicide if needed. Yellowing edges? It’s often underwatering or fluoride buildup from tap water.
How do I encourage more fruit production?
Boost production with balanced fertilizer (high potassium) during flowering and hand-pollination (gently shake the flower cluster). Ensure 12+ hours of light daily and avoid over-pruning. Patience pays off—Dwarf Cavendish trees take 9–12 months to fruit after planting!
Wrapping up and next steps
Caring for your dwarf Cavendish banana tree is all about patience, consistency, and a little pruning magic! With the right tools, timing, and techniques—like strategic pruning to encourage compact growth—you’ll enjoy lush foliage and sweet bananas year-round. 🌱✨
Ready to transform your space? Start by observing your plant’s growth and applying these tips. Before you know it, your dwarf Cavendish will thrive, rewarding you with vibrant leaves and delicious fruit. Happy gardening!