
Container Gardens
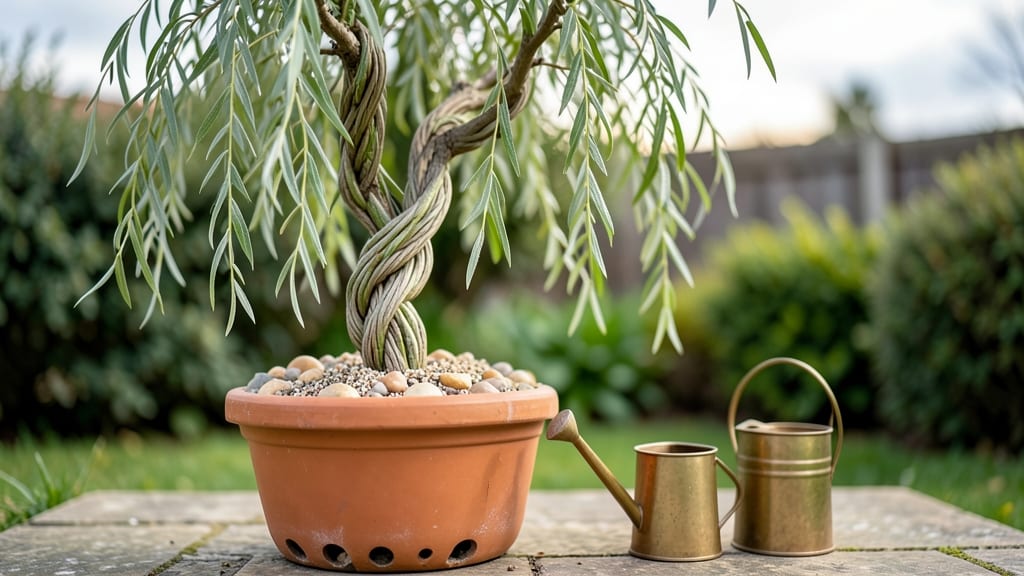
Braided willow trees in pots bring whimsical charm to patios and balconies—when you nail their care. 🌿 I’ve wrestled with these delicate beauties for years, and the difference between a lush, arching specimen and a sad, leggy mess comes down to three critical habits: soil, water, and pruning.
The right pot isn’t just about size; it’s about drainage, airflow, and giving those braided stems room to grow without binding. Start with a well-draining mix of potting soil and perlite—willows hate soggy roots.
Water deeply when the top inch feels dry, but never let them sit in saucers of water. Prune back any yellowing or overcrowded stems in early spring, and you’ll encourage those signature braids to thicken and arch beautifully.
The key is consistency: willows in pots forgive mistakes, but they punish neglect with droopy branches and stunted growth. By summer, your tree will be a showstopper with vibrant green foliage and those iconic woven trunks. The best part?
With proper winter care—like moving pots to a sheltered spot and reducing water—you’ll keep them thriving year-round, even in small spaces. No more wondering why your willow looks half-dead by August. Common challenges like root-bound conditions or spider mites are easy to fix once you know the signs.
Let’s tackle them head-on so your braided willow stays the star of your outdoor space.
📚 In This Guide
- What you need
- Instructions
- Tips and common mistakes
- Wrapping up and next steps
What you need
- ● Container: A large, sturdy pot (at least 12–18 inches in diameter and depth) with drainage holes. Terracotta or fiberglass works best for breathability.
- ○ Optional upgrade: A cache pot (a decorative outer pot with a removable inner liner) for a polished look.
- ● Potting Mix: 1–2 bags (5–10 gallons) of well-draining, moisture-retentive potting mix (e.g., a blend of peat moss, perlite, and compost). Avoid garden soil—it compacts and suffocates roots!
- ● Braided Willow Tree: A healthy, young braided willow tree (typically sold as a bare-root or potted specimen in spring). Look for flexible, green stems with no signs of disease.
- ● Pruning Tools: Sharp bypass pruners (for trimming new growth and shaping).
- ● Hand pruners or shears (for finer adjustments to the braids).
- ● Support Stakes: 3–5 bamboo or wooden stakes (about 18–24 inches tall) to secure the braids while they establish.
- ● Soft plant ties or garden twine (to gently bind the stems without cutting into them).
- ● Watering Supplies: A watering can with a rose attachment (for deep, gentle hydration) or a hose with a soft spray nozzle.
- ● Fertilizer: A balanced liquid fertilizer (e.g., 10-10-10 or fish emulsion) to boost growth during the spring and summer.
- ● Mulch: Organic mulch (like shredded bark or pine straw) to retain moisture and regulate soil temperature.
- ● Soil Moisture Meter: To check root zone humidity and avoid over- or under-watering.
- ● Decorative Elements: Pebbles, moss, or weatherproof ornaments to enhance the pot’s aesthetic.
Step-by-Step instructions for braiding and caring for willow trees in pots
Here's how to keep your braided willow looking stunning year-round with minimal fuss.
🪴 Step 1: Select and Prepare the Right Containers
Willow trees need room to grow, so choose containers that are at least 12-18 inches deep and 18-24 inches wide for each plant. I like using unglazed clay pots because they allow excess moisture to evaporate through the sides, which willow trees appreciate. Make sure each pot has multiple drainage holes—willow roots rot quickly if they sit in soggy soil.
Line the bottom of each pot with 2-3 inches of gravel or broken pottery to create a reservoir for water. This prevents roots from sitting directly in water while still providing moisture when needed. Place your pots in a location where they won’t be disturbed, as willow trees dislike being moved once established.
🌱 Step 2: Plant and Braid the Willow Stems
Plant four 1-year-old willow whips (flexible young stems) in each pot, spacing them 6 inches apart in a square pattern. Water the soil thoroughly before planting to help the roots settle. Once planted, weave the stems together in a four-strand braid, securing them at the base with soft plant ties or twine. Leave the top 6 inches of stems unbraided—this prevents the braid from tightening as the tree grows.
Here’s the thing—don’t pull the stems too tight. Willow wood is flexible but can snap if forced. Instead, gently cross each stem over the next, adjusting as you go until the braid looks natural. Trim any excess length at the top after braiding to keep the shape neat. Water the newly planted willows until the soil is evenly moist but not waterlogged.
☀️ Step 3: Provide Sunlight and Water Consistently
Willow trees thrive in full sun to partial shade, with at least 4-6 hours of direct sunlight daily. Place your pots in a spot where they’ll get morning sun and afternoon shade if temperatures exceed 80°F. If your willows start to lean toward the light, rotate the pots a quarter turn every few days to encourage even growth.
Water your braided willows deeply 2-3 times per week during the growing season (spring and summer). Let the top 1-2 inches of soil dry out between waterings—you’ll know it’s time when the soil feels slightly dry to the touch. In winter, reduce watering to once every 10-14 days, as growth slows and moisture evaporates more slowly.
✂️ Step 4: Prune and Maintain Year-Round
Prune your braided willow in early spring before new growth begins. Remove any dead, damaged, or crossing branches, and trim back any stems that have grown too long. To keep the braid neat, gently loosen the ties and adjust the weave if needed—willow wood naturally thickens over time. Avoid heavy pruning in fall or winter, as this can stress the tree.
Fertilize lightly in early spring with a balanced, slow-release fertilizer (10-10-10 or similar). Apply only half the recommended dose to avoid burning the roots. I also add a 2-inch layer of mulch around the base of the pot to retain moisture and regulate soil temperature. Just keep the mulch 2 inches away from the trunk to prevent rot.
⏰ Step 5: Overwinter for Next Year’s Growth
Before the first frost, move your pots to a protected location like a garage or shed, or wrap them in burlap or frost cloth if they must stay outdoors. Reduce watering significantly in winter, but don’t let the soil dry out completely. Check the soil monthly and water lightly if it feels dry.
In late winter, as temperatures rise, you’ll see new buds forming on the stems. This is your cue to move the pots back outdoors and resume regular care. With consistent sunlight, water, and occasional pruning, your braided willow will stay lush and elegant for years.
Tips & tricks for perfect braided willow tree care
These simple strategies will help your braided willow thrive in pots all year long.
Container Selection: Unglazed clay pots are ideal because they allow excess moisture to evaporate through the sides, but if you don't have those, terra cotta or even sturdy plastic pots with drainage holes will work. Just avoid glazed ceramic—they trap moisture and can lead to root rot. I've seen willow trees in decorative metal pots too, as long as they have drainage and don't overheat in direct sun.
Braiding Technique: When creating your four-strand braid in Step 2, remember that willow wood is flexible but can snap if forced. Start by crossing stems gently, then adjust as you go—think of it like tying your shoes. If the braid starts to tighten as the tree grows, simply loosen the ties at the base and adjust the weave. This prevents the classic "tight braid" look that makes willows appear stunted.
Watering Wisdom: The 2-3 times per week watering schedule in Step 3 works best when you water deeply—meaning until water runs out the drainage holes. Check soil moisture by sticking your finger 1-2 inches deep; if it feels dry, it's time to water. In hot weather, you might need to water daily, but always let the top layer dry slightly between waterings to prevent soggy roots.
Seasonal Adjustments: During winter care in Step 5, if you can't move your pots indoors, wrap them in burlap or frost cloth to protect from freezing winds. I've also had success placing pots against a south-facing wall where they get reflected sunlight. The key is maintaining that monthly soil check—willow roots stay active even in winter, just at a much slower pace.
Pro Tips for Braided Willow Tree Care In Pots
- These simple strategies will help your braided willow thrive in pots all year long.
- Container Selection: Unglazed clay pots are ideal because they allow excess moisture to evaporate through the sides, ...
- Braiding Technique: When creating your four-strand braid in Step 2, remember that willow wood is flexible but can sna...
Frequently asked questions
Got questions about keeping your braided willow tree happy in pots? You’re not alone! Here are some of the most common concerns—and their easy solutions.
How often should I water my braided willow tree in a pot?
Water your braided willow consistently—aim for 1-2 inches of water per week, especially in hot weather. Pots dry out faster than ground soil, so check moisture daily in summer. Let the top inch of soil dry out between waterings, but avoid soggy roots. Pro tip: Use a moisture meter or stick your finger in the soil for accuracy!
Can braided willows survive winter in pots?
Yes, but they need protection! Move pots to a sheltered spot (like a garage or under an eave) before temps drop below 20°F (-7°C). Wrap the pot in burlap or bubble wrap and mulch the soil with straw. If your area gets harsh winters, consider repotting in spring—smaller roots mean less stress for cold.
Why are the leaves turning yellow or brown?
Yellowing leaves often signal overwatering or poor drainage. Brown edges? It’s likely underwatering or sunburn. Check your pot’s drainage holes—if blocked, repot with fresh, well-draining soil (like a mix of potting soil and perlite). Bonus: Yellow leaves can also mean nutrient deficiency; try a balanced fertilizer in spring.
How big should the pot be for a braided willow?
Start with a pot 12-18 inches wide and deep for young trees. As it grows, upgrade to a container 2-3 inches larger in diameter every 2-3 years. Braided willows have shallow roots, so prioritize width over height. Warning: Too-small pots = stunted growth and stress. Aim for at least 1 gallon of soil per inch of trunk diameter.
What’s a good alternative if my braided willow isn’t thriving?
If your willow struggles with pests, pests, or space, try these low-maintenance pot-friendly alternatives:
- Dwarf Japanese Maple – Compact, colorful foliage, and cold-hardy.
- Ornamental Grass (e.g., Karl Foerster Feather Reed) – Adds texture with minimal fuss.
- Boxwood ‘Green Velvet’ – Thrives in small pots and stays neatly trimmed.
- Crepe Myrtle (Dwarf Varieties) – Beautiful blooms and adaptable to containers.
All love similar care but with fewer drama-prone quirks!
Wrapping up and next steps
Caring for a braided willow tree in pots is a rewarding journey that brings whimsy and charm to small spaces!
With the right soil mix, watering routine, and pruning love, your willow will thrive year-round—even in cozy balconies or sunny patios. 🌿✨ Remember, patience and consistency are key, but the payoff? A lush, braided masterpiece that turns heads and lifts spirits.
Ready to dive deeper? Grab your shears and a watering can—your willow’s next adventure starts now! Check out our seasonal care calendar to keep your tree happy all year.