
Container Gardens
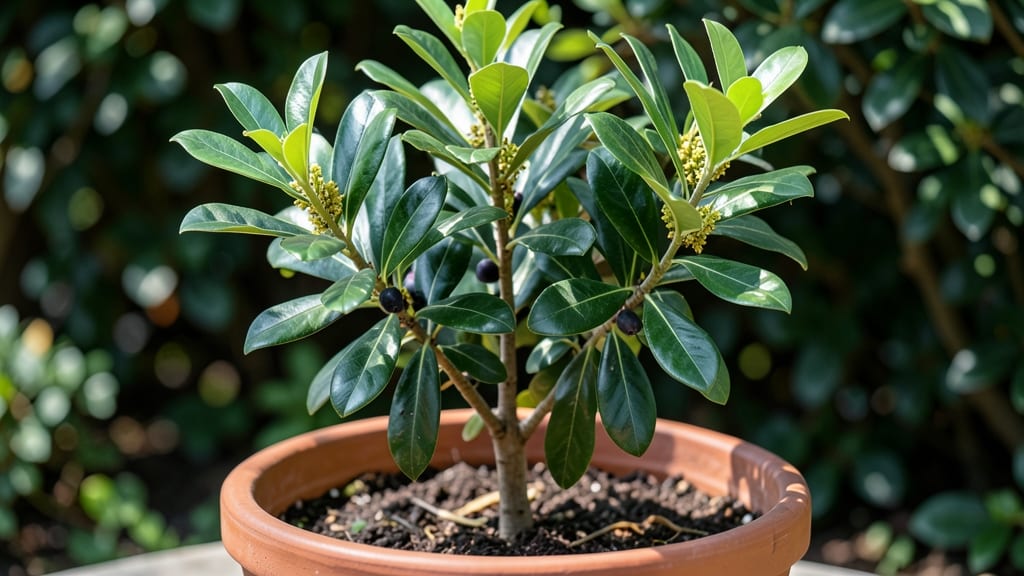
A bay tree in a container transforms any small space into a fragrant, evergreen sanctuary. 🌿 I’ve grown mine for years—its glossy leaves and piney scent make it the perfect indoor-outdoor plant, even on a tiny balcony.
The key is choosing the right pot and soil to keep it thriving without outgrowing its home too quickly.
Start with a 10- to 15-gallon container for mature plants, ensuring drainage holes to prevent soggy roots. A well-draining potting mix with perlite or sand keeps moisture balanced, while bright, indirect light mimics its Mediterranean roots.
Overwatering is the biggest mistake—let the top inch dry between waterings, and you’ll avoid root rot.
Prune lightly in spring to shape the tree and encourage bushier growth, and pinch back leggy stems to keep it compact. With the right care, your container bay tree will stay lush, fragrant, and perfect for years—adding both beauty and aroma to any spot.
Even in containers, bay trees can live for decades with proper care. The trade-off is regular monitoring for pests like spider mites, but the rewards—fresh bay leaves for cooking and year-round greenery—make it worth the effort.
📚 In This Guide
- What you need
- Instructions
- Tips and common mistakes
- Wrapping up and next steps
What you need
- ● Container: A 5-gallon or larger pot (16–18 inches in diameter) with drainage holes. Opt for terracotta or ceramic for better breathability.
- ● Well-draining potting mix: A blend of 60% organic potting soil, 30% perlite or pumice, and 10% compost (avoid garden soil—it compacts!).
- ● Bay tree sapling: A 1–2-year-old nursery-grown bay tree (look for Laurus nobilis varieties).
- ● Drainage layer: 1–2 inches of gravel or coarse sand (placed at the bottom of the pot).
- ● Slow-release fertilizer: A balanced 10-10-10 or 20-20-20 formula (follow package instructions).
- ● Pruning shears (for shaping and harvesting leaves).
- ● Watering can with a rose attachment (for gentle watering).
- ○ Mulch (optional): Pine bark or straw (1 inch thick) to retain moisture.
- ○ Saucer or tray (optional): To catch excess water and prevent messes.
- ○ Support stake (optional): If your bay tree grows tall, a bamboo stake can help with stability.
Step-by-Step instructions for growing a thriving bay tree in a container
Here's the method I've perfected for nurturing bay trees in containers—fragrant, healthy, and perfect for small spaces.
🪴 Step 1: Select the Right Container and Drainage
Bay trees need room to grow, so choose a 12-18 inch diameter pot with drainage holes—terracotta works best because it breathes. If your pot lacks holes, drill them yourself to prevent root rot. I like to add a 2-3 inch layer of gravel or broken pottery at the bottom to improve drainage and aeration.
Bay trees hate soggy roots, so this layer ensures excess water flows away. If you're repotting an established plant, size up by 2-3 inches in diameter—too much space causes moisture issues. Place the pot in a saucer to catch drainage, but empty it after 10 minutes to avoid waterlogging.
🌱 Step 2: Prepare Well-Draining Soil and Plant
Fill the pot with a mix of 50% potting soil, 30% perlite or coarse sand, and 20% compost. This blend prevents compaction and mimics the Mediterranean conditions bay trees thrive in. Moisten the mix until it feels like a wrung-out sponge—damp but not dripping.
If planting bare-root, soak the roots in lukewarm water for 10 minutes before placing the tree in the pot. Position it so the root flare (where roots meet the trunk) sits ½ inch below the soil line. Backfill gently, tapping the pot to eliminate air pockets. Don't press too hard—bay roots need air too.
☀️ Step 3: Position for Light and Water Correctly
Bay trees crave 6+ hours of direct sunlight daily, ideally in a south or west-facing spot. A window won't cut it—supplement with a grow light if natural light is insufficient. You'll know they're happy when new leaves emerge deep green and glossy within 4-6 weeks of planting.
Water deeply once a week in summer, letting 2-3 inches of soil dry between waterings. In winter, reduce to every 2-3 weeks—overwatering is the #1 killer of container bay trees. Stick your finger in the soil: if it's dry past your first knuckle, it's time to water. Always water at the base, never overhead.
✂️ Step 4: Prune and Fertilize for Fullness
Prune in late winter or early spring before new growth starts. Cut back 1/3 of the longest stems to encourage bushiness, and remove any dead or crossing branches. Use clean, sharp pruners to avoid tearing the bark. Bay trees respond well to pruning—you'll see new shoots emerging within 2-3 weeks.
Feed with a balanced 10-10-10 fertilizer every 6-8 weeks during growing season. Reduce to monthly in winter. I mix fertilizer into the top 1 inch of soil and water it in—never apply dry fertilizer directly to leaves. Yellowing leaves? You're over-fertilizing. Brown edges? Time to increase humidity with a pebble tray.
🌿 Step 5: Maintain Year-Round Health
Bay trees love humidity—mist leaves 2-3 times weekly or place the pot on a tray of pebbles and water (keep pebbles wet, not submerged). In winter, move the pot away from dry heat sources like vents. Watch for aphids or spider mites—wipe leaves with neem oil solution if you spot webbing or sticky residue.
Every 2-3 years, repot into a slightly larger container to refresh the soil. This prevents nutrient depletion and root-bound stress. The perfect bay tree in a container is fragrant, full, and free of pests—with these steps, you'll have one that thrives for decades. Real talk: patience pays off with bay trees—they reward slow, consistent care with lush, aromatic foliage.
Tips & tricks for perfect container-grown bay trees
Here's what nobody tells you about keeping your bay tree thriving in containers—these are the details that separate a struggling plant from a fragrant, decades-long companion.
Drainage Layer Mastery: That 2-3 inch gravel layer in Step 1 isn't just decorative—it's your first line of defense against root rot. I've seen bay trees die from soggy roots after just two weeks, so don't skip this. For extra insurance, add a handful of activated charcoal to the drainage layer—it prevents bacterial buildup and keeps the roots healthy. Pro tip: Use unglazed terracotta pots, which wick away moisture better than plastic.
Soil Mix Secrets: The 50-30-20 soil blend in Step 2 works wonders, but here's the real trick: Pre-mix your soil components in a wheelbarrow or large bucket before adding to the pot. This ensures even distribution and prevents clumping. For established trees, I like to add a handful of worm castings to the mix—it gives them a natural nutrient boost without overdoing it. And always test your soil moisture by sticking your finger in: it should feel like a wrung-out sponge, not a dripping wet washcloth.
Light Positioning Hacks: That 6+ hours of direct sunlight in Step 3 is non-negotiable, but here's how to maximize it: Rotate your pot ¼ turn every week to ensure even growth. Bay trees grow toward the light, so this prevents lopsided growth. If you're using a grow light, position it 6-12 inches above the plant and keep it on for 12-14 hours daily. You'll notice the difference in just 4-6 weeks when those glossy new leaves appear—it's like watching a plant get a spa treatment.
Pruning Precision: When you're cutting back those ⅓ of longest stems in Step 4, aim to make your cuts just above a leaf node where new growth can emerge. Use clean, sharp pruners to avoid crushing the stems, and always sterilize your tools with rubbing alcohol between cuts. I've found that pruning in late winter gives the tree a head start for spring growth—you'll see those new shoots emerging within 2-3 weeks, and they'll be more vigorous than if you pruned later in the season.
Pro Tips for Bay Tree In Container
- Here's what nobody tells you about keeping your bay tree thriving in containers—these are the details that separate a...
- Drainage Layer Mastery: That 2-3 inch gravel layer in Step 1 isn't just decorative—it's your first line of defense ag...
- Soil Mix Secrets: The 50-30-20 soil blend in Step 2 works wonders, but here's the real trick: Pre-mix your soil compo...
Frequently asked questions
Got questions about growing a bay tree in a container? You’re not alone! Here are some of the most common concerns—plus quick, practical answers to keep your fragrant evergreen thriving.
How big should the container be for a bay tree?
A mature bay tree needs at least 18–24 inches in diameter and deep roots (18+ inches deep). Smaller pots work for young plants, but upgrade as it grows. Pro tip: Ensure drainage holes are present to prevent root rot!
How often should I water a bay tree in a container?
Bay trees prefer consistently moist (not soggy) soil. Water when the top 1–2 inches of soil feel dry—usually every 5–7 days in summer, less in winter. Overwatering is the #1 killer! Reduce frequency if leaves yellow or drop.
Can a bay tree survive indoors year-round?
Yes, but it needs bright, indirect light (south/west windows are ideal). If indoors, expect slower growth. For best results, move it outside in spring/summer (6+ hours of sunlight). Watch for pests like spider mites in dry indoor air.
What’s the best soil mix for a potted bay tree?
Use a well-draining mix like:
- 60% potting soil
- 30% perlite or coarse sand
- 10% compost
Avoid heavy garden soil—it compacts and suffocates roots. Repot every 2–3 years with fresh mix to boost nutrients.
Why are my bay tree leaves turning yellow?
Yellow leaves usually signal overwatering or nutrient deficiency. Check soil moisture first—let it dry slightly between waterings. If roots smell rotten, trim affected areas and repot. For deficiencies, fertilize with balanced liquid fertilizer (10-10-10) in spring/summer.
Are there dwarf bay tree varieties for small containers?
Yes! Try ‘Tiny Tower’ (6–8 ft tall) or ‘Dwarf Bay’ (3–4 ft). These stay compact but still produce fragrant leaves. Just ensure your pot is at least 12 inches wide for dwarf types.
Wrapping up and next steps
Growing a bay tree in a container is a rewarding way to bring fragrant evergreen beauty to even the smallest outdoor spaces—whether it’s a cozy balcony, sunny patio, or windowsill.
With the right container, soil, and care, you’ll enjoy lush foliage, aromatic leaves, and even homegrown bay leaves for cooking year after year. 🌿✨
Now that you’re equipped with the essentials, why not take the next step? Start by selecting your container, prepping your bay tree sapling, and give it a home where it can thrive.
Before you know it, you’ll be harvesting fresh bay leaves for your favorite dishes—all while adding charm to your space!